
Partner Registration Form
Instead of inviting partners one by one, let prospective partners apply through a registration form on your website. Suger builds and hosts the form for you, then gives you a unique link and embeddable code so you can publish it wherever you’d like.
Overview
A partner registration form is a hosted signup form that prospective partners can fill out to apply to your partner program. Suger provides each form with its own URL and an embed snippet, so you can share it as a direct link or place it directly on a page of your website.
Create a Partner Signup Form
-
Access Sign Up Forms in Settings
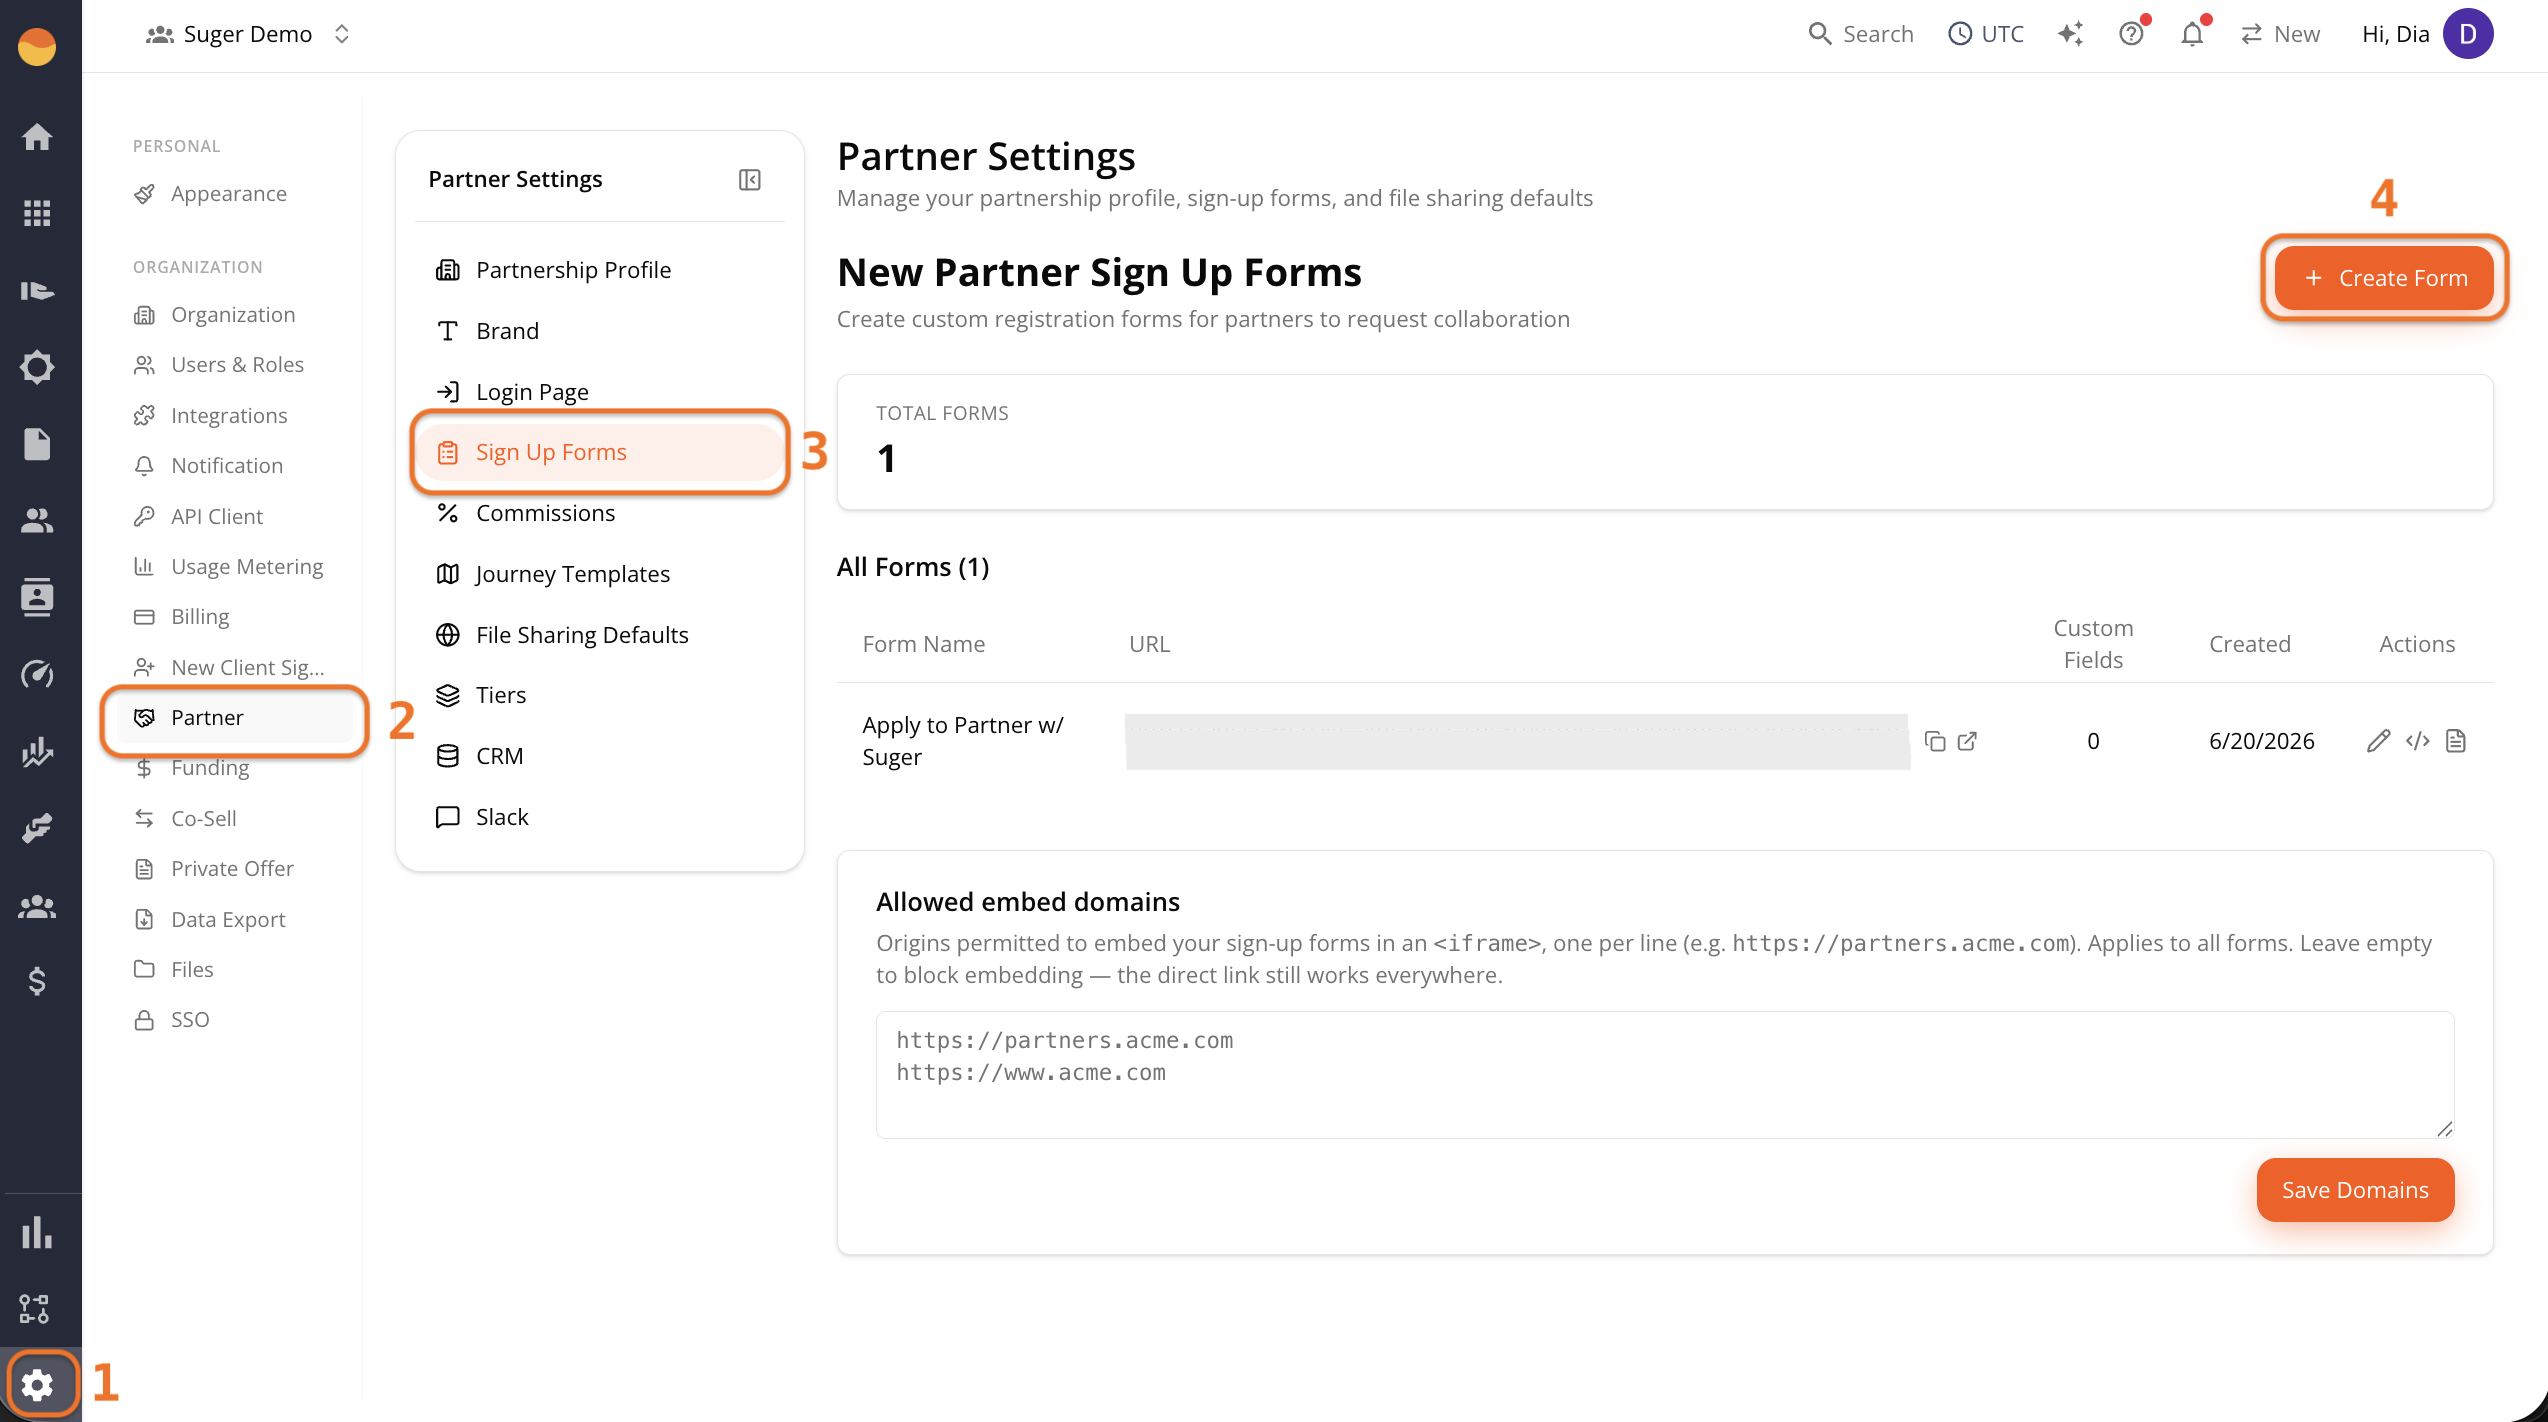
- Go to Suger Console, then Settings.
- Click Partner, then Sign Up Forms.
- Click + Create Form.
-
Create the form
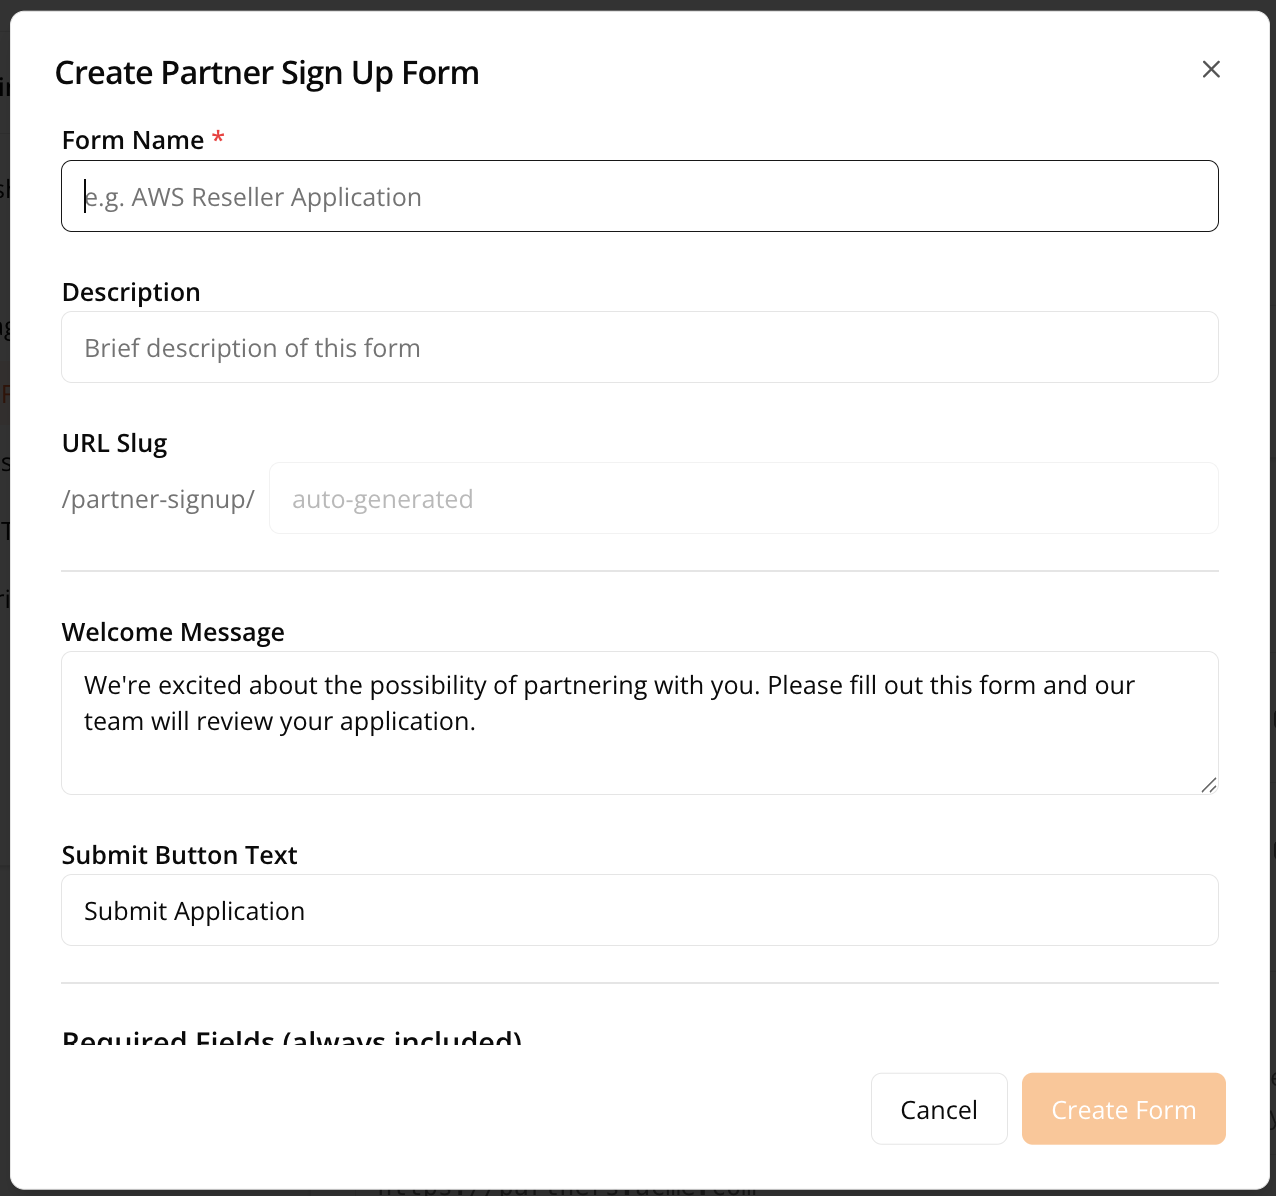
- Form Name: Appears as the heading partners see at the top of the form, so name it with them in mind (for example, “Apply to Partner w/ Suger”).
- Description: A short note about what the form is for.
- URL Slug: Automatically generated as part of the form URL and can’t be edited.
- Welcome Message: Message shown at the top of the form. Use it to explain what applicants can expect after submitting.
- Submit Button Text: Label displayed on the form’s submit button. The default is Submit Application, but you can customize it.
-
Review the required fields
Every registration form includes the following required fields, which can’t be removed or reordered:
- First Name
- Last Name
- Work Email
- Company Name
- Company Website
- Why do you want to partner with us?
-
Add custom fields (optional)
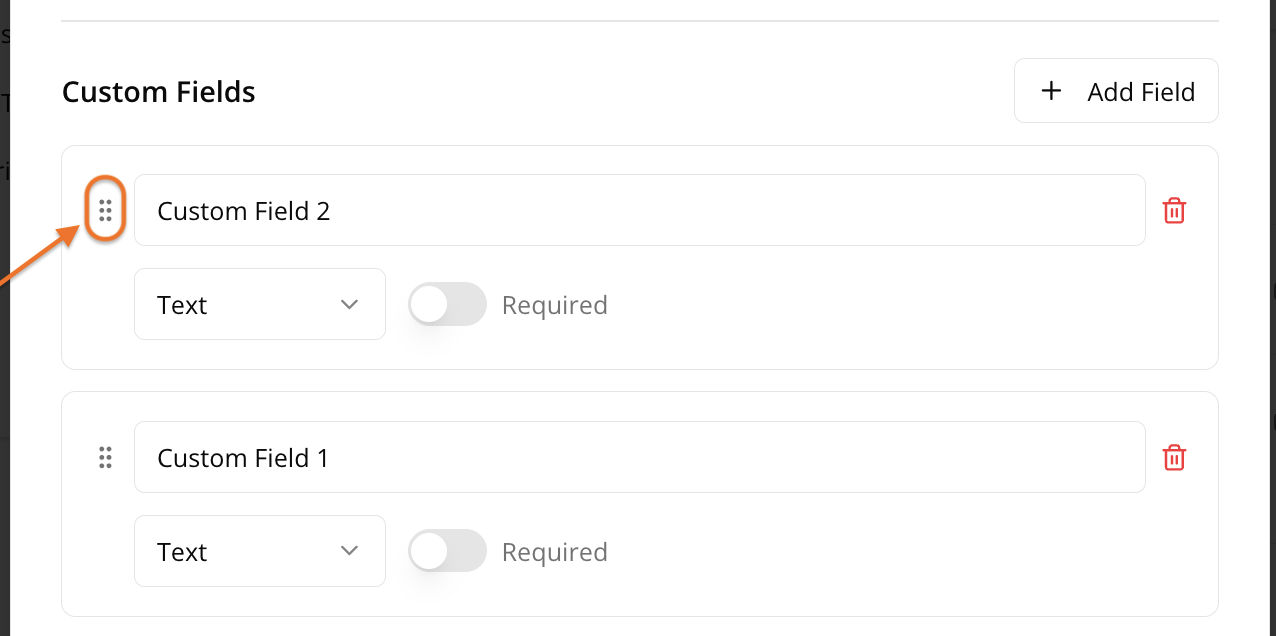
- To collect additional information, click + Add Field.
- Drag and drop fields to change the order in which partners see them.
-
Click Create Form to save.
Share and Manage Your Registration Forms
After you create a form, it appears under All Forms with its own unique URL. From the Actions column, you can:
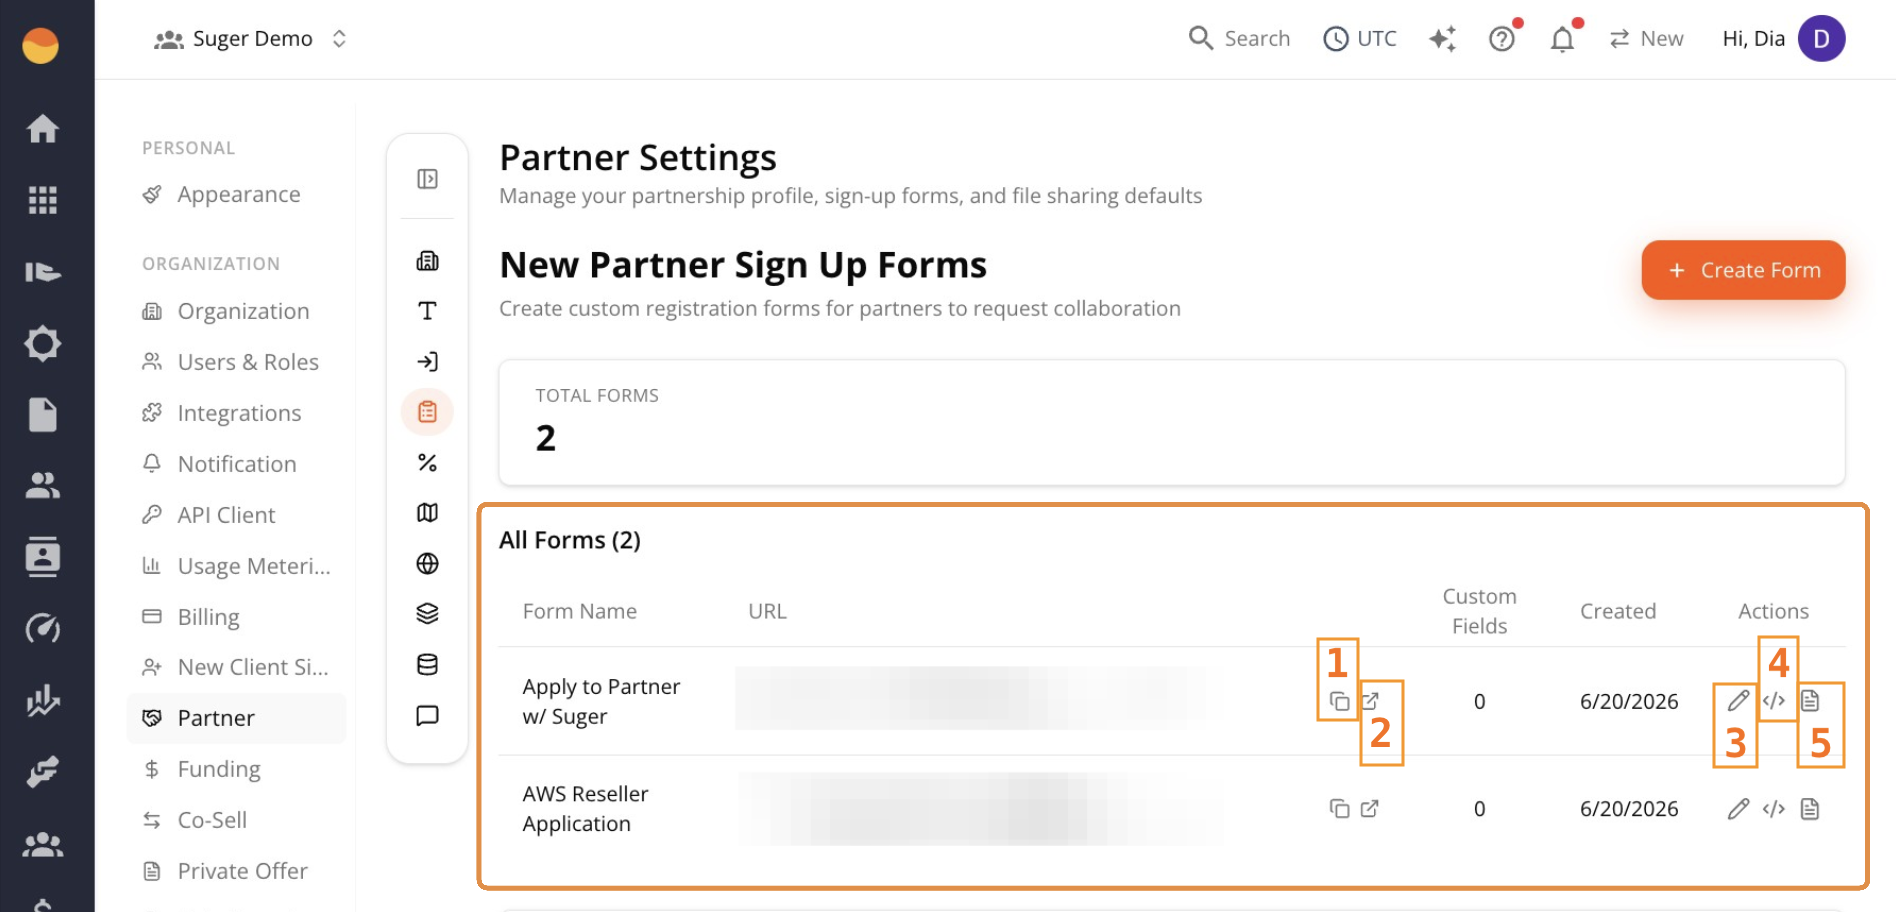
- Copy link — Copies the form’s direct URL to your clipboard, ready to share with a prospective partner.
- Open — Opens the live form in a new tab, useful for previewing exactly what a partner would see.
- Edit (pencil icon) — Go back and change the form’s fields, welcome message, or other settings.
- Copy embed code (
</>icon) — Copies a ready-to-use embed snippet to your clipboard, for placing the form directly on a page of your website. - View details (document icon) — Opens a technical details panel showing the form’s underlying field structure in raw format.
Embed the Form on Your Website
If you’d like the registration form to appear directly on a page of your website instead of opening in a separate page, embed it using the code Suger generates.
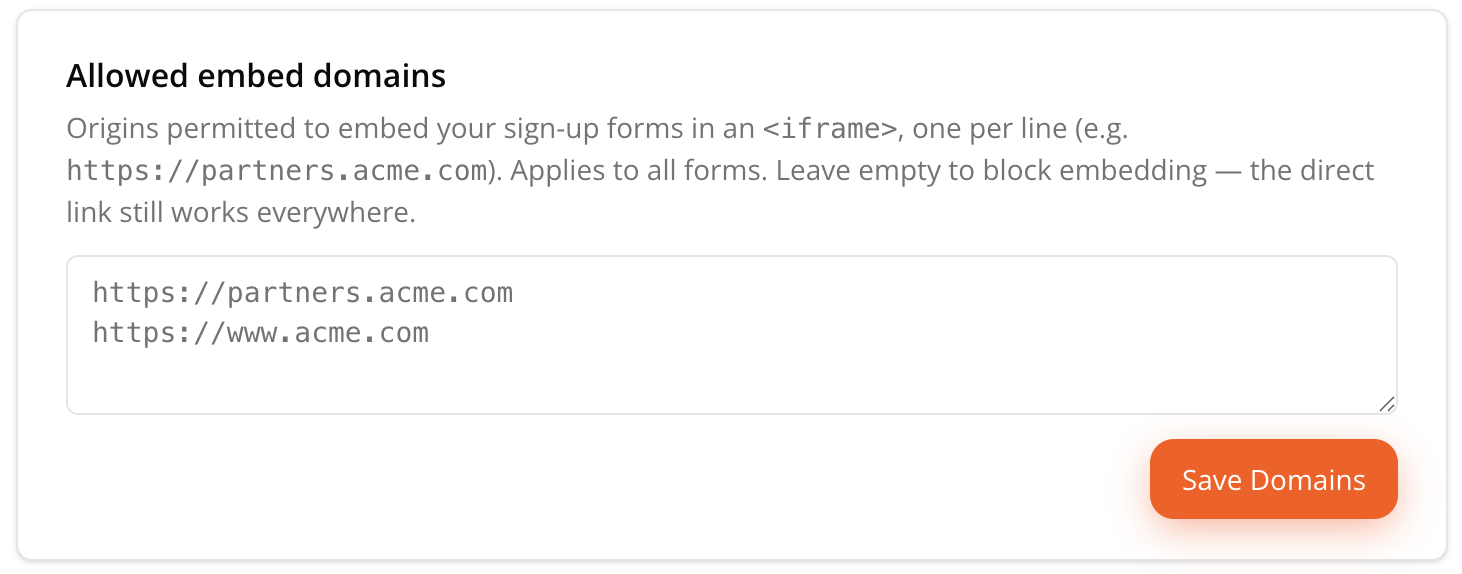
Before embedding works, you must allow the domains where the form will appear.
-
Under Allowed embed domains, enter each website domain that can embed your forms, one per line (for example,
https://partners.example.com). -
Click Save Domains.
-
Go back to the All Forms section, then click Copy embed code (
</>) for the form you want to embed. -
Paste the copied code into your website where you’d like the form to appear.