
Invite Partners
Invite a single partner or bring in many at once from a CSV file, with Suger drafting the outreach email for you based on the purpose, tone, and context you provide.
Overview
You can invite partners into your network one at a time or in bulk using a CSV file. In either case, Suger can generate the outreach email for you from the purpose, tone, and context you supply — the more specific you are, the less editing you’ll need afterward.
Invite a single partner
Step 1: Start the invitation
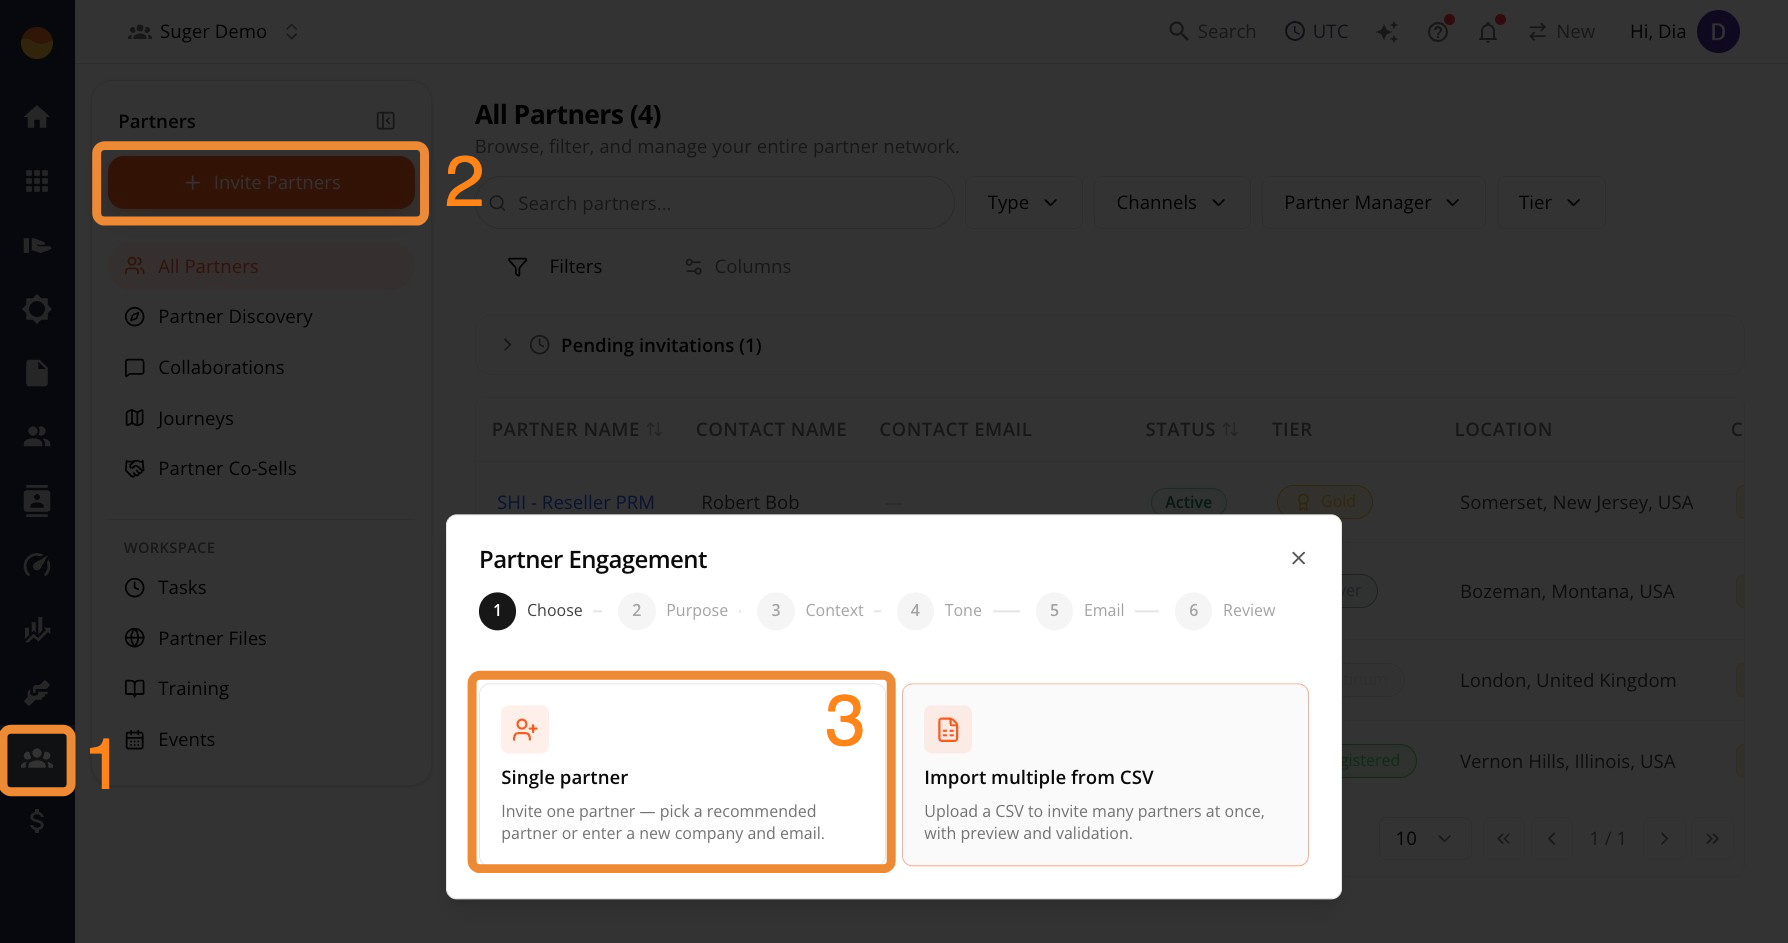
- Go to Suger Console, then click Partners.
- Click + Invite Partners, then choose Single partner.
Step 2: Identify the partner and purpose
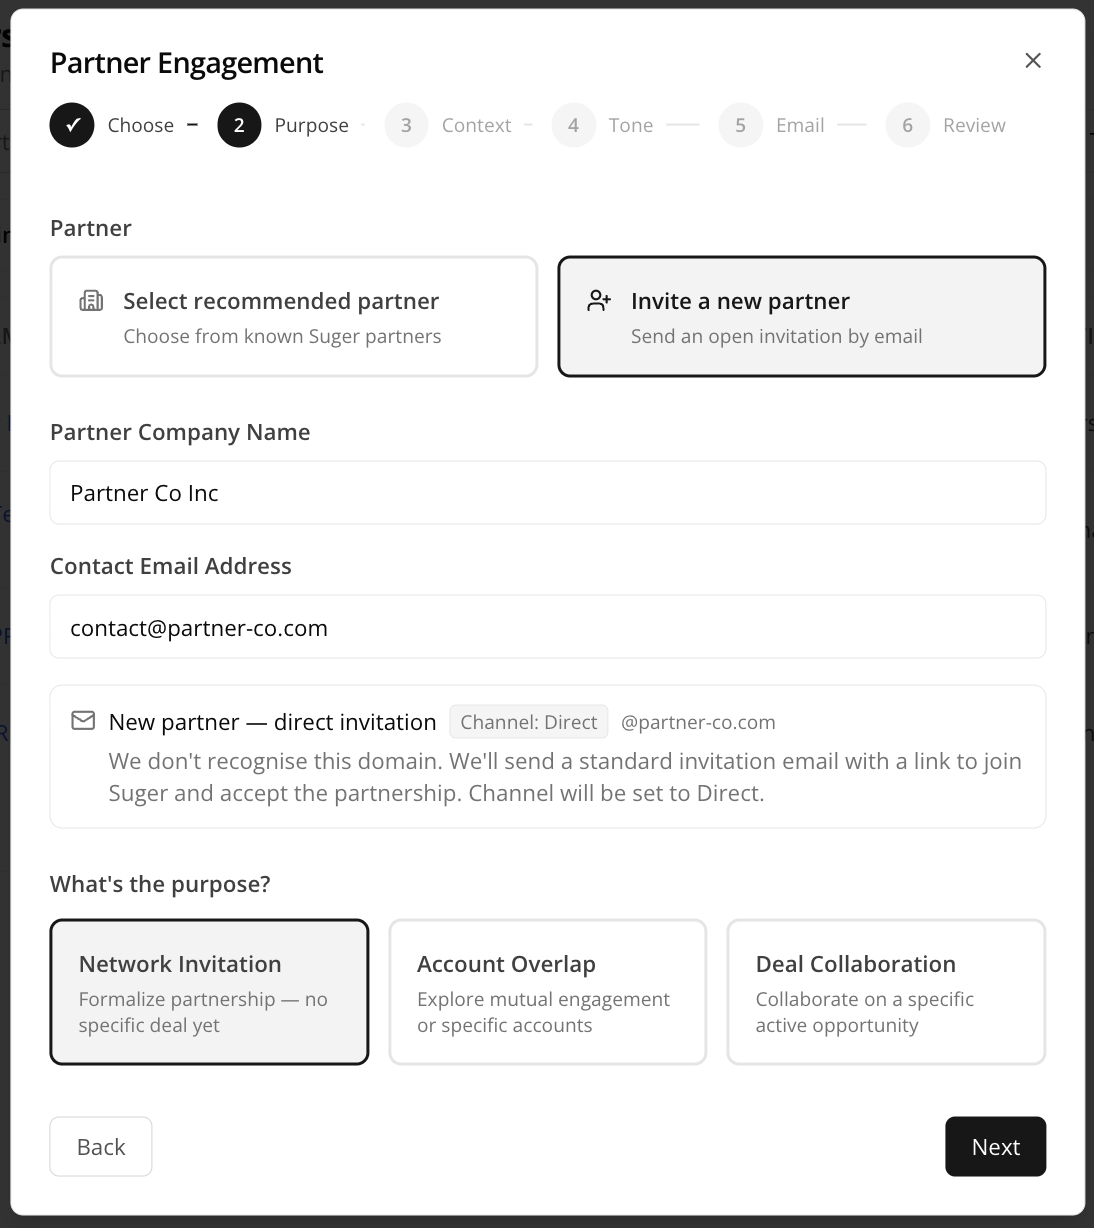
First, choose who you’re inviting.
If the partner is already known to Suger:
- Click Select recommended partner.
- Use the Select a partner dropdown to choose their name.
If the partner is brand new:
- Click Invite a new partner.
- Enter their company name under Partner Company Name.
- Enter their contact under Contact Email Address.
Next, choose the purpose. Under What’s the purpose?, select the option that matches this outreach:
- Network Invitation — Formalize a partnership, with no specific deal yet.
- Account Overlap — Explore mutual engagement or specific accounts.
- Deal Collaboration — Collaborate on a specific, active opportunity.
Then click Next.
Step 3: Provide context for the engagement
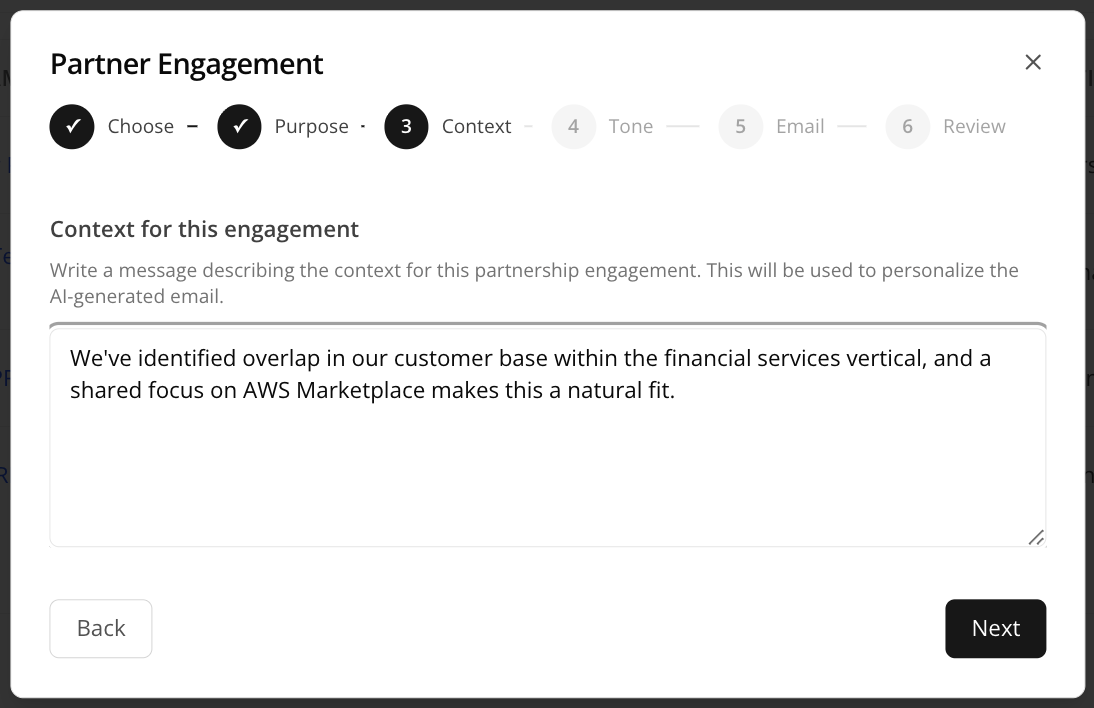
Describe why this partner is relevant to you. Suger uses this to personalize the email it generates in a later step, so the more specific you are, the less editing you’ll need to do afterward.
- Enter a short description under Context for this engagement.
- Click Next.
Step 4: Choose an email tone
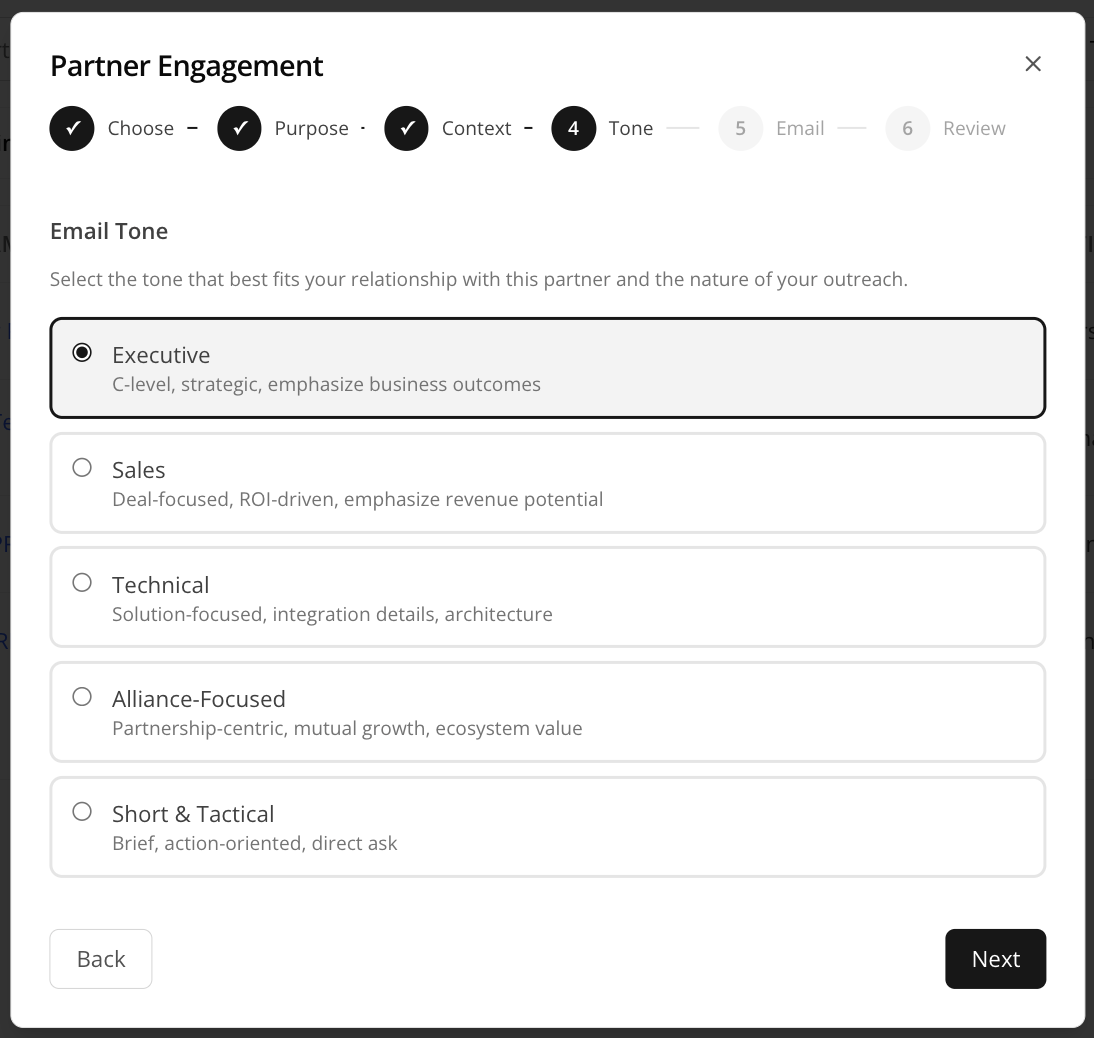
Pick the tone that best matches your relationship with this partner and the nature of your outreach.
- Select one of the five tone options.
- Click Next.
Step 5: Generate and send the email
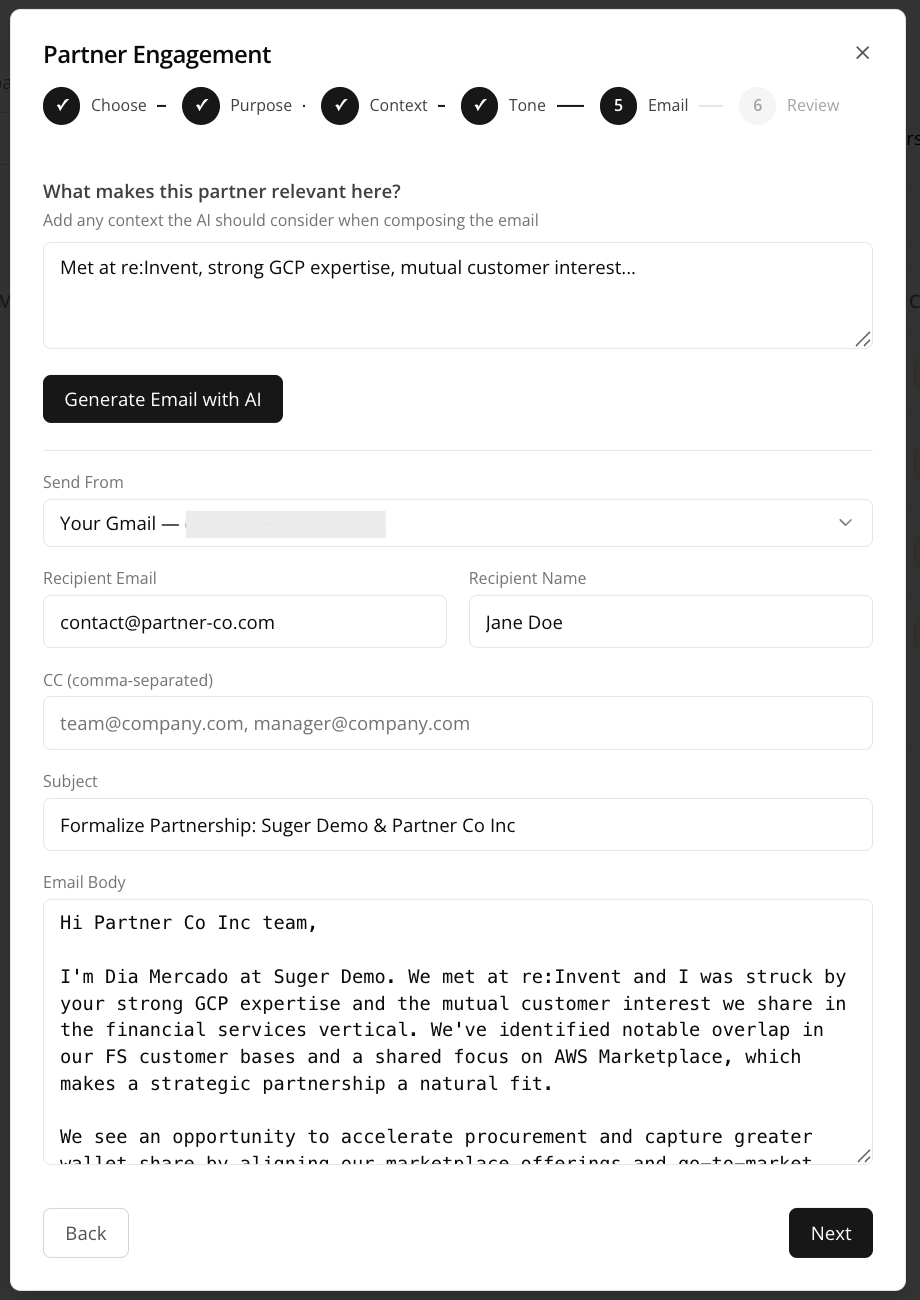
- Add any extra context for the AI under What makes this partner relevant here?, then click Generate Email with AI.
- Wait a few seconds while Suger generates a subject and email body.
- Confirm the sending account under Send From.
- Fill in Recipient Email and Recipient Name.
- (Optional) Add anyone who should be copied under CC.
- Review the generated Subject and Email Body, and edit either if needed.
- Click Next.
Step 6: Review and send the invitation
Confirm the partner, purpose, tone, recipient, context, and email content are all correct, then click Send Invitation.
Once sent, the partner appears under Pending invitations on the All Partners page until they accept.
Invite multiple partners via CSV
Step 1: Start the invitation
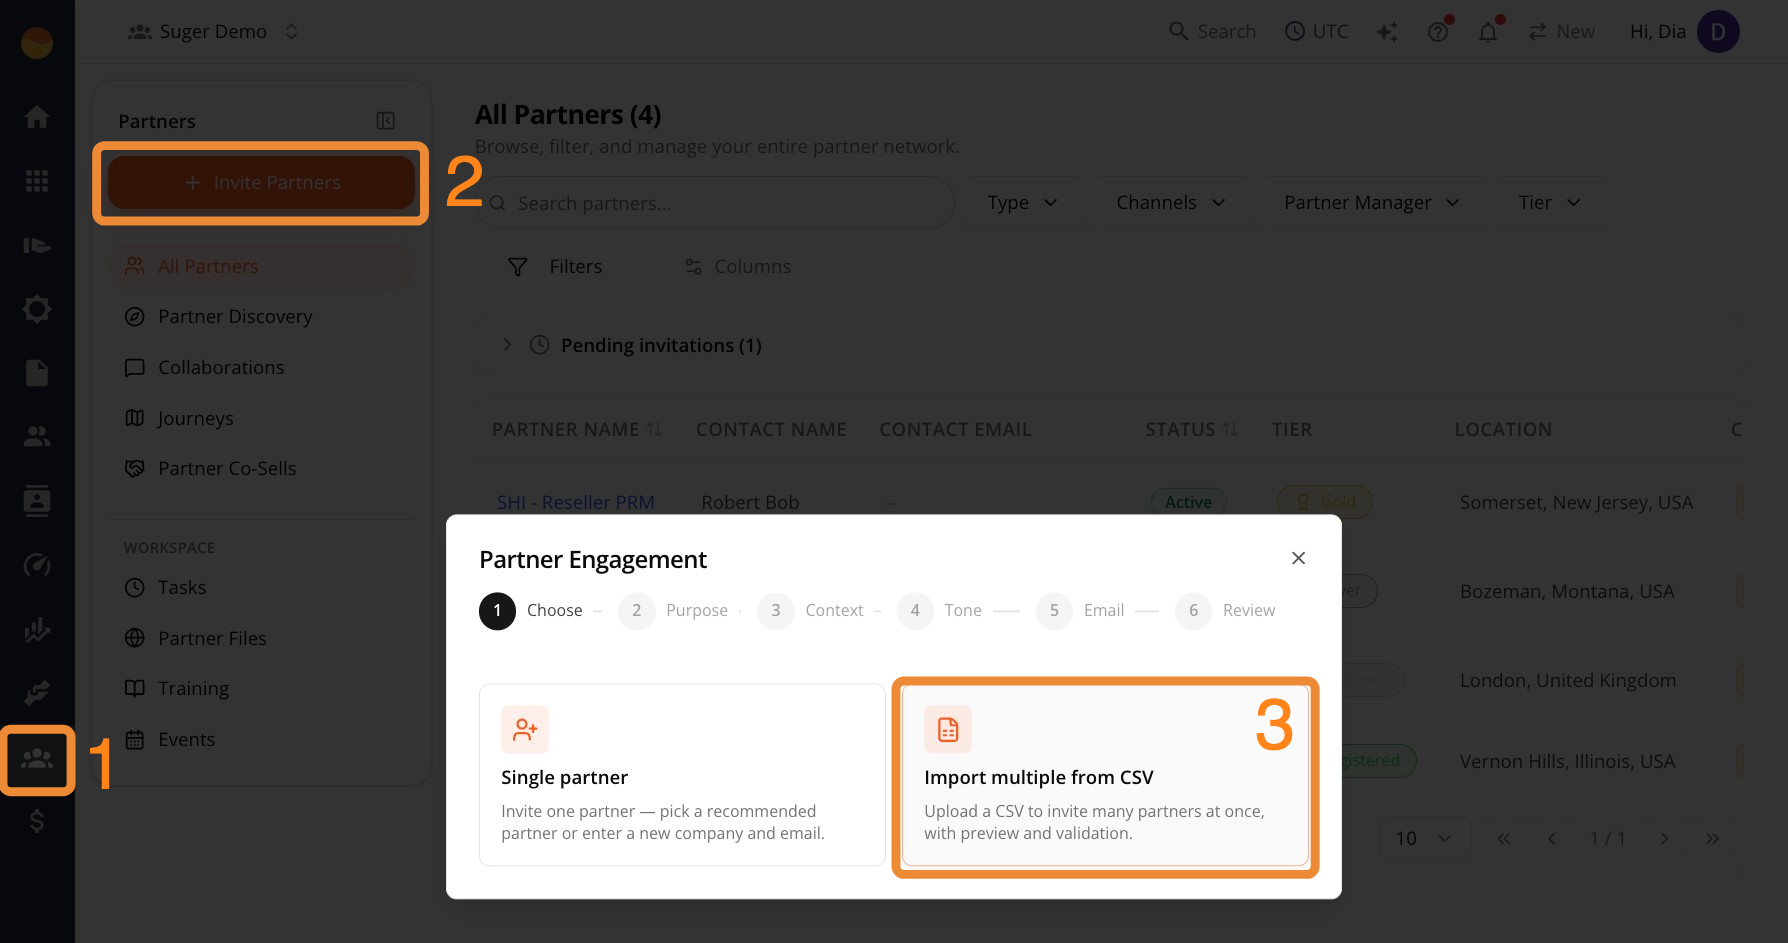
- Go to Suger Console, then click Partners.
- Click + Invite Partners, then choose Import multiple from CSV.
Step 2: Download and prepare your CSV
-
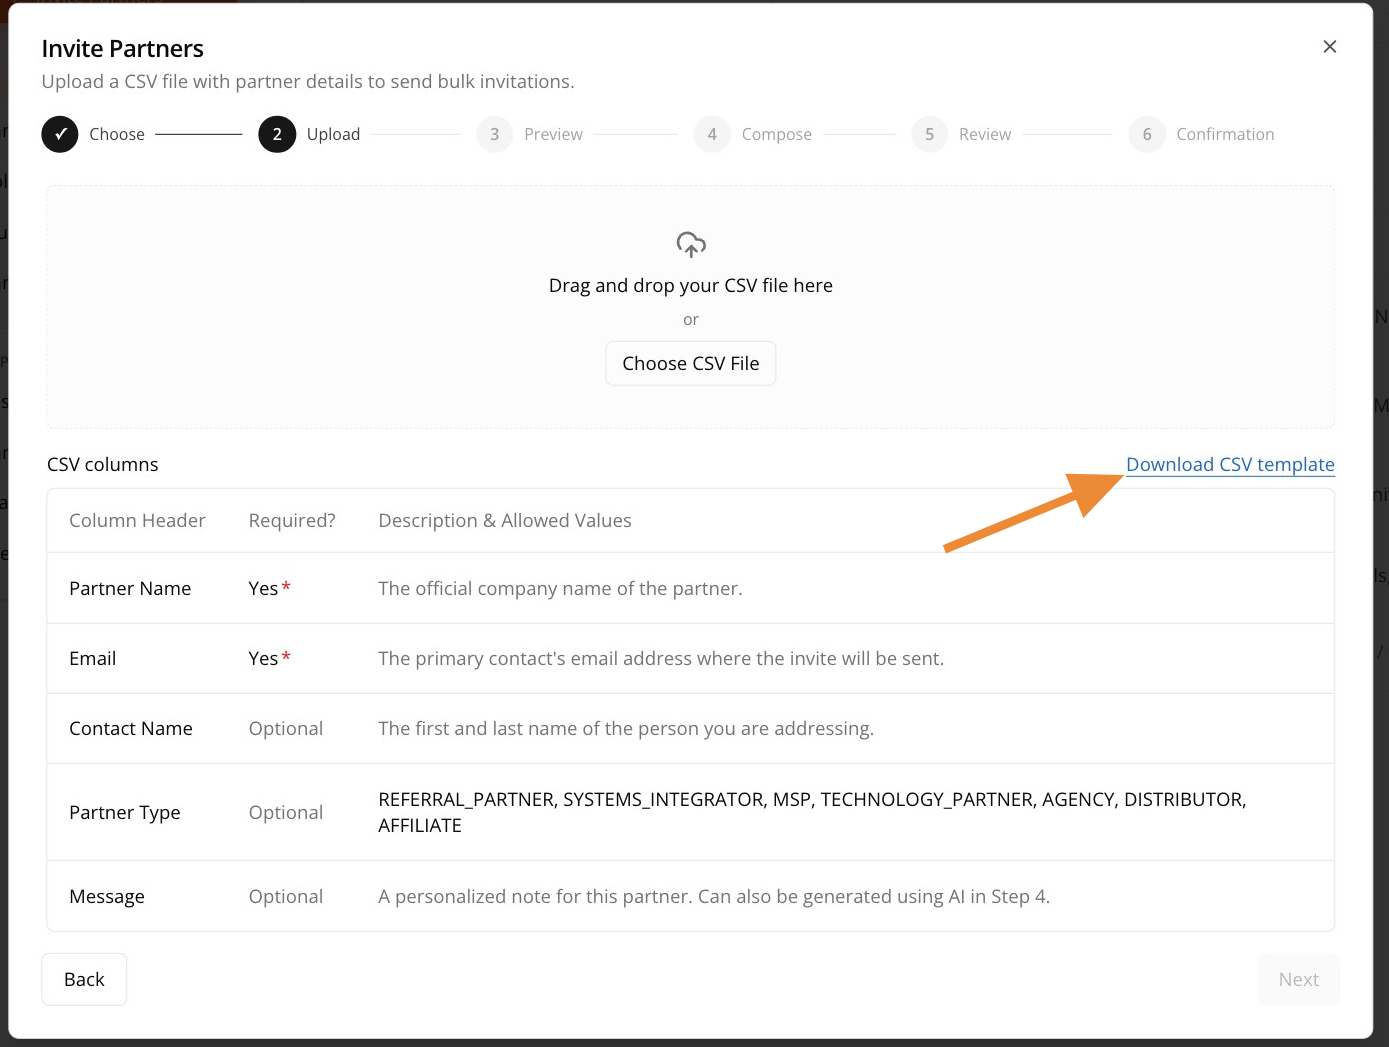
Click Download CSV template to save a blank file with the correct column headers.
-
Open the file in a spreadsheet program, like Excel, Google Sheets, or Numbers.
-
Fill in one row per partner. Don’t change, rename, or reorder the column headers in row 1 — Suger reads the file based on those exact headers.
-
Leave a cell blank if that column doesn’t apply to a partner (Contact Name, Partner Type, and Message are optional).
-
Once every row is filled in, save the file.
Step 3: Upload your CSV
- Click Choose CSV File, or drag and drop your file onto the upload area.
- Click Next.
Step 4: Preview and validate
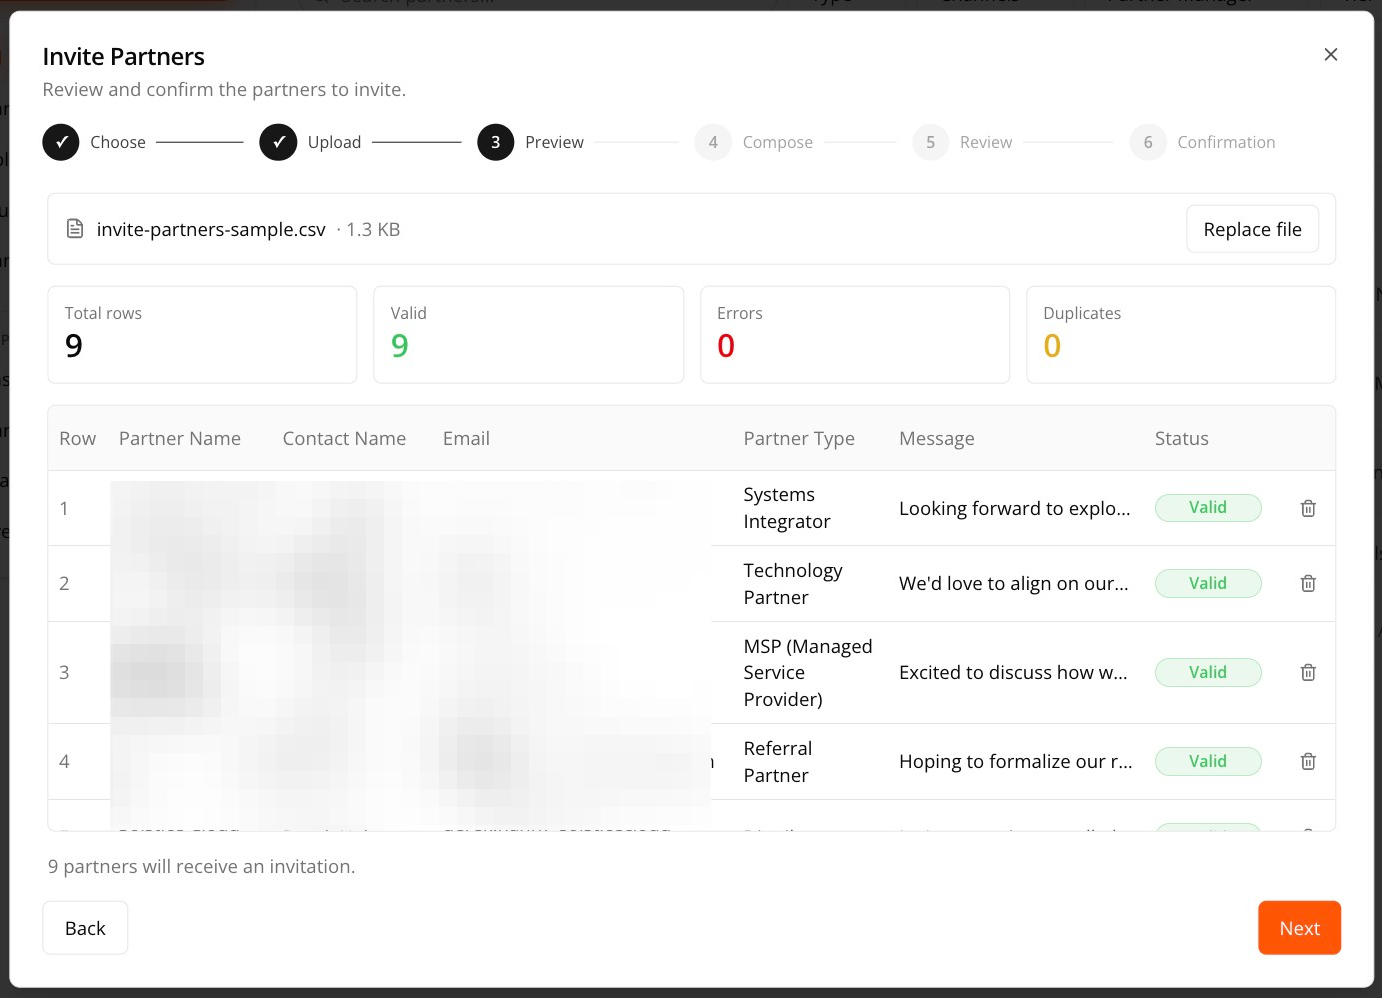
Suger checks your file and shows a summary of Total rows, Valid rows, Errors, and Duplicates, along with a row-by-row breakdown.
- Fix any rows marked with errors before continuing. Click the trash icon next to a row to remove it from the batch.
- Click Next once you’re ready to proceed.
Step 5: Compose your message
- Confirm the account under Send from.
- Select an Email tone from the dropdown: Executive, Sales, Technical, Alliance-Focused, or Short & Tactical.
- Select a Purpose: Network Invitation, Account Overlap, or Deal Collaboration.
- Click Generate with AI to draft a subject and message body, or write your own.
- Click Next.
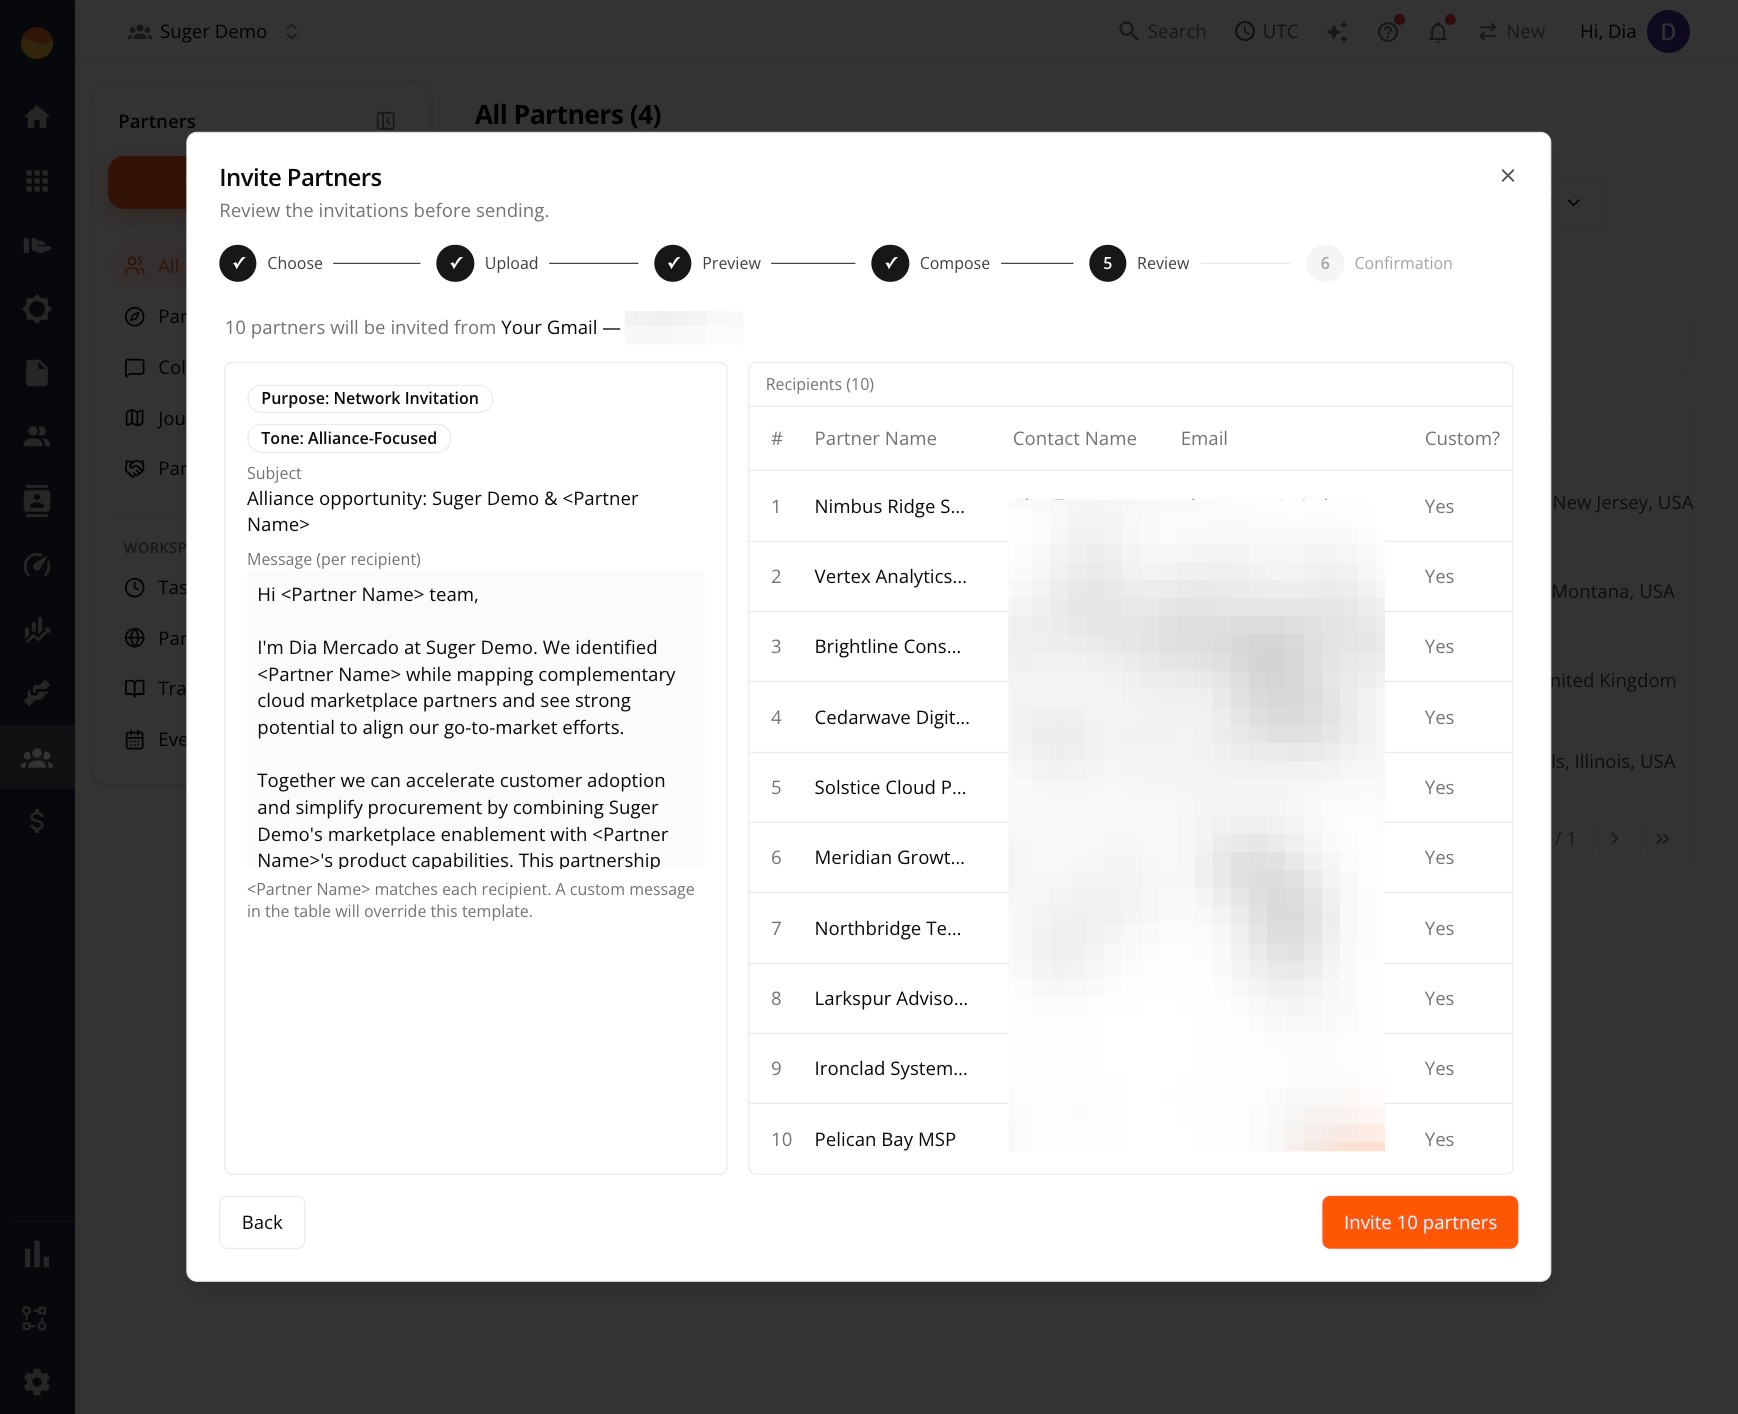
Step 6: Review and send
- Review the Purpose, Tone, Subject, and message template.
- Check the Recipients table to confirm every partner and email address is correct. The Custom? column shows Yes for any partner using their own CSV message instead of the shared template.
- Click Invite [number] partners to send.
Step 7: Confirmation
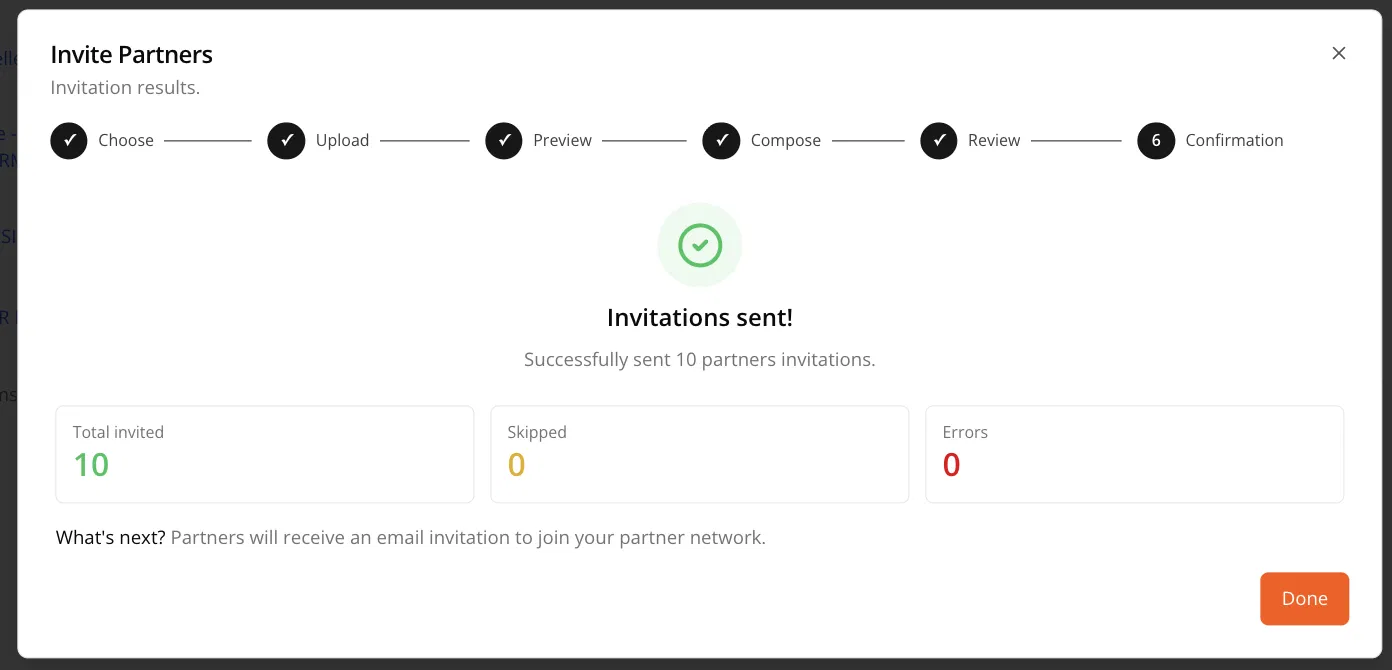
Suger shows how many invitations were sent, along with counts for Skipped and Errors. Click Done to close the wizard.
Once sent, all invited partners appear under Pending invitations on the All Partners page until they accept.
Next step
Once you’ve sent your invitations, see Track partner collaborations and pending invitations to follow their status and know when to follow up on ones that have gone quiet.