AWS ACE Migration S3 to Partner Central API
Overview
This guide explains how to migrate your existing S3-based AWS APN integration to the Partner Central API (ACE API).
The migration ensures your integration uses the latest API-based method, providing improved stability, real-time updates, and full support for AWS ACE features.
The migration process includes:
- Updating IAM role permissions using AWS CloudFormation.
- Upgrading the integration in the Suger Console.
- Verifying the updated integration.
- Running inbound and outbound synchronization to complete the migration.
1. Prerequisites
Before starting the migration, make sure you have:
- An AWS Seller Account linked to your APN account.
- Access to AWS Partner Central with an Alliance Lead or Cloud Admin role.
- An AWS IAM administrator who can configure roles via CloudFormation.
- An existing IAM role used for your current S3-based integration.
2. Migration Steps
Step 1: Open Partner Central API Configuration via Console UI
- In the Suger Console, go to Integrations → AWS ACE.
- Click Edit on your existing AWS ACE integration.
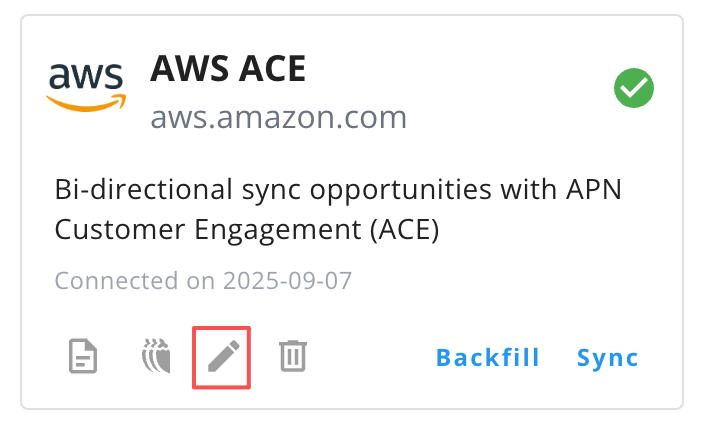
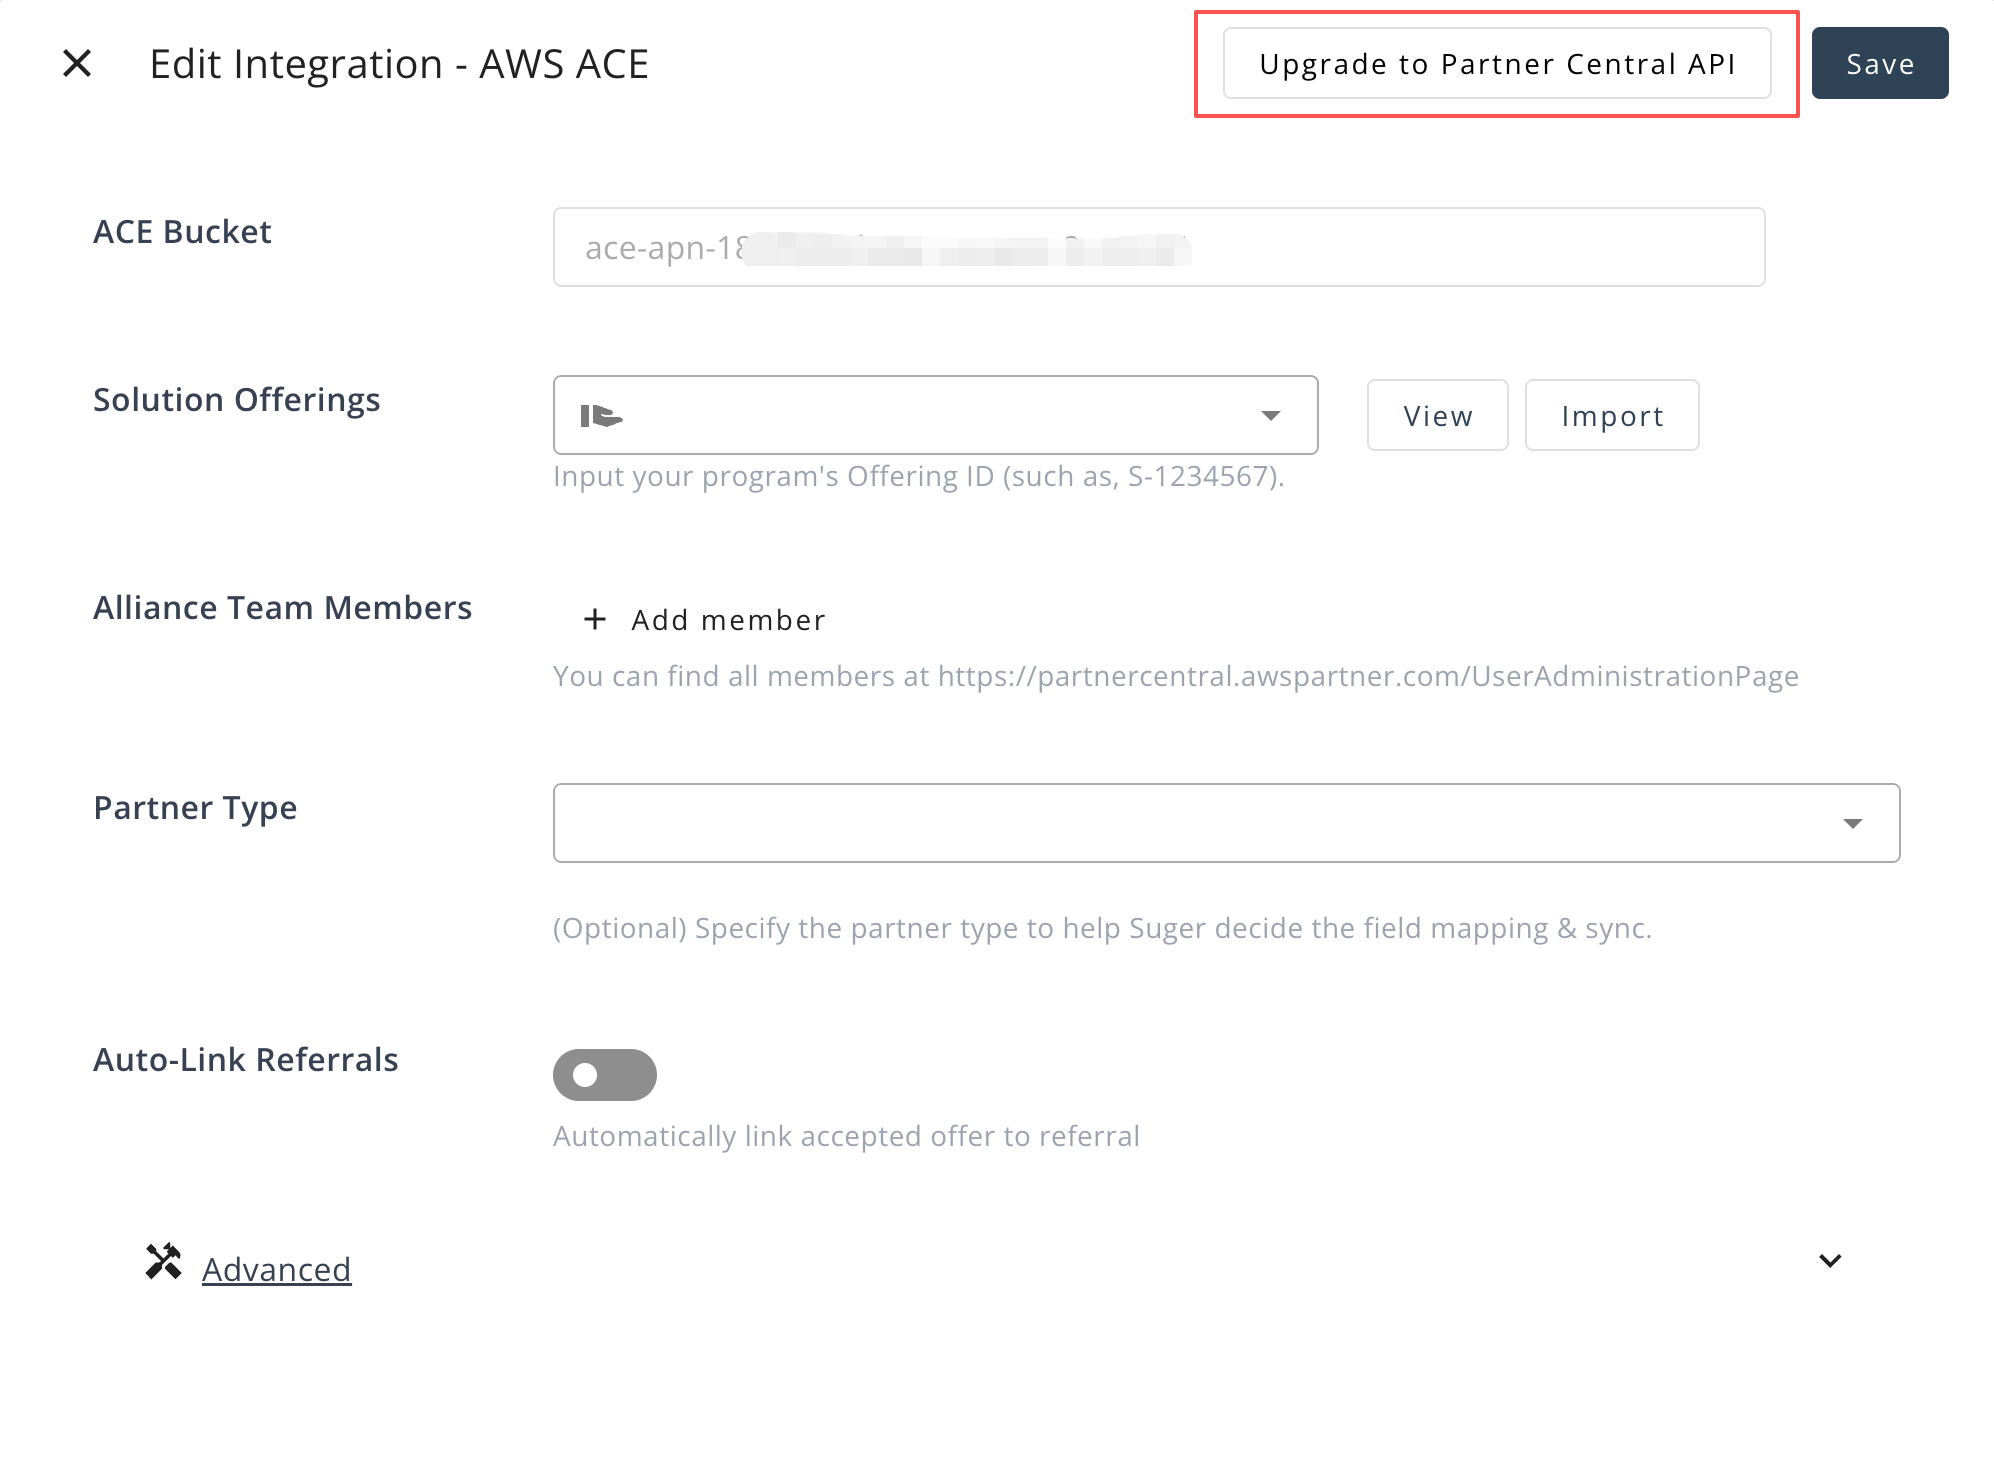
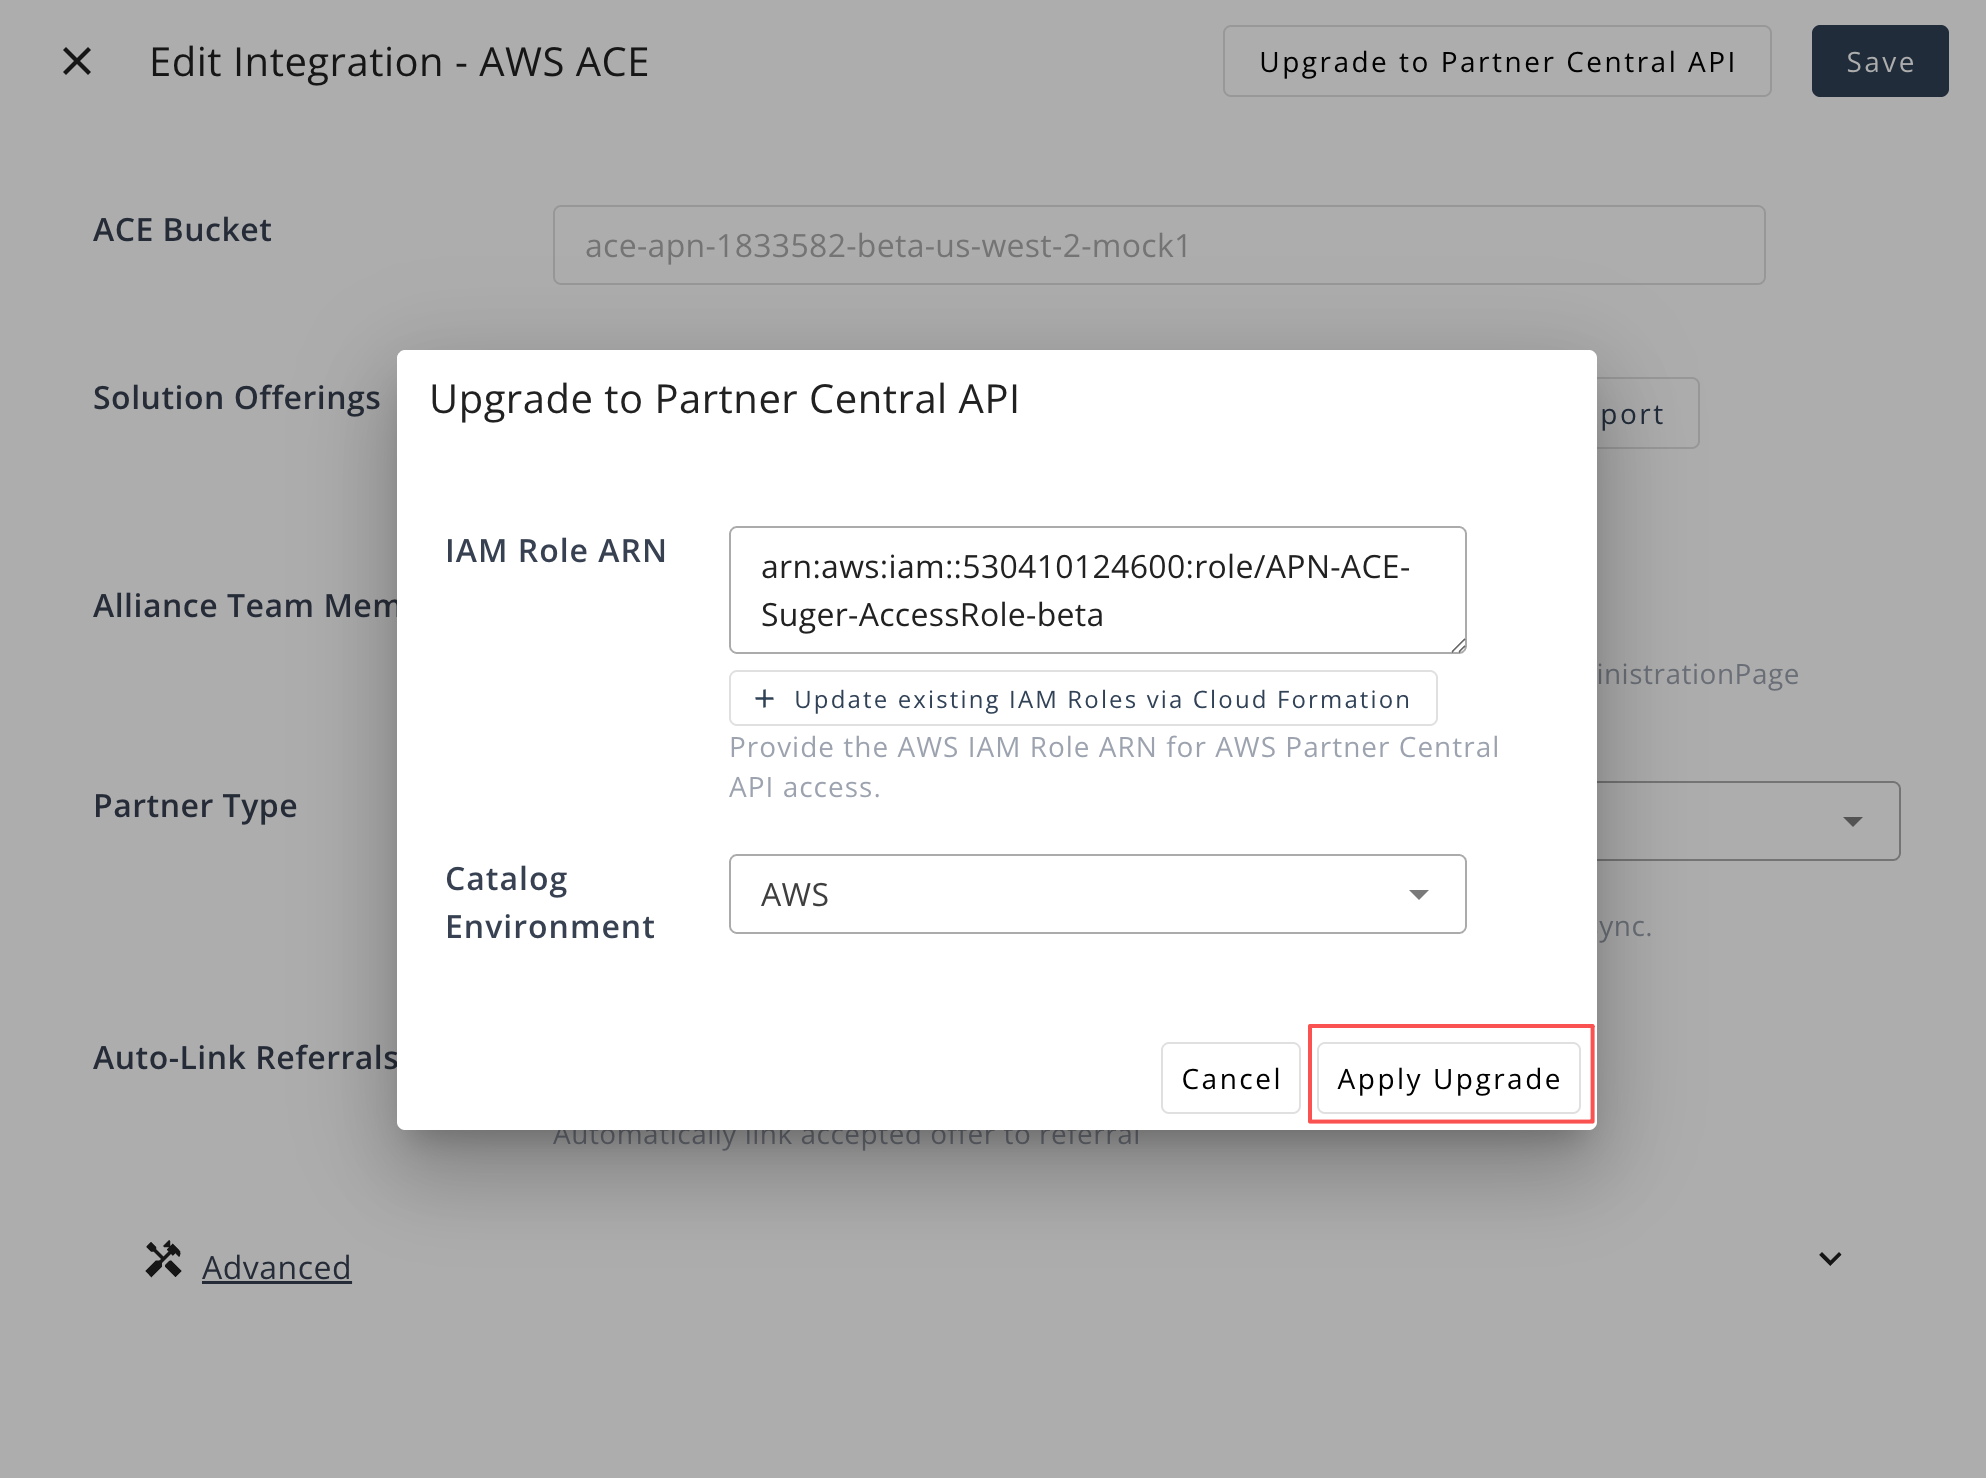
- Click Upgrade to Partner Central API in the top-right corner.
- Click Update Existing IAM Roles via CloudFormation.
This will redirect you to the AWS CloudFormation Console.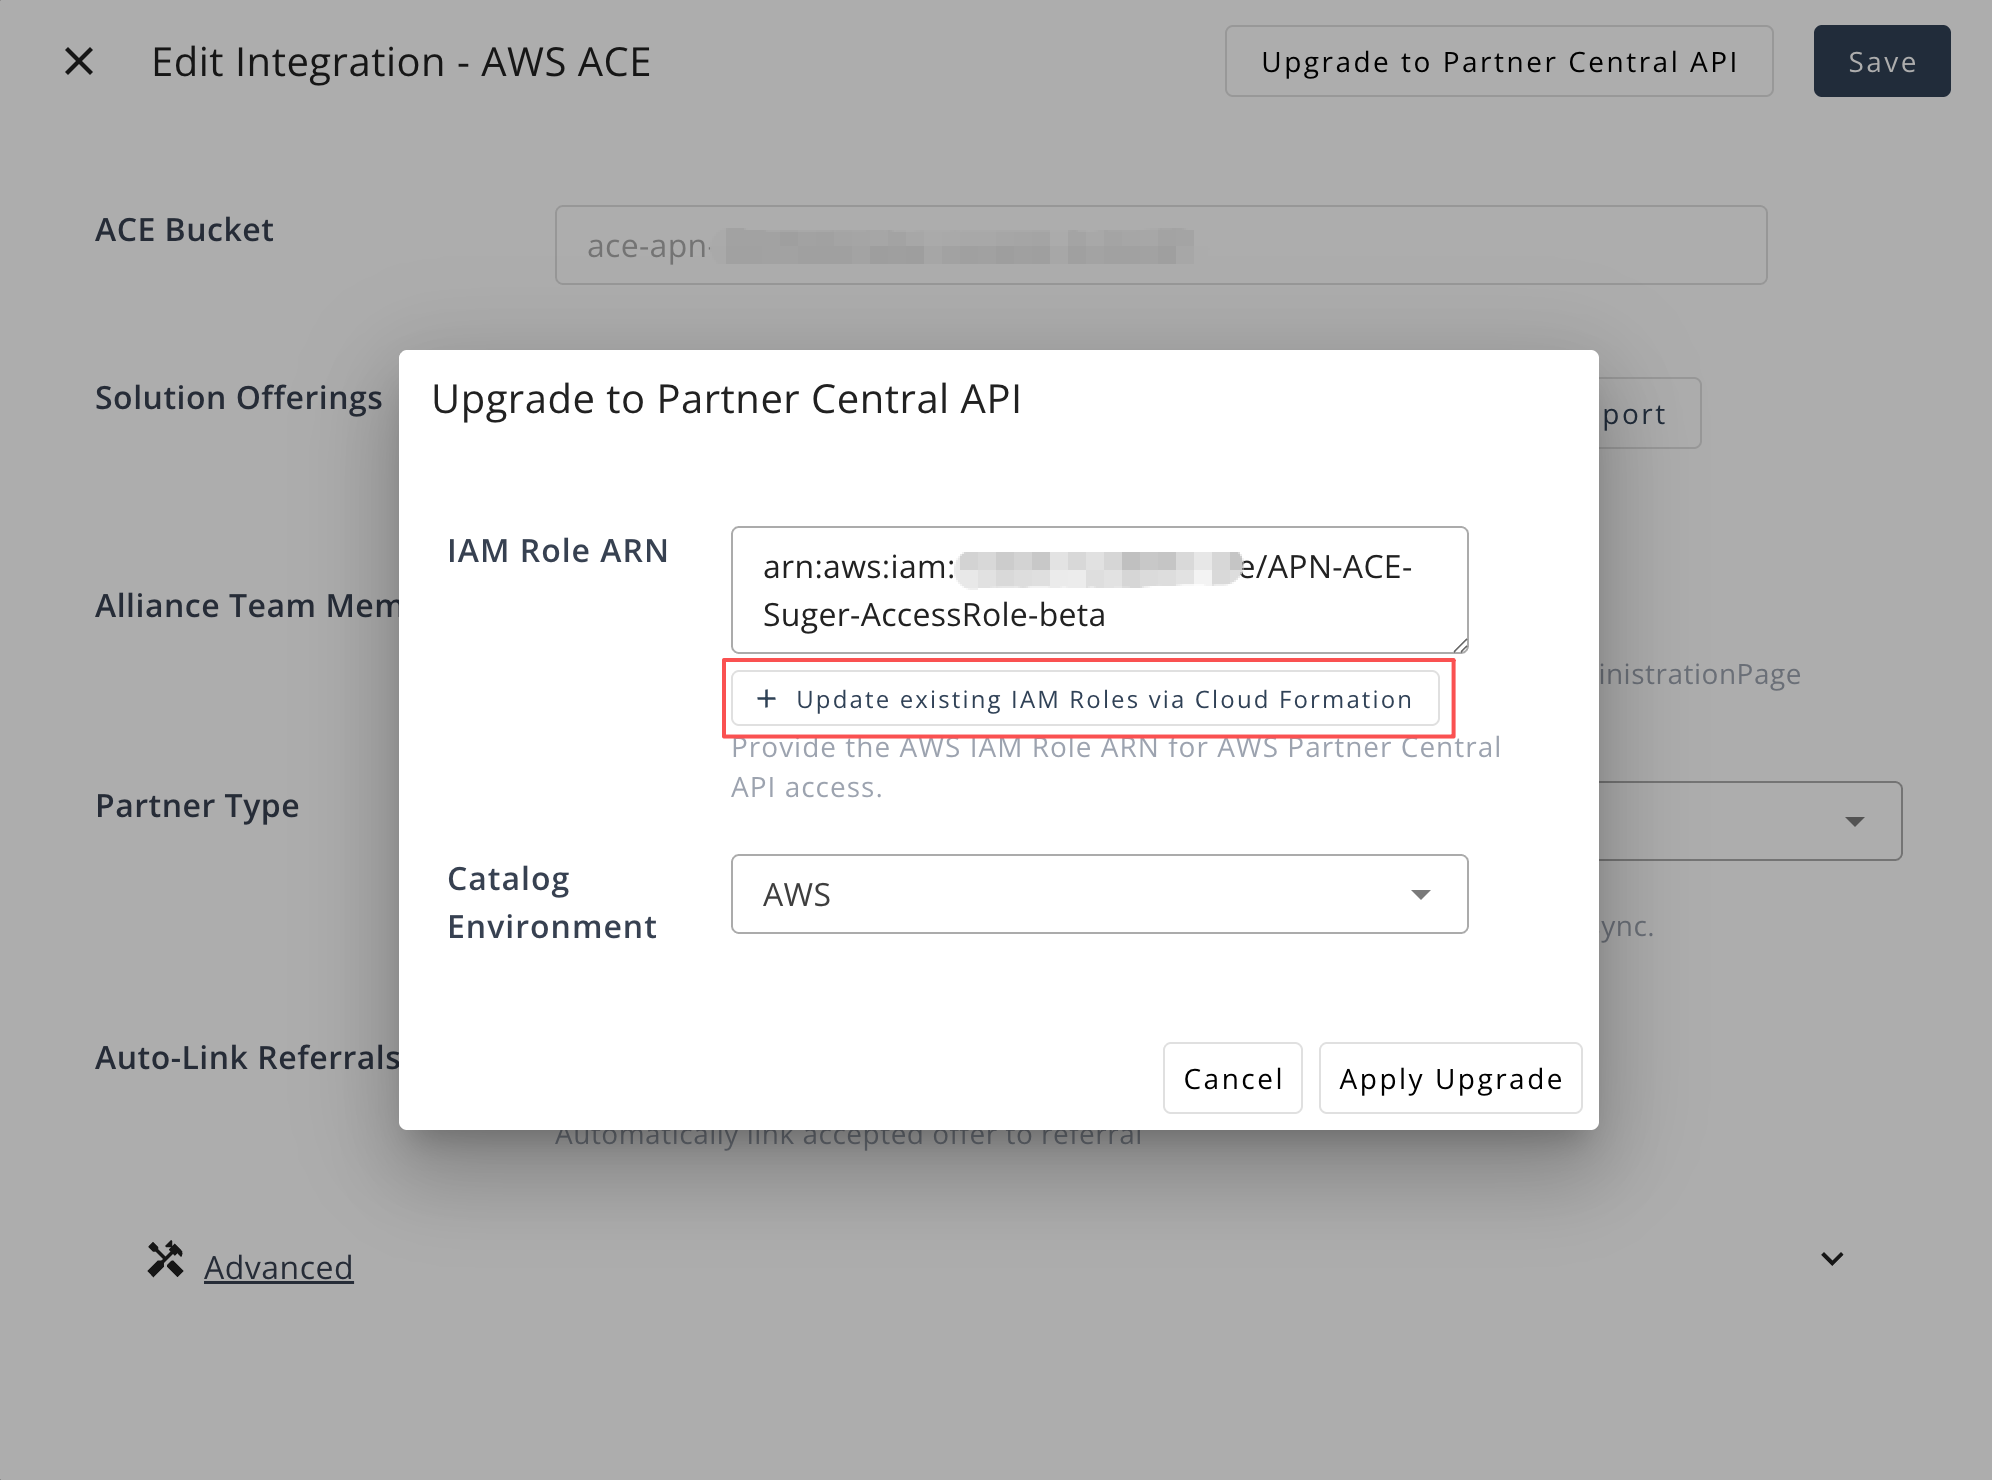
Step 2: Configure Partner Central API Permissions
-
On the redirected CloudFormation page, review the settings.
- Check the box “I acknowledge that AWS CloudFormation might create IAM resources with custom names.”
- Click Create stack.
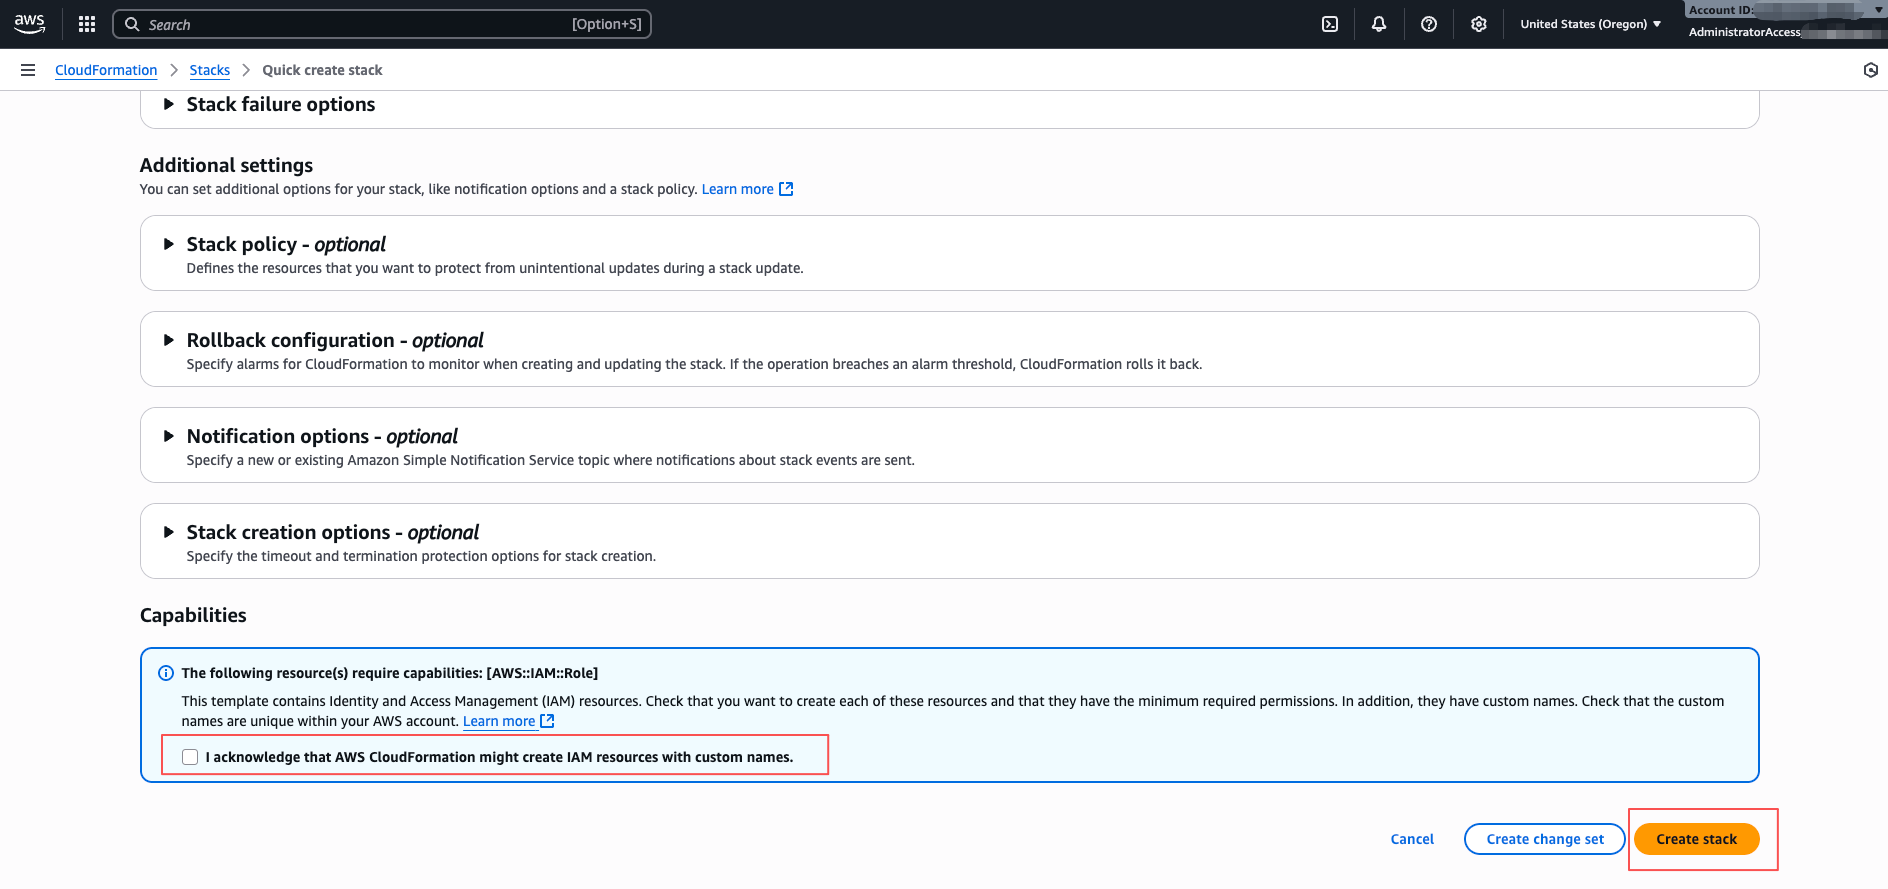
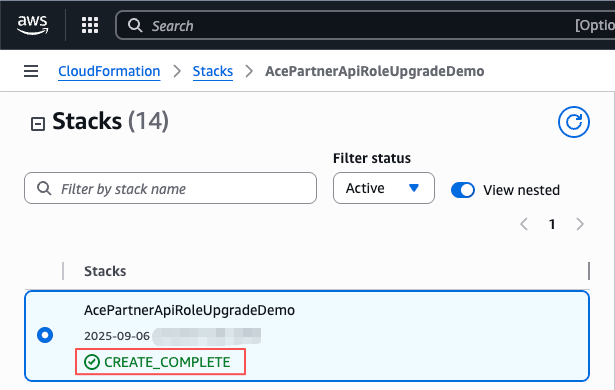
-
Wait until the stack status changes to CREATE_COMPLETE.
Step 3: Verify Integration
- Return to the Suger Console → Settings → Integrations → AWS ACE.
- Click Apply Upgrade to update and verify the integration.
Step 4: Perform Data Synchronization
-
In the Suger Console → Co-Sell → AWS ACE, click the Inbound Sync button to pull opportunity data from APN into Suger.
-
Go to Settings → Integrations → AWS ACE → Operations and wait until the inbound sync status changes to Completed.
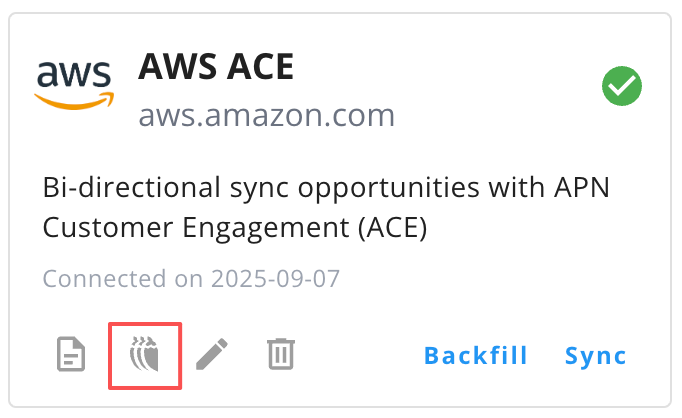

-
Next, return to Co-Sell → AWS ACE and click the Outbound Sync button to push data from Suger back to your CRM Partner.
-
Again, check the Operations page and wait until the outbound sync status shows Completed.
Both inbound and outbound sync must be completed successfully to ensure data consistency between APN and Suger.