Salesforce
Integrate Suger with Salesforce to create private offers, manage contracts, and co-sell across AWS, Azure & GCP Marketplaces directly from your CRM.
Overview
This guide walks you through integrating Salesforce with Suger, enabling your sales and business teams to:
- Create marketplace offers directly from Salesforce opportunities
- Manage co-sell referrals within your existing CRM workflow
- Sync opportunity data between Salesforce and marketplace platforms
- Streamline collaboration between sales teams and marketplace operations
Prerequisites
- A Salesforce Administrator account
- A Suger organization account and API Key
- Installation link for the Salesforce package (Production or Sandbox)
Installation
Install the Salesforce Package
Install the Suger package from the AppExchange:
- Click Get it Now
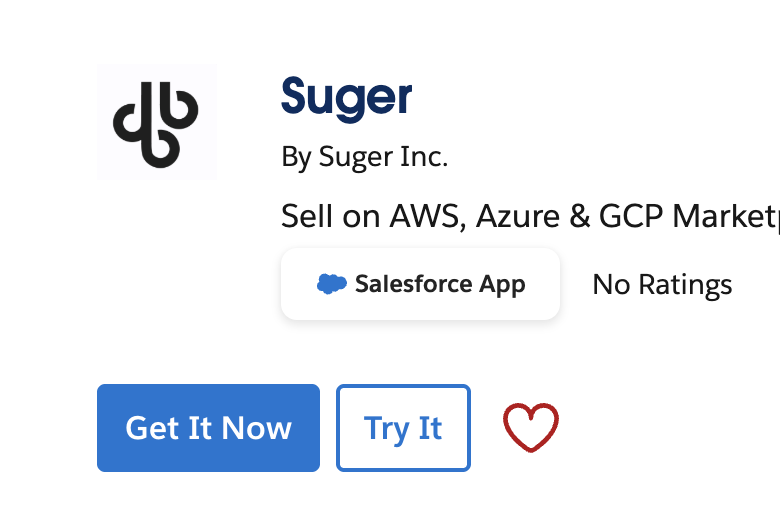
- Log in with your Salesforce Admin account
- Choose Install in Production (or Sandbox)
- Select Install for Admins Only / All Users / Specific Profiles
- Click Install
Set Up Integration User
To connect Suger with Salesforce, you need a dedicated Integration User account. This user will authenticate via OAuth 2.0 Web Server Flow and allow Suger to communicate with your Salesforce org using REST APIs.
Creating a dedicated Integration User ensures:
- Secure and isolated access for API calls
- Easier troubleshooting and monitoring
- No dependency on personal user accounts
Choose a License Type
When creating the Integration User, select one of the following license types:
| License Type | When to Use | Notes |
|---|---|---|
| Salesforce License | Required if your field mapping involves any Quote object — standard Quote (Quote) or CPQ Quote (SBQQ__Quote__c) | You must also assign a CPQ license to the user if you are using CPQ. The Salesforce Integration License does not grant access to Quote objects. |
| Salesforce Integration License | Recommended in most cases | Free license, limited to API-only users (cannot log in via UI). Use with Salesforce API Only System Integrations profile |
Create the Integration User
- In Salesforce Setup, go to Users → New User.
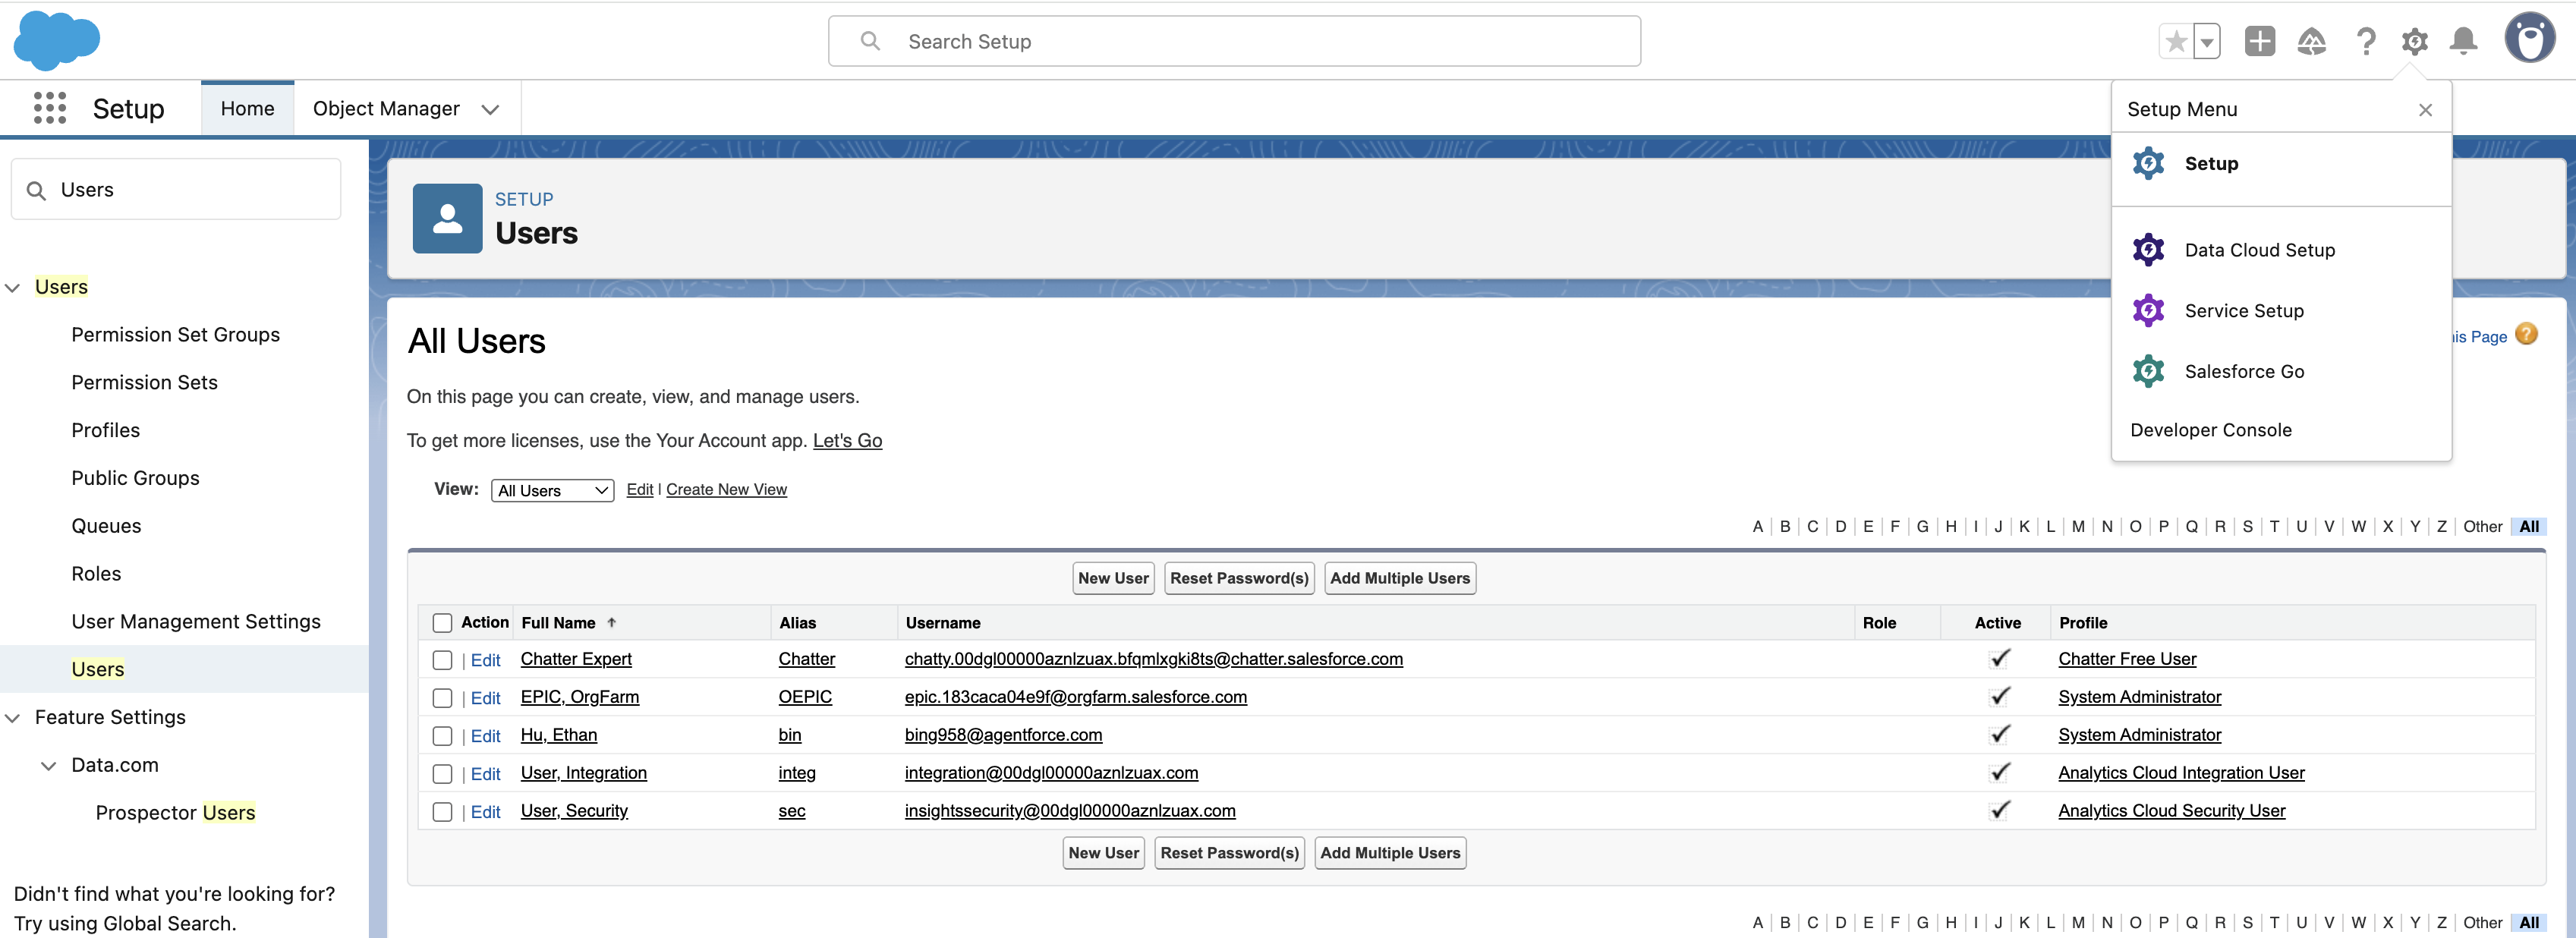
- Enter a valid email address (required for activation).
- Assign one of the licenses listed above.
- For Salesforce Integration License, assign the Salesforce API Only System Integrations profile.
- Save and activate the user.
Assign Permission Sets
After creating the user, assign the necessary permission sets depending on the license type:
If using Salesforce License:
-
Assign the Suger Integrator permission set.
-
Create an additional permission set granting Read and View All access on:
- Account
- Contact
- Opportunity
- Any other objects/fields required in your field mapping
If you are using standard Quote, grant Read access to Product2, Pricebook2, and Quote. The combination of these three permissions also grants access to QuoteLineItem (no separate permission is required).
If using Salesforce Integration License:
- Assign the Suger Integrator (Salesforce Integration License) permission set.
- Create a new permission set (with Salesforce API Integration as the license type) granting Read and View All access on:
- Account
- Contact
- Opportunity
- Any other objects/fields required in your field mapping
- When creating this permission set, be sure to select Salesforce API Integration as the license. Note that it is Salesforce API Integration, NOT Salesforce Integration.
At this point, your Integration User is ready. You can now proceed to connect Salesforce and Suger via OAuth in the next step.
Configuration
To enable two-way communication, you need to:
- Allow Salesforce → Suger (enter Organization ID and API Key in Salesforce).
- Allow Suger → Salesforce (authorize access via OAuth).
Configure Salesforce to Access Suger
This step configures Salesforce so it can call Suger APIs.
-
Get your Organization ID and API Key
- Organization ID: found in Suger Console → Settings → Organization & Users
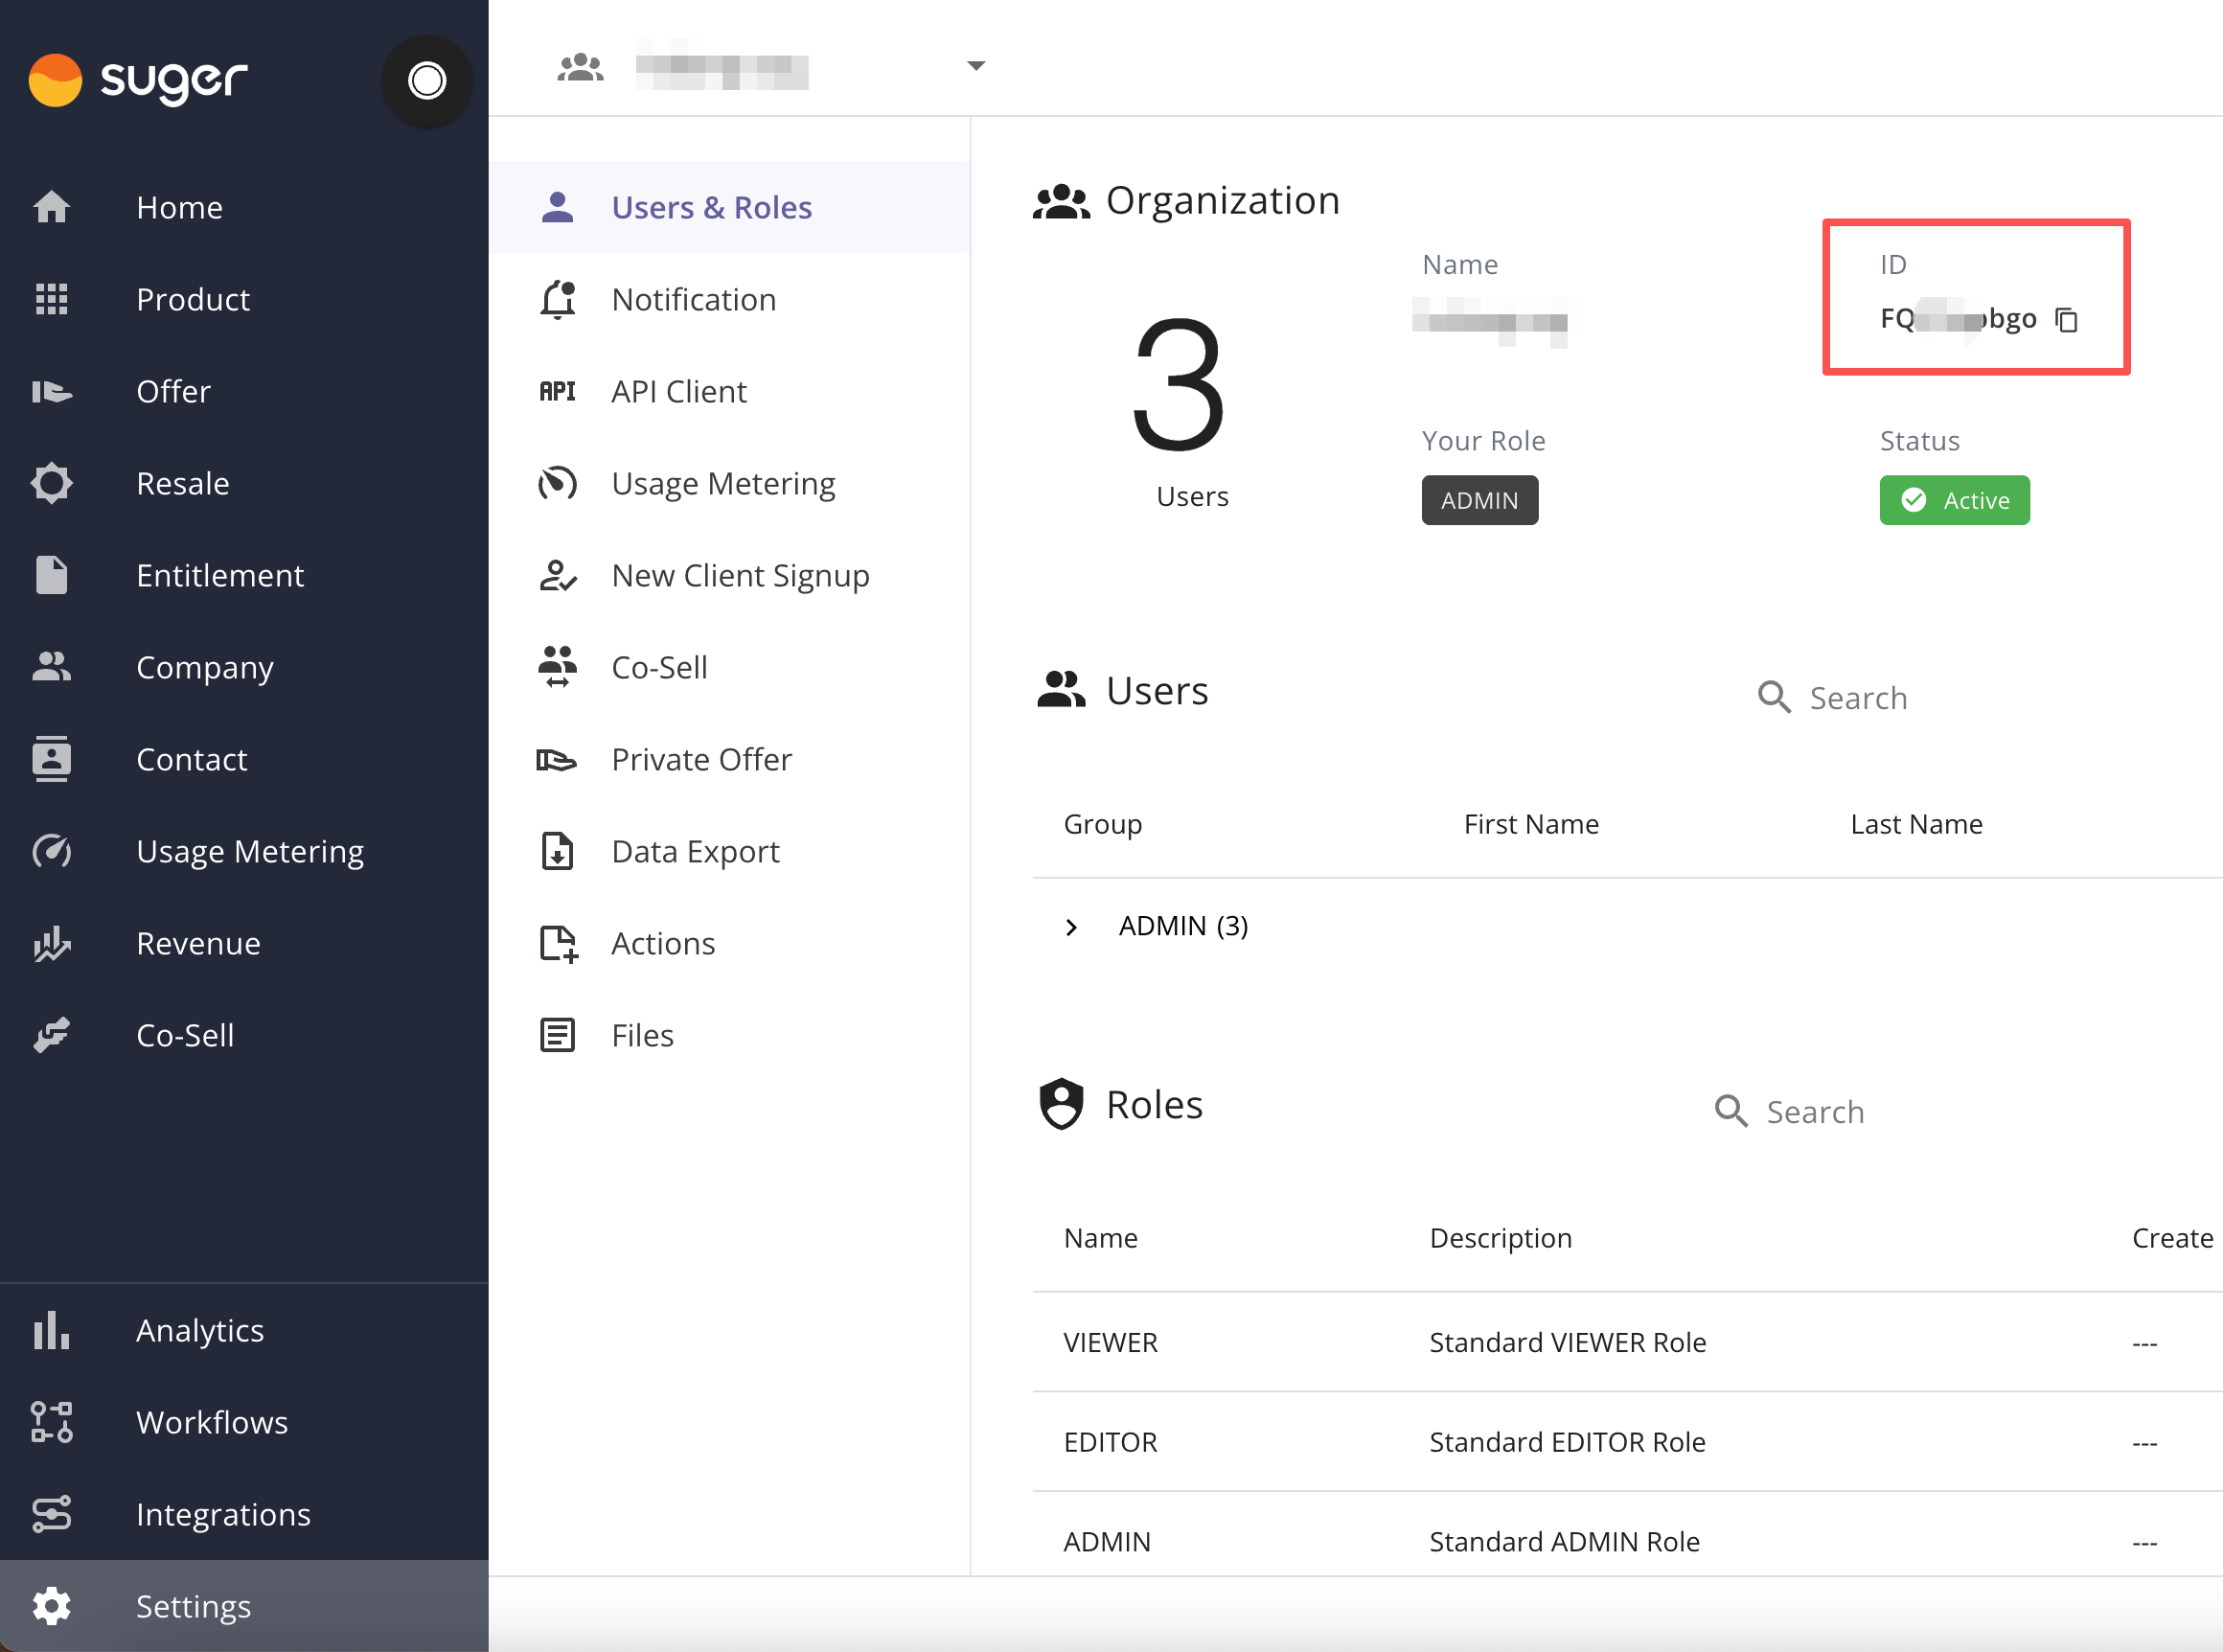
- API Key: generate in Suger Console → Settings → API Client
- Follow the instructions at API Client
- Organization ID: found in Suger Console → Settings → Organization & Users
-
Open Suger app in Salesforce
- In Salesforce, search for Suger under Apps and open it.
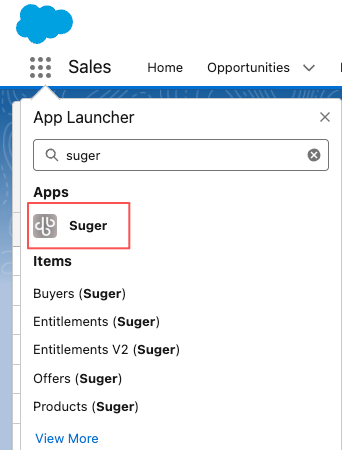
- In Salesforce, search for Suger under Apps and open it.
-
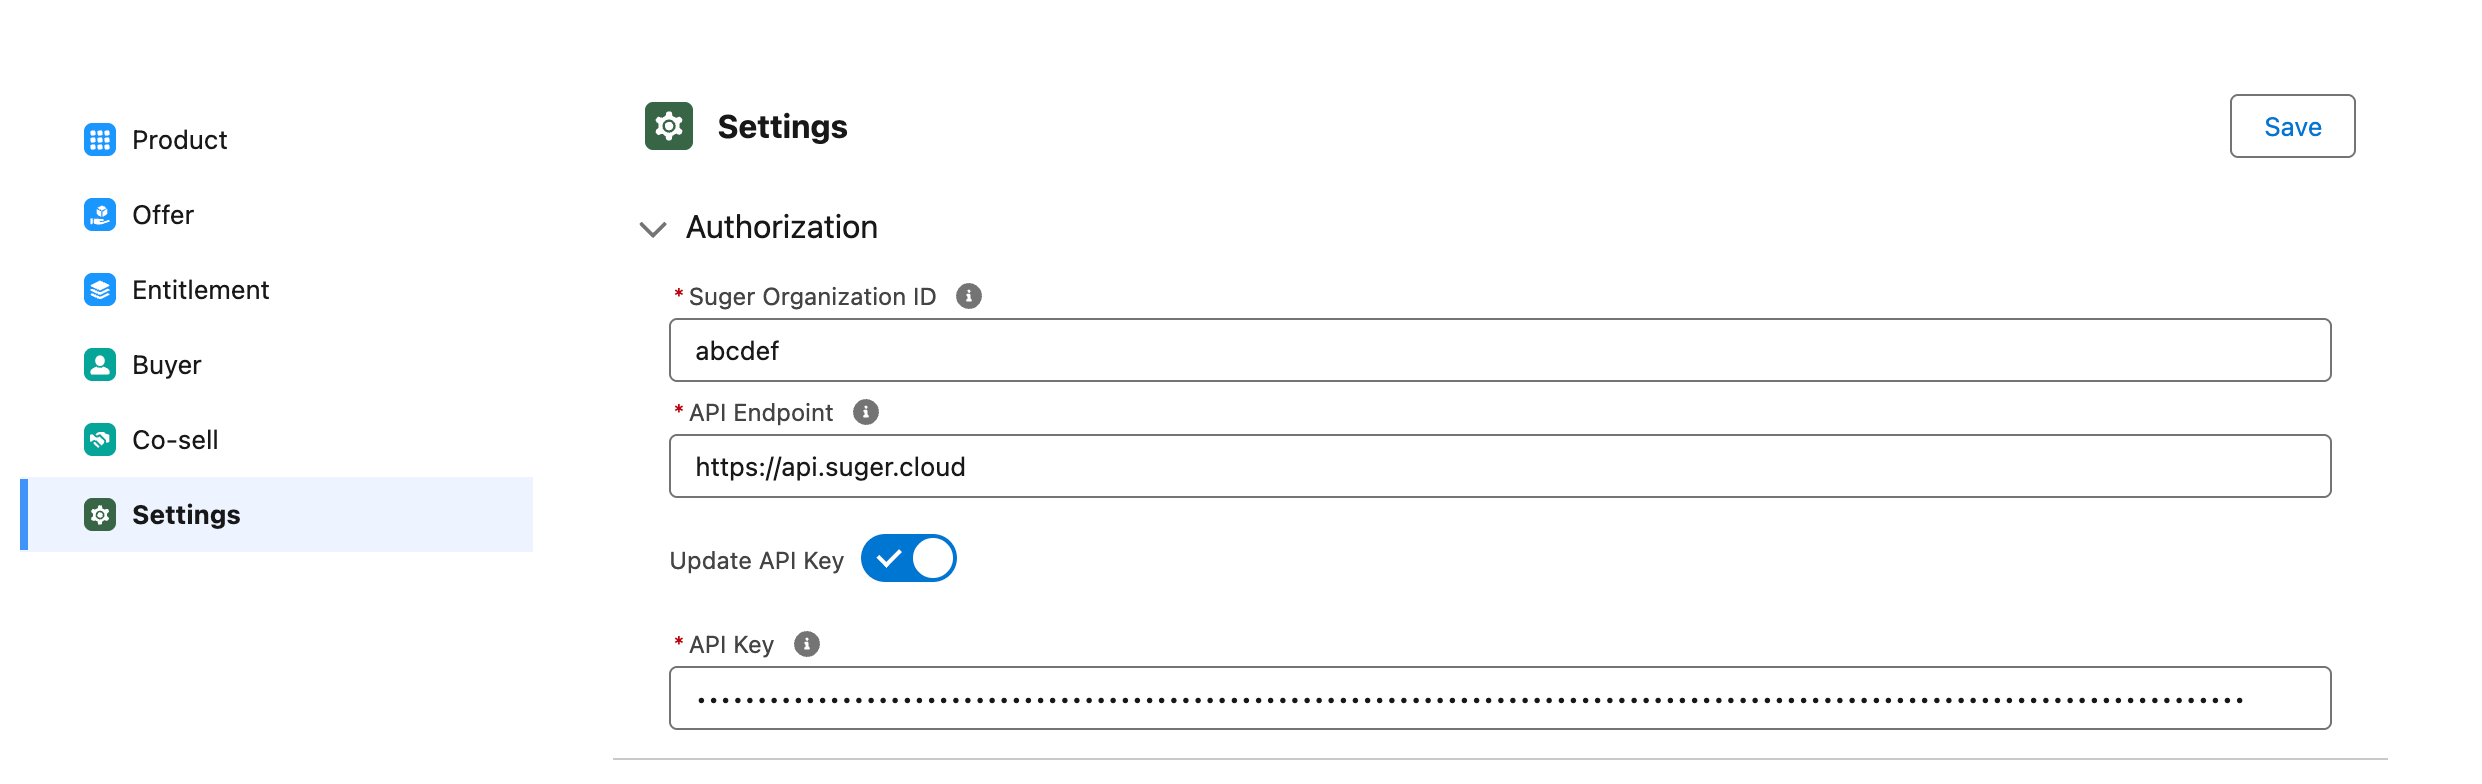
Enter settings in Salesforce
-
Go to Settings inside the Suger app.
-
Fill in:
- Organization ID
- API Endpoint:
https://api.suger.cloud - API Key (check no trailing spaces)
-
Click Save.
-
Configure Suger to Access Salesforce
This step configures Suger Console to connect to Salesforce using the Integration User.
-
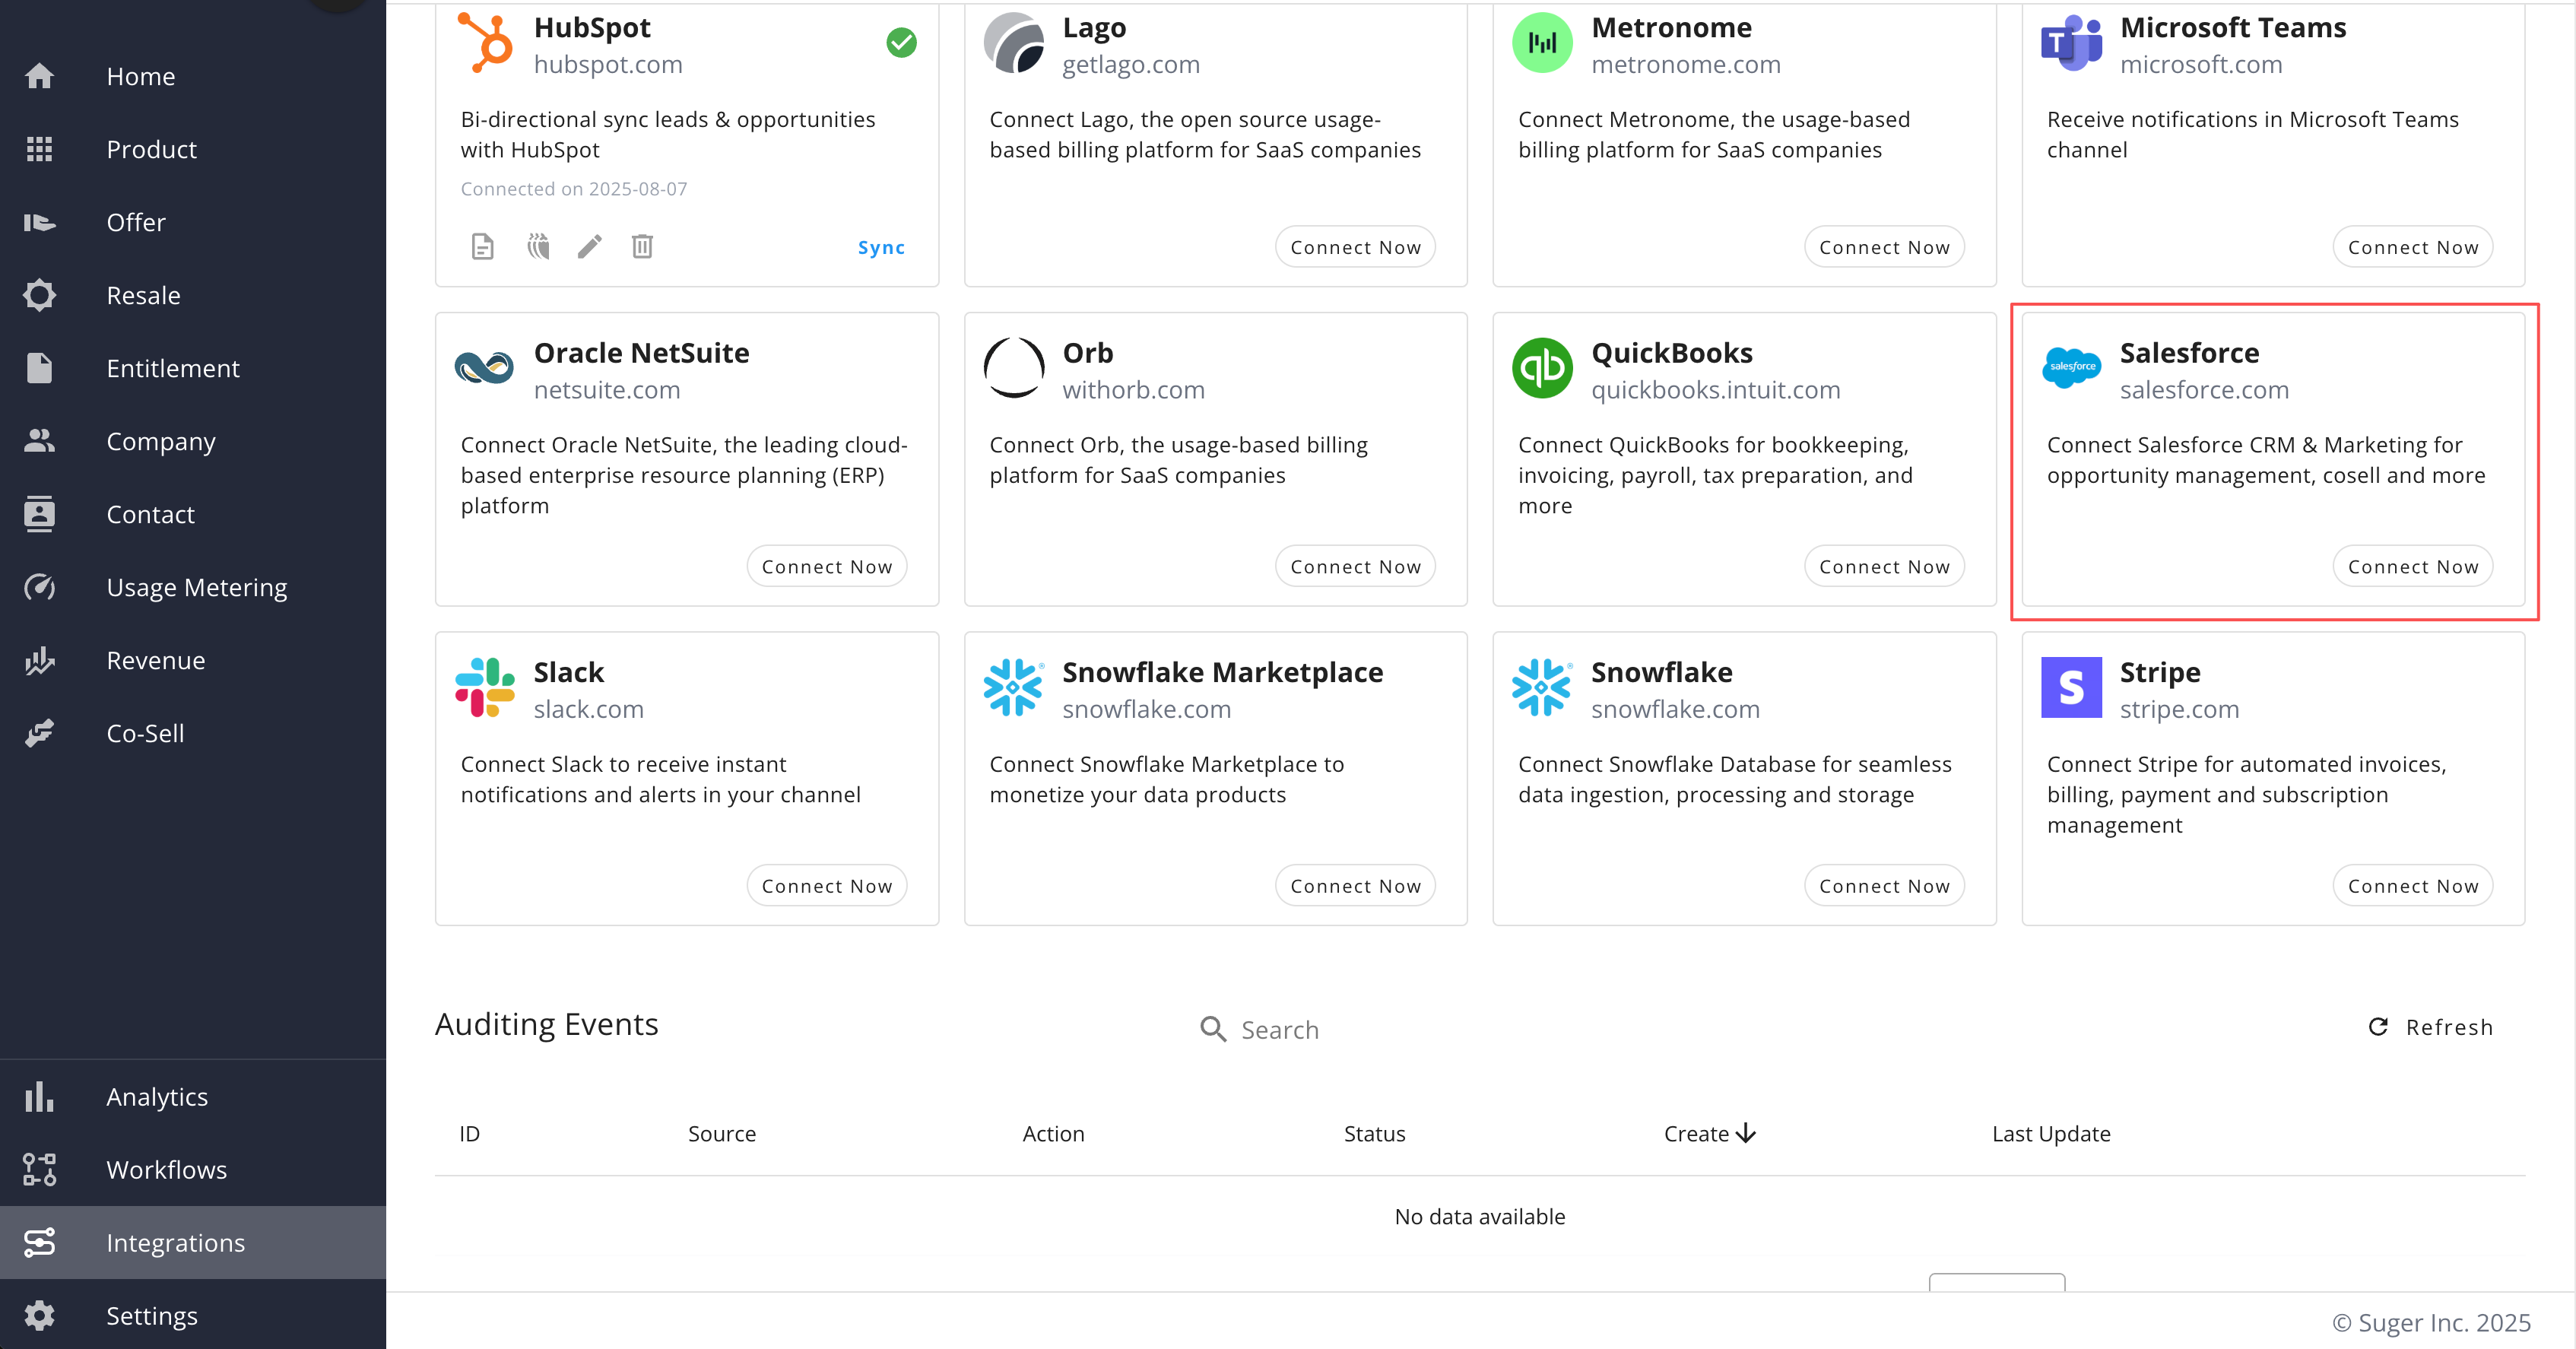
Go to Integrations in Suger Console
- Navigate to Settings → Integrations → Salesforce.
- Click Connect Now.
-
Select Environment
- Enter your Salesforce Subdomain (e.g., acme.my.salesforce.com).
- Check Sandbox if you are connecting to a sandbox org.
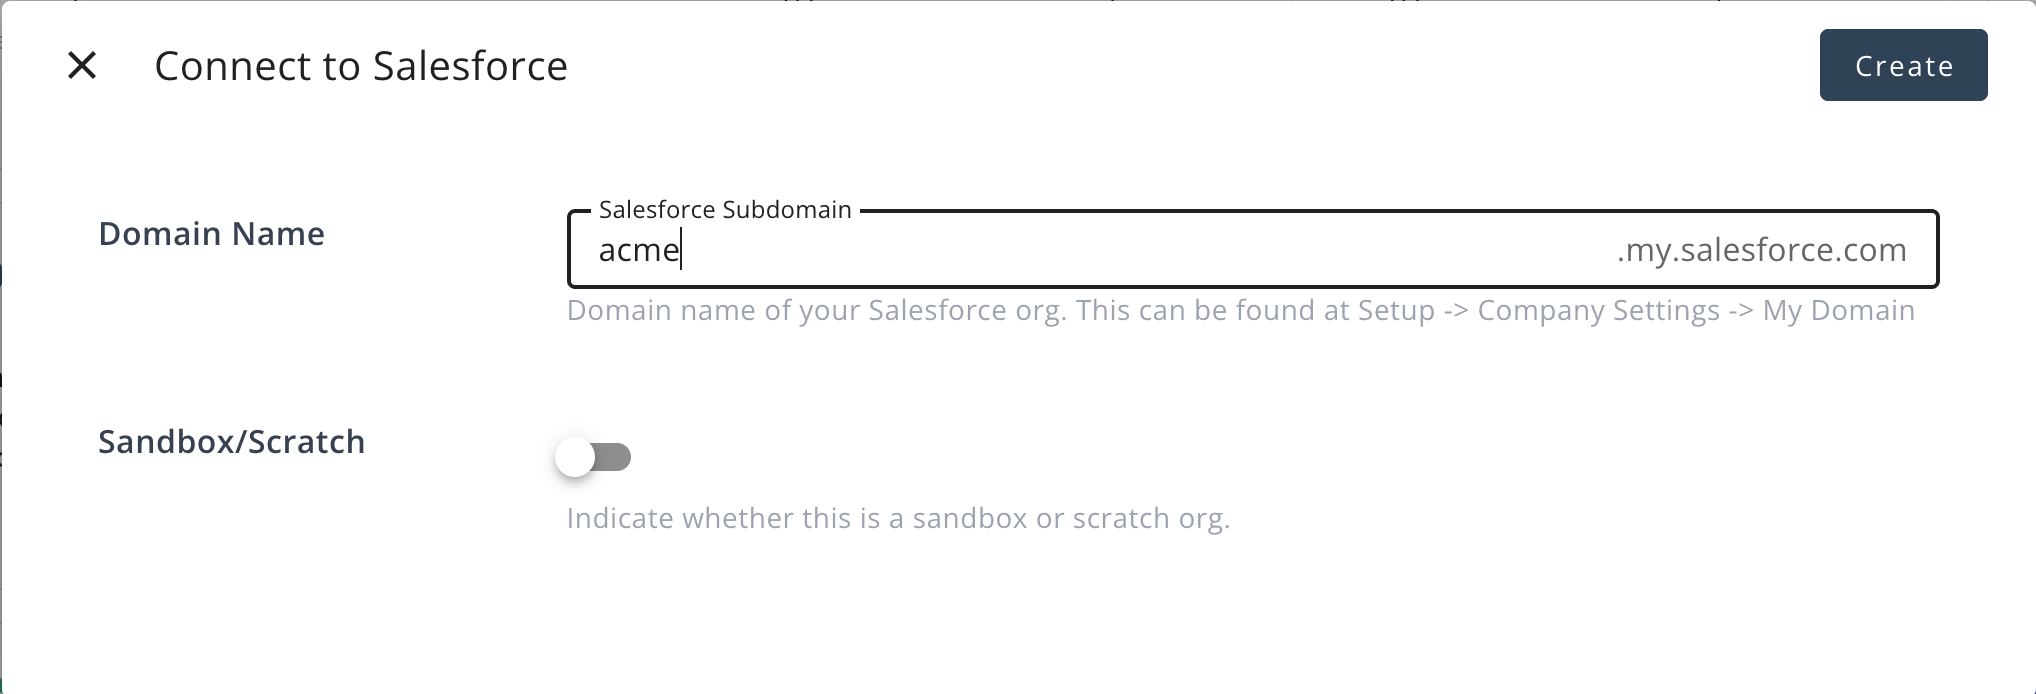
- Click Create
Find your Salesforce Subdomain in Salesforce Setup → Company Settings → My Domain.
-
Verify the connection
- Click Verify.
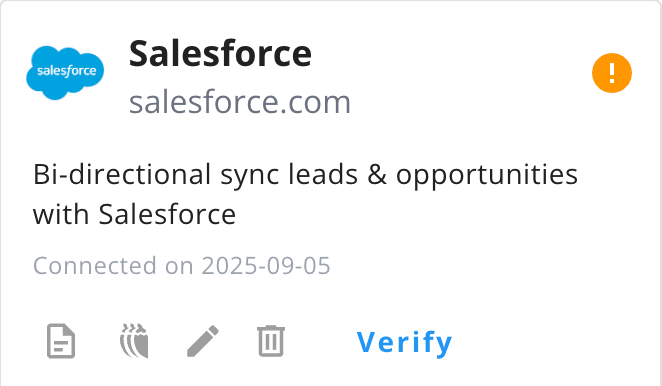
- Click Verify.
Use Your Own External Client App
By default, Suger connects using its own managed OAuth app — you only need to enter your subdomain and click Create. If you prefer to connect with your own Salesforce External Client App (ECA) instead, toggle Custom External Client App on the connect form and enter its Consumer Key and Consumer Secret.
First, create the External Client App in Salesforce (Setup → External Client App Manager → New External Client App) and configure its OAuth settings:
- Callback URL:
https://api.suger.cloud/public/integration/salesforce/oauthCallback - OAuth scopes:
- Manage user data via APIs (
api) - Perform requests at any time (
refresh_token,offline_access) — required. Without it Salesforce returns no refresh token and Suger rejects the connection (otherwise it would stop working once the first access token expires). - Access the identity URL service (
id) — optional; only needed if you enable Change Data Capture (real-time sync), which uses your Salesforce org ID. Core sync, offers, and co-sell work without it.
- Manage user data via APIs (
- Under Flow Enablement, enable Authorization Code and Credentials Flow (the flow Suger uses).
- Under Security, enable Require Proof Key for Code Exchange (PKCE).
- Leave Enforce Refresh Token IP Allowlist disabled, unless you add Suger’s egress IPs to the allowlist (otherwise token refresh will fail).
External Client Apps have no “valid until revoked” setting (that’s a classic Connected App option). There is no fixed refresh-token expiry to configure; the only expiry is the optional Limit Idle Refresh Token TTL to 30 Days, which never triggers for an active integration that refreshes regularly.
Then enter the Consumer Key (as Client ID) and Consumer Secret on the Suger connect form and click Create.
User Interface Setup
Enable Suger Widget on Opportunity Pages
Add the Suger Opportunity Quick Panel component to enable Suger features directly on opportunity records:
- Open Salesforce Setup → Object Manager → Opportunity → Lightning Record Pages.
- Edit the Opportunity Record Page.
- In the Components panel, search for Suger.
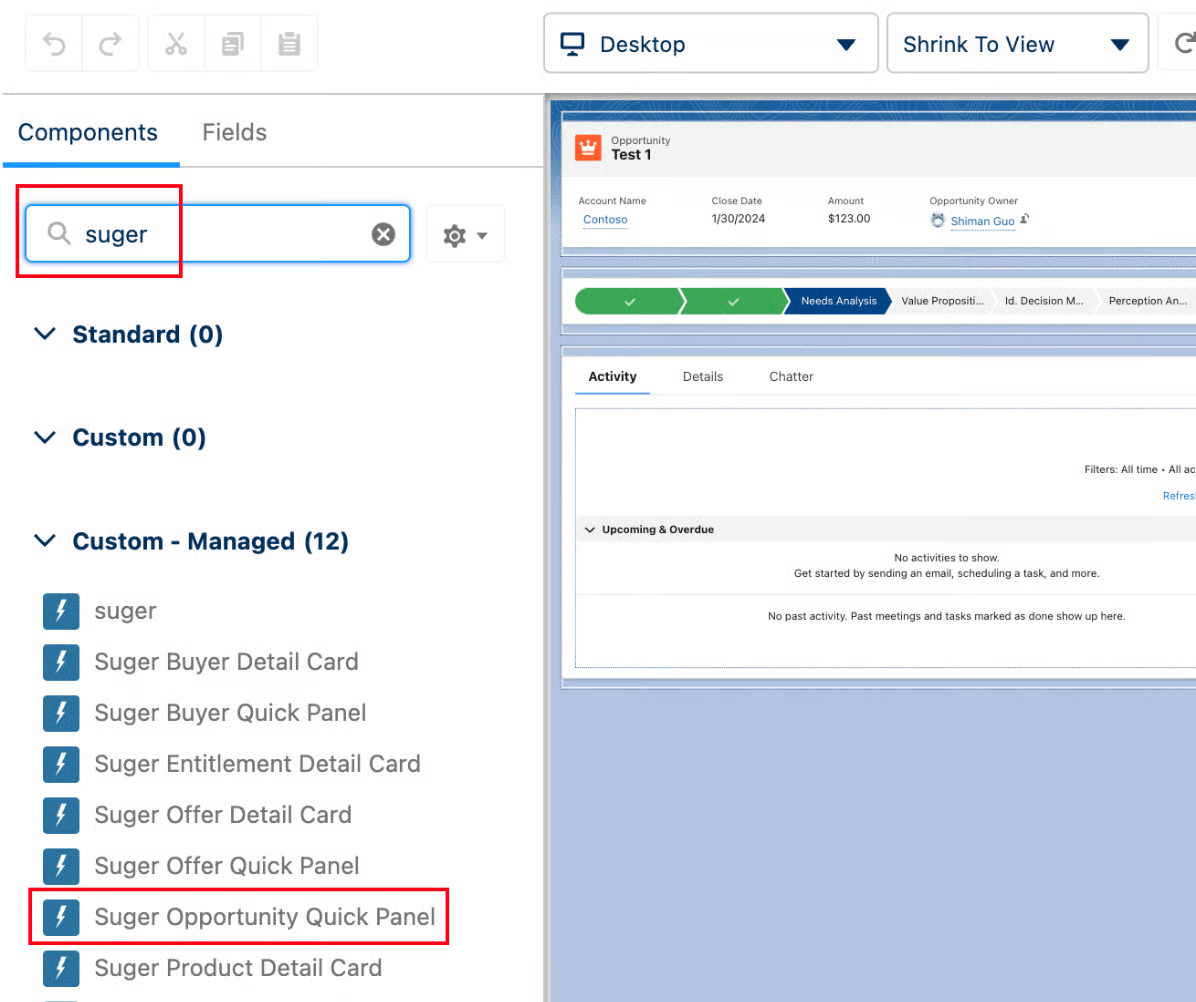
- Drag and drop Suger Opportunity Quick Panel onto the page layout.
- Save and activate the page.
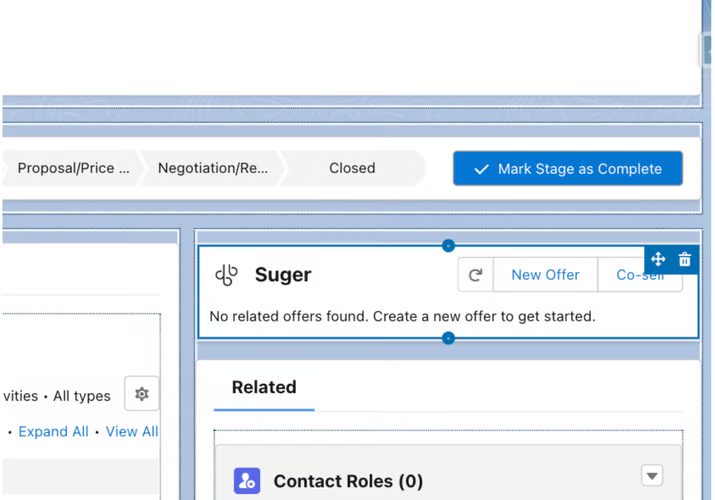
When configured, users will see New Offer and Co-sell buttons on Opportunity records.
Assign User Permissions
Your team will only see the correct Suger buttons if they are assigned the right Permission Set. Suger provides three permission sets:
| Permission Set | Visible Features | Typical Use Case |
|---|---|---|
| Suger User – Marketplace | Marketplace buttons only (e.g., New Offer) | Sales team managing offers |
| Suger User – Cosell | Co-sell button only | Business development team |
| Suger User | All functionalities | Power users, admins, or full-feature users |
Example: If Jane Doe is assigned Suger User – Cosell, she will only see the Co-sell button in the Suger Widget.

Custom Permissions
Under the hood, button visibility is controlled by the following Custom Permissions (under the Suger namespace):
Create OfferCreate Referral
Authentication & Security
Suger connects to your Salesforce org via the OAuth 2.0 Authorization Code flow with PKCE, with Refresh Token Rotation, 30-day idle TTL, and IP allowlist enforced at the External Client App level.
See Salesforce App → Authentication & Security for the full reference — OAuth flow, token storage, required admin policy settings, revocation, and transport security.
CRM Enrichment
Automatically populate Salesforce records with intelligence signals from Suger (engagement scores and marketplace metrics across AWS, Azure, GCP).
See Salesforce App → CRM Enrichment for the full configuration guide — custom field setup, SOQL targeting, refresh-cycle controls, and sync progress tracking.
Suger AI Tools
Suger AI uses a middleware strategy — wrapping the Salesforce REST API directly.
Org-level only: Salesforce tools use the org-level integration credentials.
| Tool | Description |
|---|---|
salesforce_query | Execute a SOQL query against Salesforce |
salesforce_search | Execute a SOSL search across Salesforce objects |
salesforce_list_objects | List all available sObject types |
salesforce_describe_object | Describe an sObject type (fields, metadata, picklist values) |
salesforce_get_record | Get a single record by sObject type and ID |
salesforce_create_record | Create a new record |
salesforce_update_record | Update fields on an existing record |
salesforce_delete_record | Delete a record by sObject type and ID |
Troubleshooting
If a user still sees the wrong button after assigning the correct permission set:
-
Check the user profile
- Go to the user’s profile and verify whether Salesforce automatically enabled additional custom permissions when the package was installed.
- If unnecessary permissions are enabled, uncheck them. (screenshot: user profile showing Custom Permissions section)
-
Force refresh the page
- Ask the user to refresh with Cmd+R (Mac) or Ctrl+Shift+R (Windows).
-
Object / Field-Level Security (FLS)
- Ensure users have Read/View All permissions on Account, Contact, Opportunity, and any mapped fields.
-
API Only User / Login Access
- Remember that Salesforce Integration License is API-only; business users need a full Salesforce License + proper Permission Set.
Removing the Integration
To completely remove the Salesforce integration:
From Suger Console
- Navigate to Suger Console → Settings → Integrations → Salesforce
- Click the 🗑️ Delete button
- This removes stored credentials from Suger
From Salesforce
- Go to Setup → Connected Apps OAuth Usage
- Locate the Suger Connected App
- Click the User Count link
- Click Revoke (specific user) or Revoke All (all users)