Google Mail
Overview
Gmail, Google’s email service, offers a comprehensive platform for communication and productivity. With features like advanced search capabilities, powerful filters, and seamless integration with other Google Workspace tools, Gmail is a cornerstone of modern email management.
By integrating Suger with Gmail, users can leverage automation workflows to enhance email productivity. Tasks such as sending emails, applying labels for organization, and managing threads can be automated, improving efficiency and enabling customized email workflows tailored to specific needs.
Create Integration
Suger’s Google Mail integration authenticates with a Service Account (with domain-wide delegation).
- Create a service account in your target GCP project for Google Mail integration.
- Enable the Gmail API in the same Google project.
- Create the service account key, and download the associated JSON file. It is required for the following integration.
- Enable G-Suite Domain-wide Delegation for the service account.
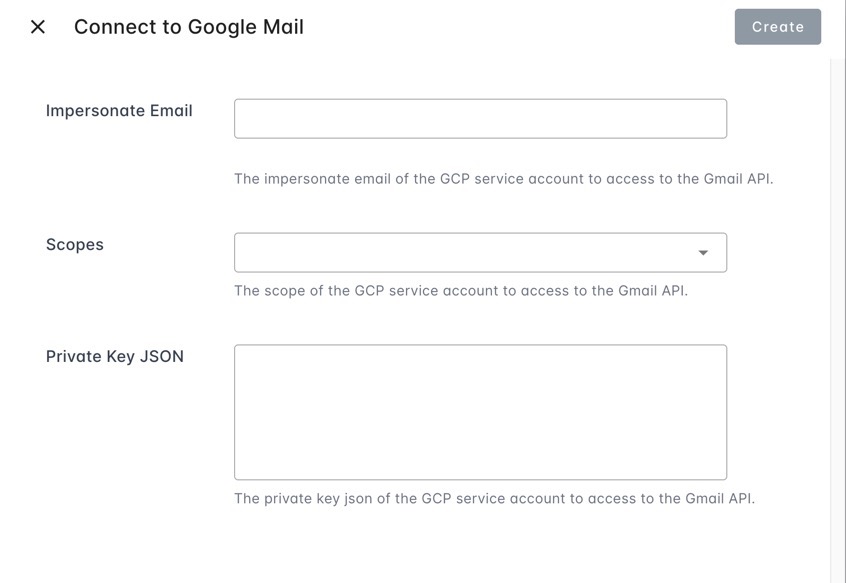
- Specify the impersonated email address, select the appropriate scopes configured in the previous step, and store the JSON key file contents within the Suger console integration page.
Suger AI Tools
Suger AI uses a middleware strategy — wrapping the Gmail API directly.
Profile & Labels
| Tool | Description |
|---|---|
googlemail_get_profile | Get the authenticated user’s Gmail profile |
googlemail_list_labels | List all Gmail labels (system and user-created) |
Messages
| Tool | Description |
|---|---|
googlemail_list_messages | List messages using Gmail search syntax |
googlemail_get_message | Get a message (headers by default) |
googlemail_get_message_body | Get a message with fully decoded body (plain text + HTML) |
googlemail_send_mail | Send an email (plain text, HTML, or threaded reply) |
googlemail_reply_to_message | Reply to a message, preserving thread |
googlemail_modify_message_labels | Add or remove labels on a message |
googlemail_batch_modify_messages | Apply label changes to up to 1,000 messages at once |
googlemail_get_attachment | Download a message attachment |
googlemail_trash_message | Move a message to Trash |
googlemail_untrash_message | Restore a trashed message |
Threads
| Tool | Description |
|---|---|
googlemail_list_threads | List conversation threads |
googlemail_get_thread | Get all messages in a thread |
googlemail_modify_thread_labels | Add or remove labels on an entire thread |
googlemail_trash_thread | Trash an entire thread |
googlemail_untrash_thread | Restore a trashed thread |
Drafts
| Tool | Description |
|---|---|
googlemail_list_drafts | List drafts |
googlemail_create_draft | Save an email as a draft |
googlemail_get_draft | Get a draft |
googlemail_update_draft | Replace a draft’s content |
googlemail_send_draft | Send a previously saved draft |
googlemail_delete_draft | Permanently delete a draft |
Edit Integration
Editing is not supported for security reasons. To change configuration, delete the integration and create a new one.
Delete Integration
The Google Mail integration can be deleted like all other integrations. Once the deletion is triggered, all integration info including the service account with the key will be deleted immediately & permanently from Suger. No time window or methods to recover.