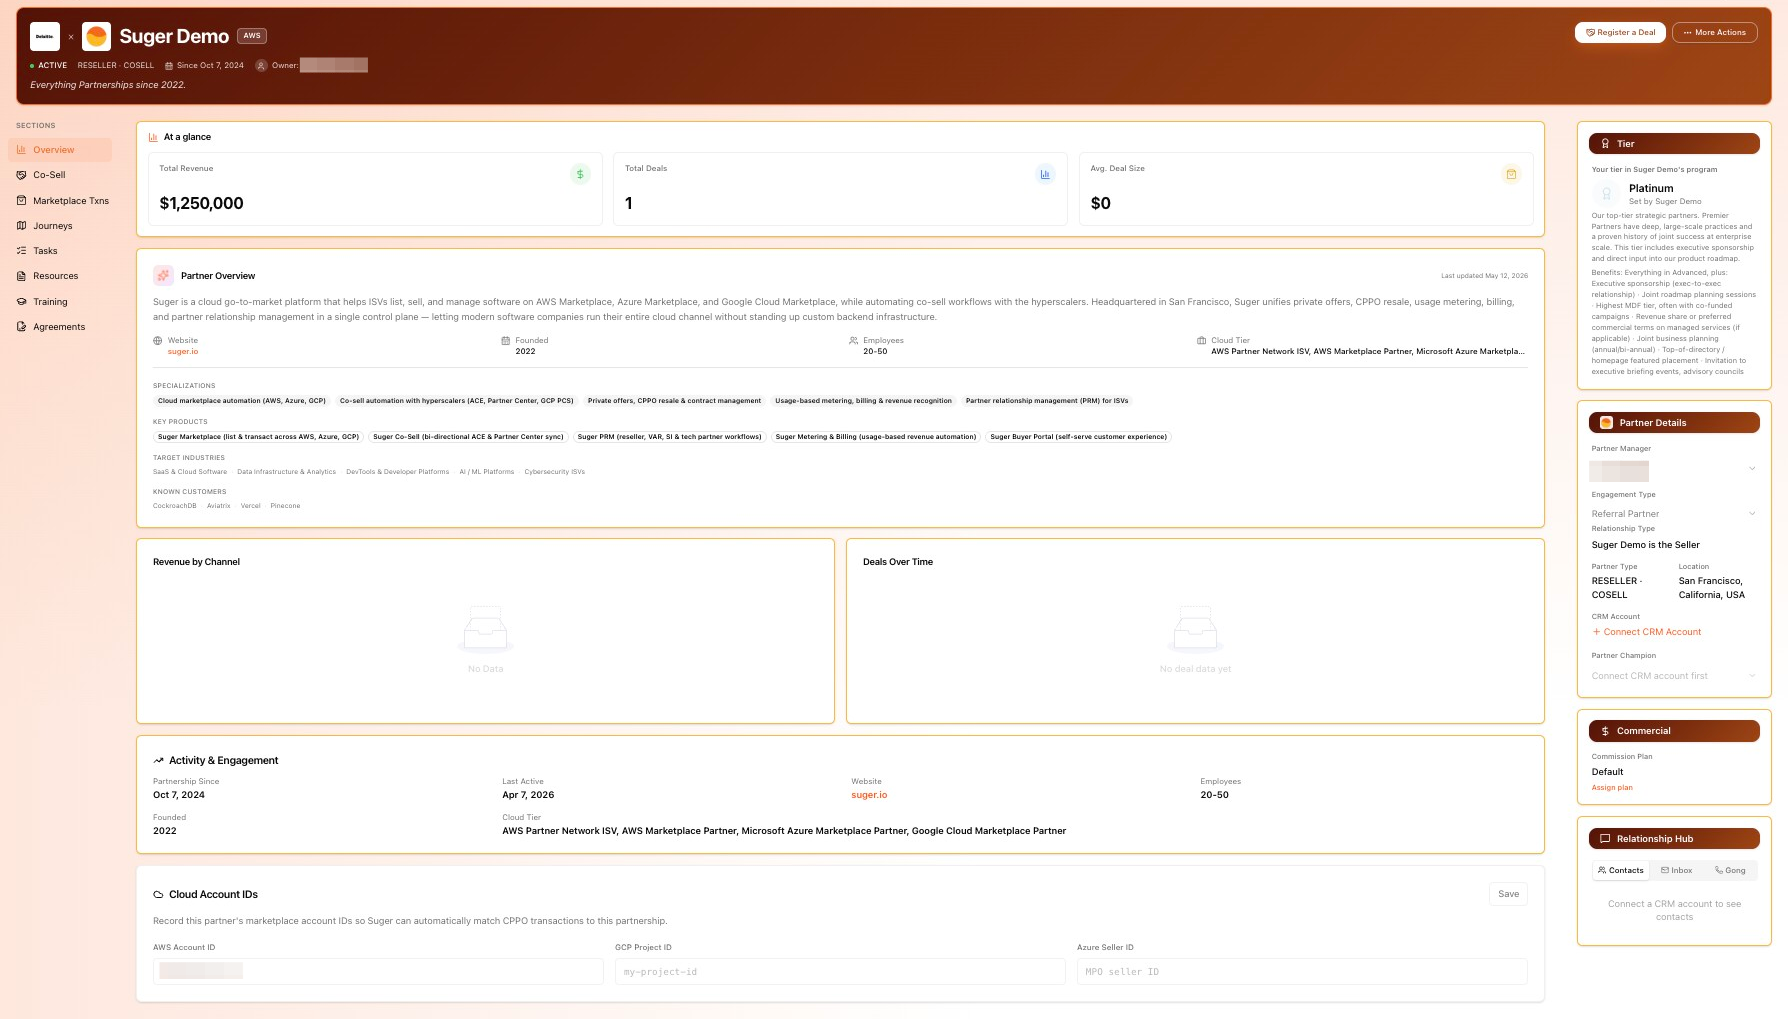
Complete Partnership Profile
Set up the profile partners see when they view your company in Suger — your identity, relationship type, capabilities, portal URL, and access settings.
Overview
Your Partnership Profile is what partners see when they view your company inside Suger. It also stores the information used for your partnership capabilities and company identity, so it’s one of the first things you should complete before inviting partners.
Step 1: Access your Partnership Profile settings
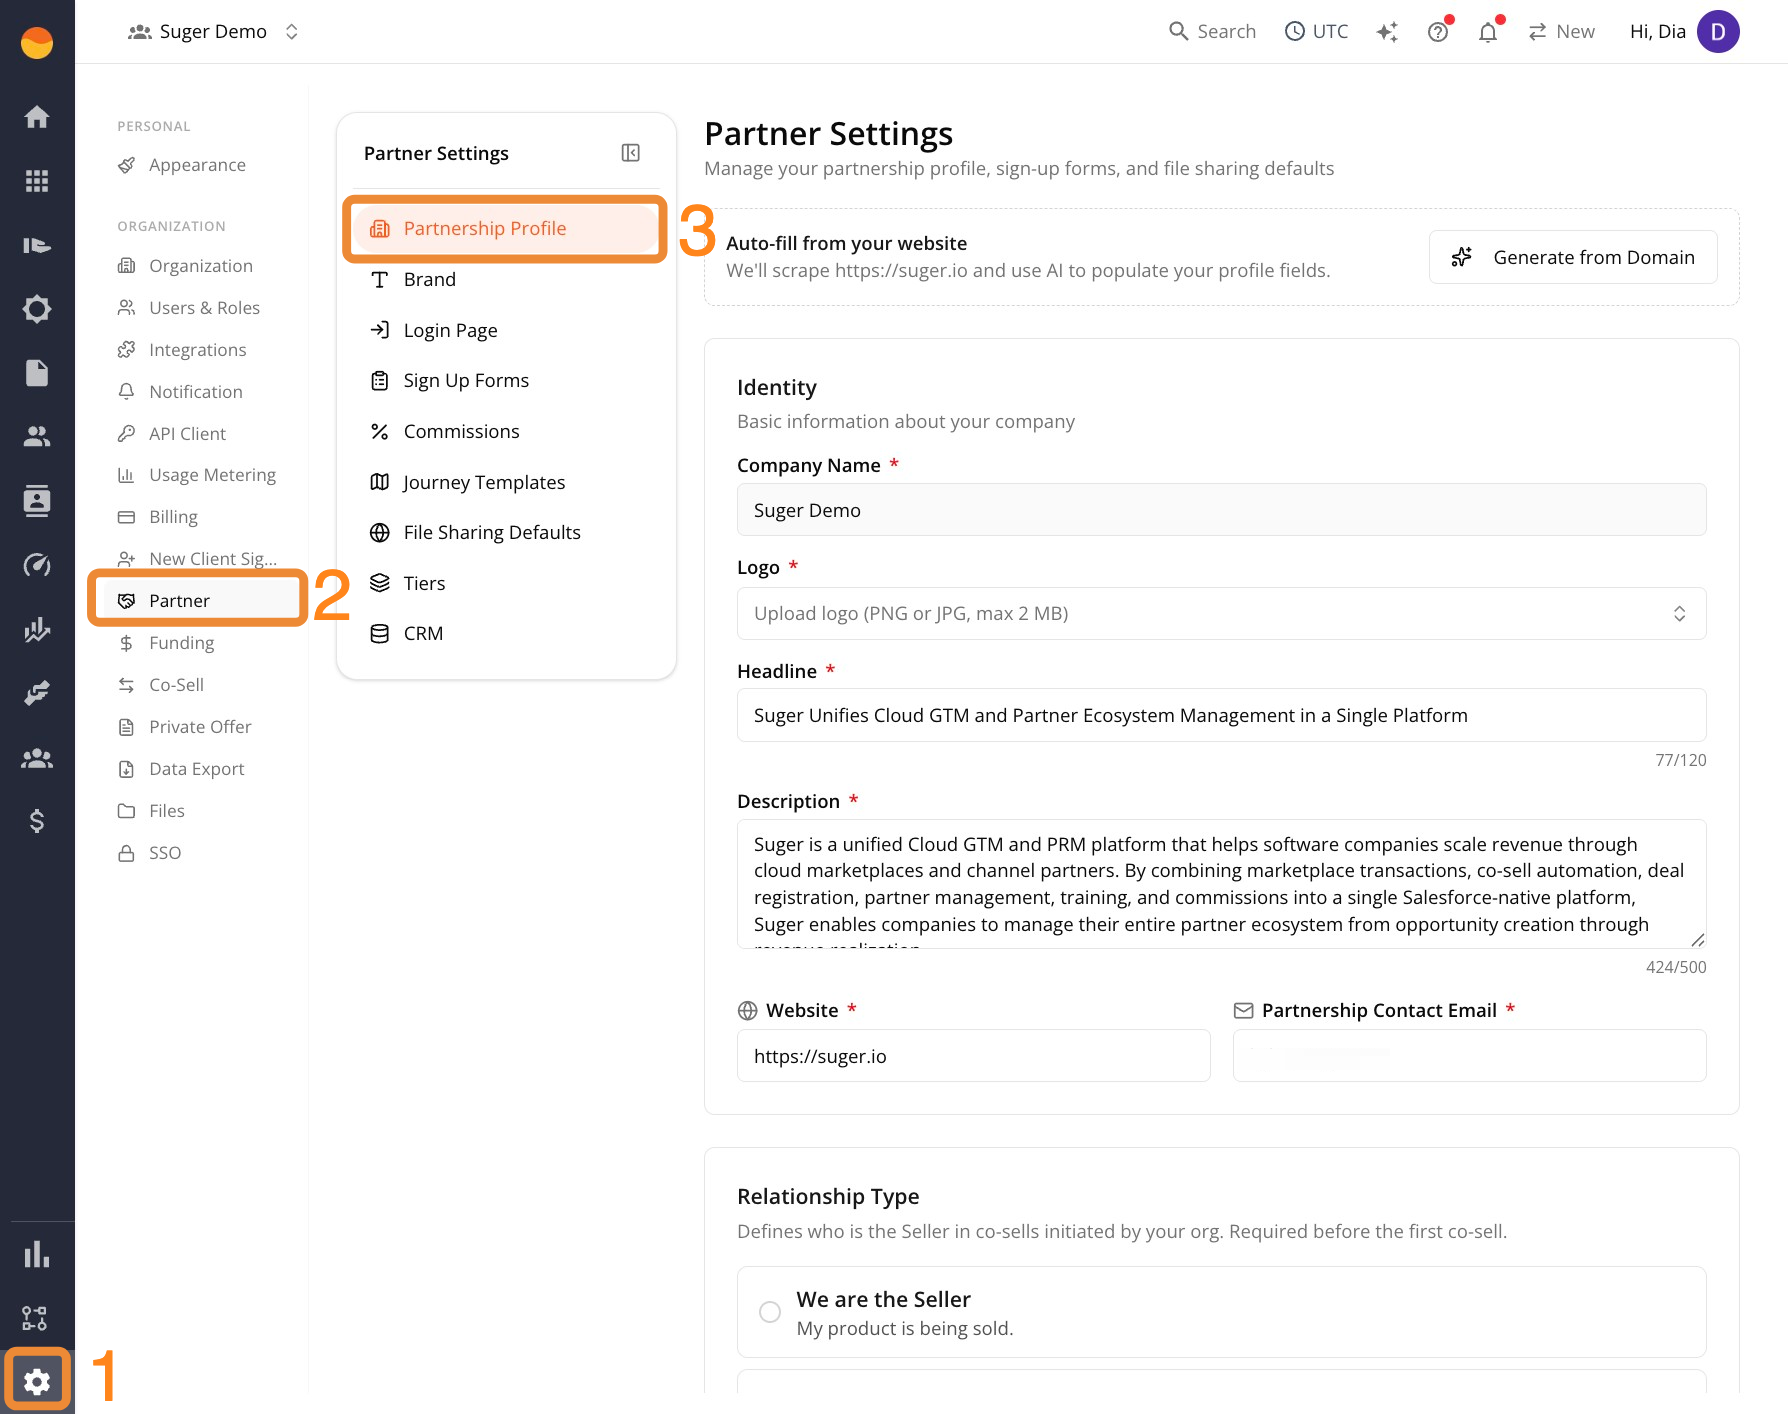
- Go to Suger Console, then Settings.
- Click Partner, then Partnership Profile.
Step 2: Fill in your company identity
Auto-fill from your website
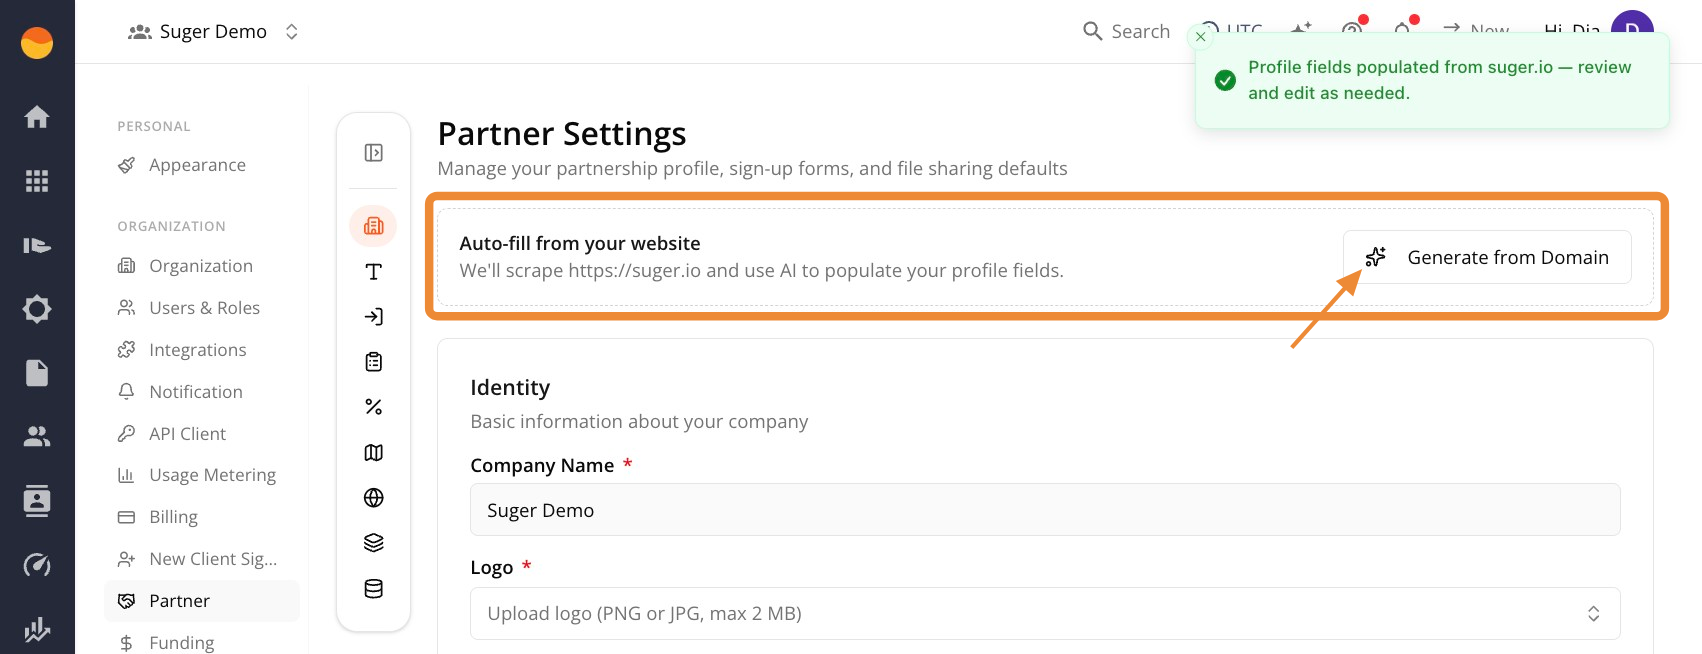
Before filling out your profile manually, you can have Suger generate a first draft from your company website.
At the top of the page, click Generate from Domain. Suger uses AI to generate your profile content based on information from your website.
Review the generated content carefully before saving. It’s intended as a starting point and may need edits to accurately reflect your company.
Identity
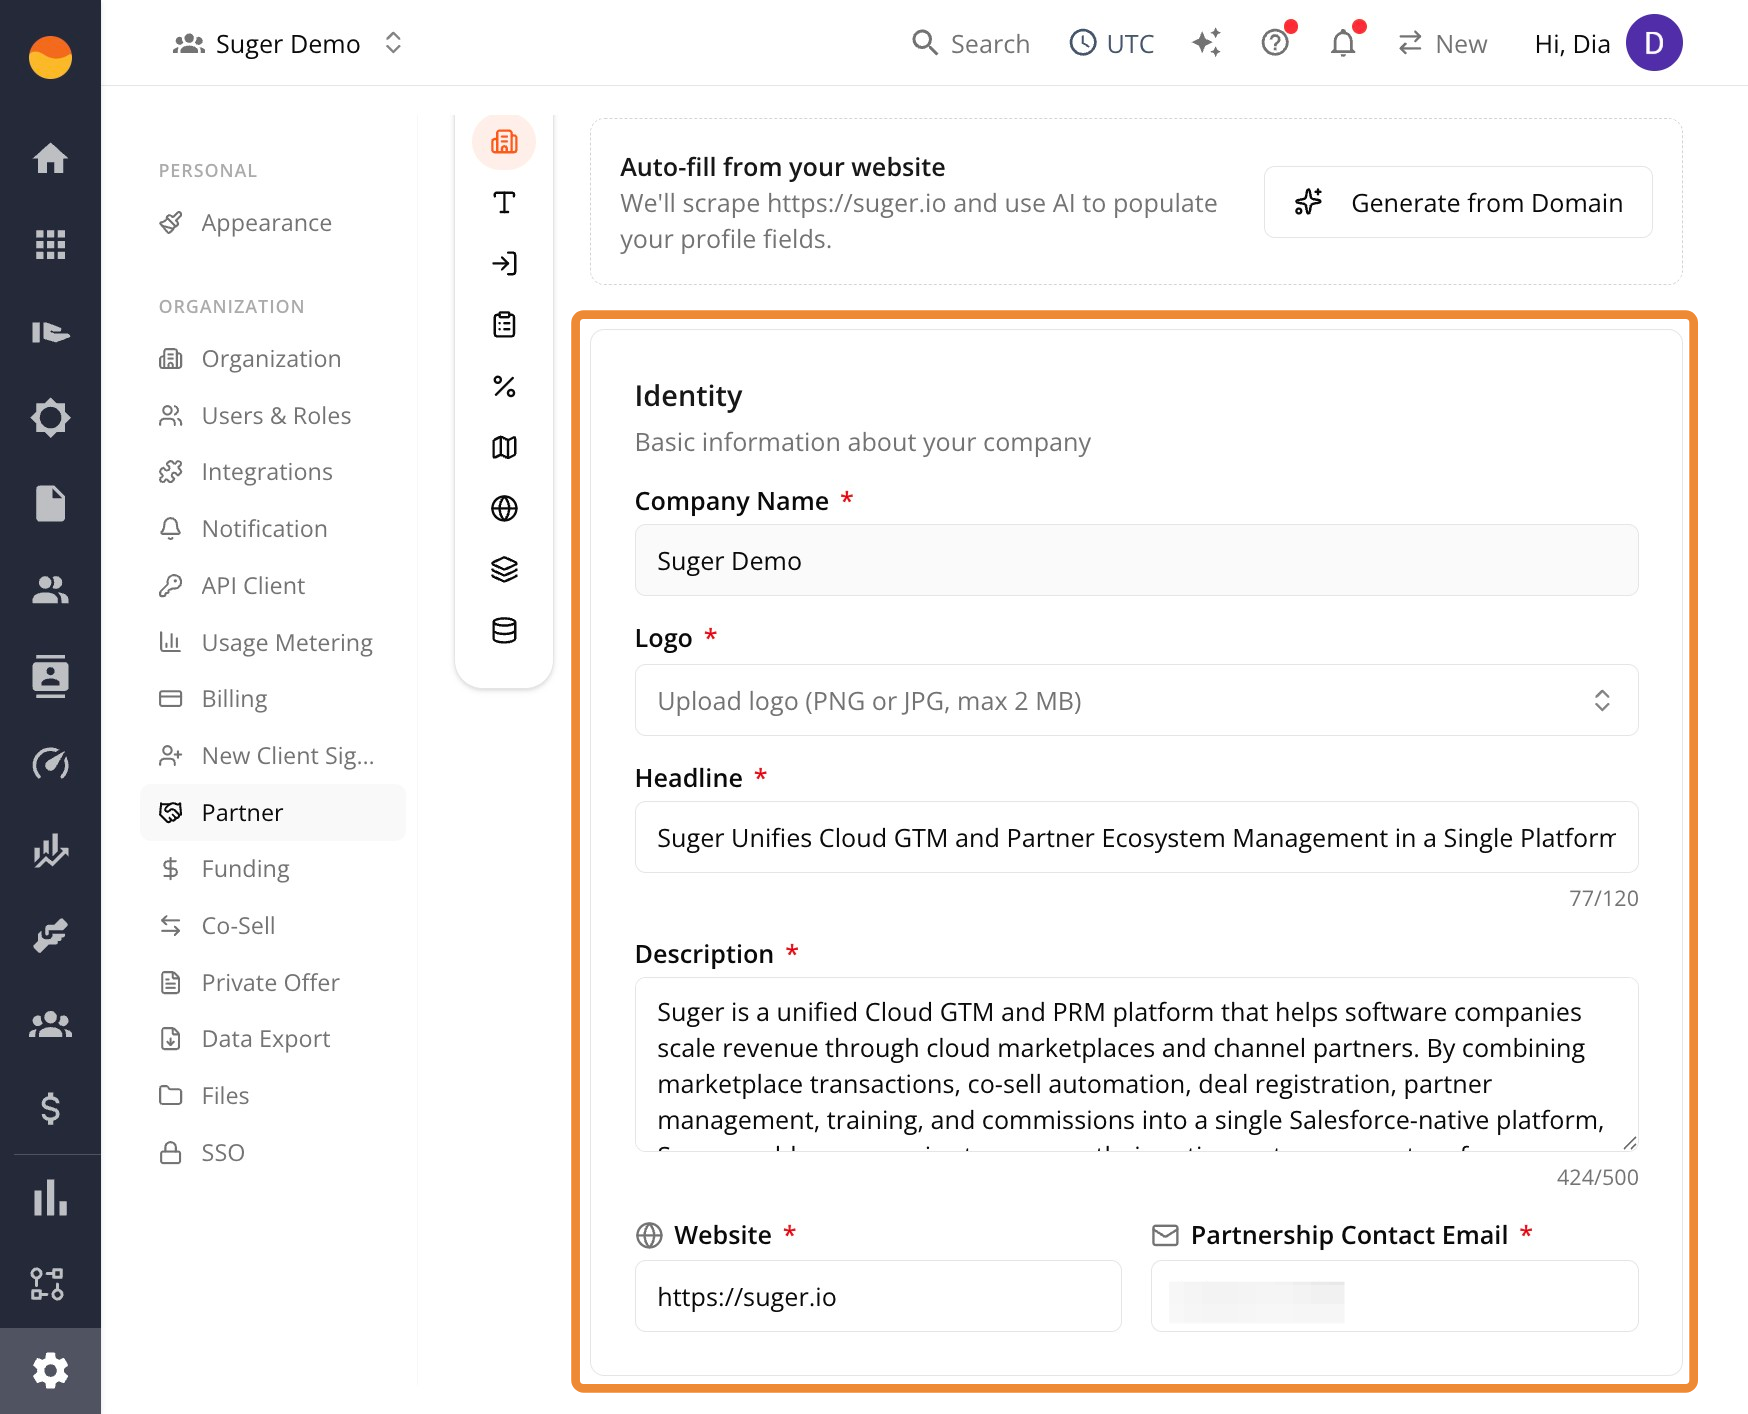
The Identity section covers the basic details partners will see about your company. Work through each field in order:
- Company Name — Your official company name as you want it displayed to partners.
- Logo — Upload your company logo. PNG or JPG only, 2 MB max.
- Headline — A short, one-line summary of what your company does (120 characters max). Think of this as your tagline — it’s the first thing a partner reads about you.
- Description — A fuller explanation of your business: what you do, who you serve, and why it matters to a partner (500 characters max). Both Headline and Description show a live character counter, so you’ll see exactly how much room you have left as you type.
- Website — Your company’s main website URL.
- Partnership Contact Email — The email address partner inquiries should go to. Use an inbox your team actually monitors, not a personal address, since this is what partners will use to reach you.
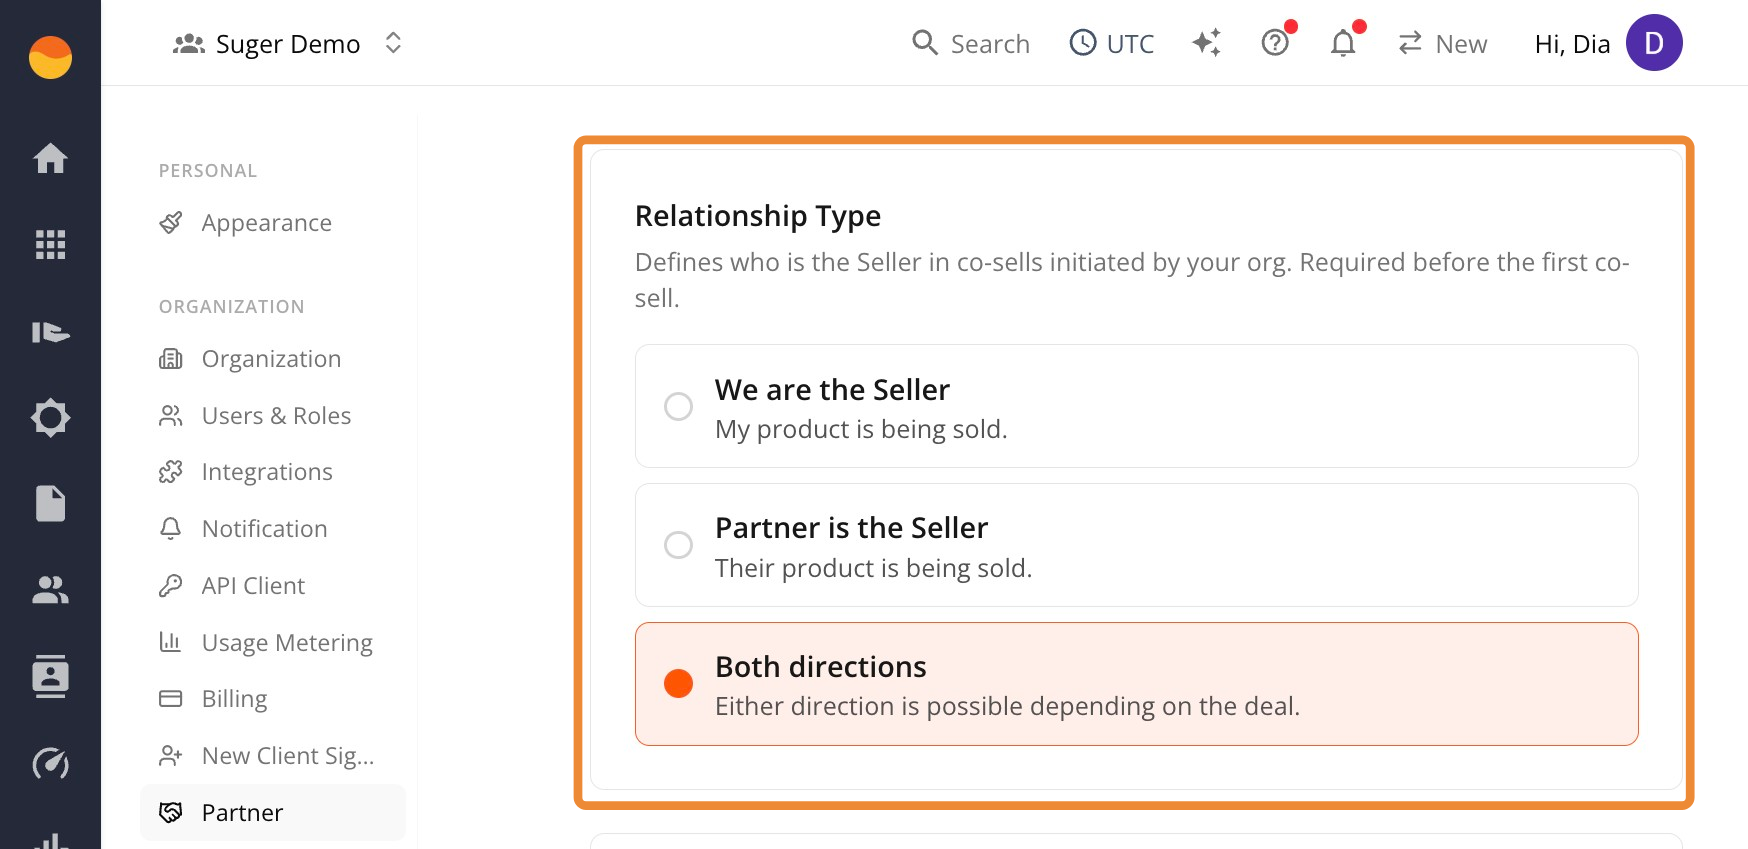
Step 3: Set your Relationship Type
Choose how your company participates in co-sells:
- We are the Seller — if your product is what’s typically being sold in a deal.
- Partner is the Seller — if you’re usually the one referring or supporting someone else’s sale.
- Both directions — if either can happen depending on the deal.
This is required before your first co-sell, and it determines what the next section is called and which capabilities you’ll see in it.
Step 4: Choose your capabilities
The section below Relationship Type changes based on what you picked.
If you selected “We are the Seller”
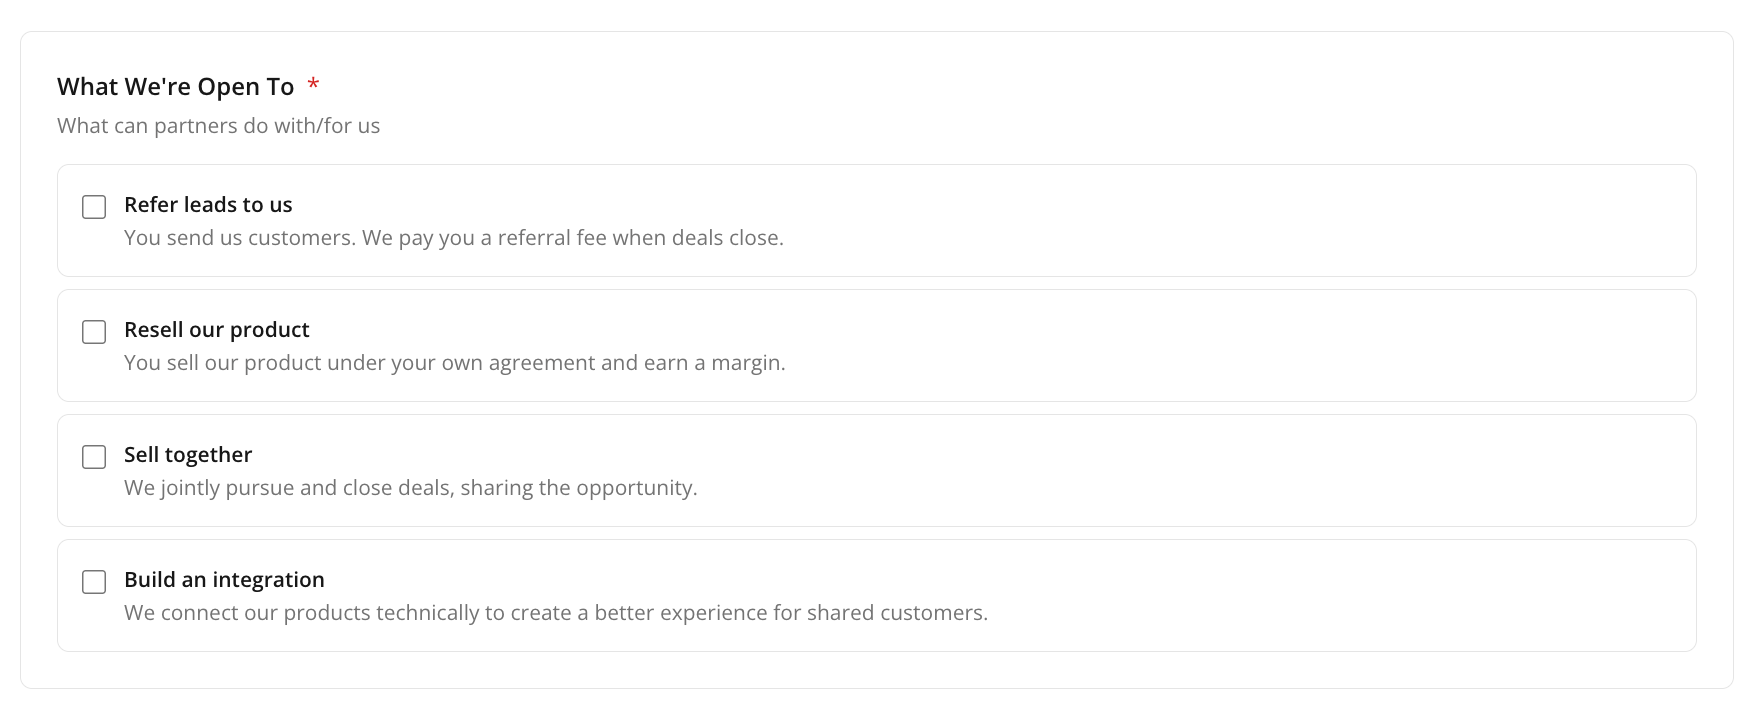
You’ll see a section called What We’re Open To (“What can partners do with/for us”). Check off any that apply:
-
Refer leads to us — Partners send you customers, and you pay them a referral fee when deals close.
In practice: this is the lowest-commitment option. There’s no resale agreement involved — just a lead-passing relationship with a payout tied to it.
-
Resell our product — Partners sell your product under their own agreement and earn a margin.
In practice: this needs a formal resale agreement in place (a Resale Authorization, or CPPO_OUT, when you’re issuing it — for example, AWS’s Reseller Contract for AWS Marketplace). You won’t see the partner’s final markup or end-customer price; that stays private to them.
-
Sell together — You jointly pursue and close deals, sharing the opportunity.
In practice: this is a co-sell relationship. Deals get registered and tracked jointly, and both sides typically have visibility into where the deal stands.
-
Build an integration — You connect your products technically to create a better experience for shared customers.
In practice: this is a product or engineering commitment, not just a go-to-market one, so it usually involves more than your partnerships team alone.
If you selected “Partner is the Seller”
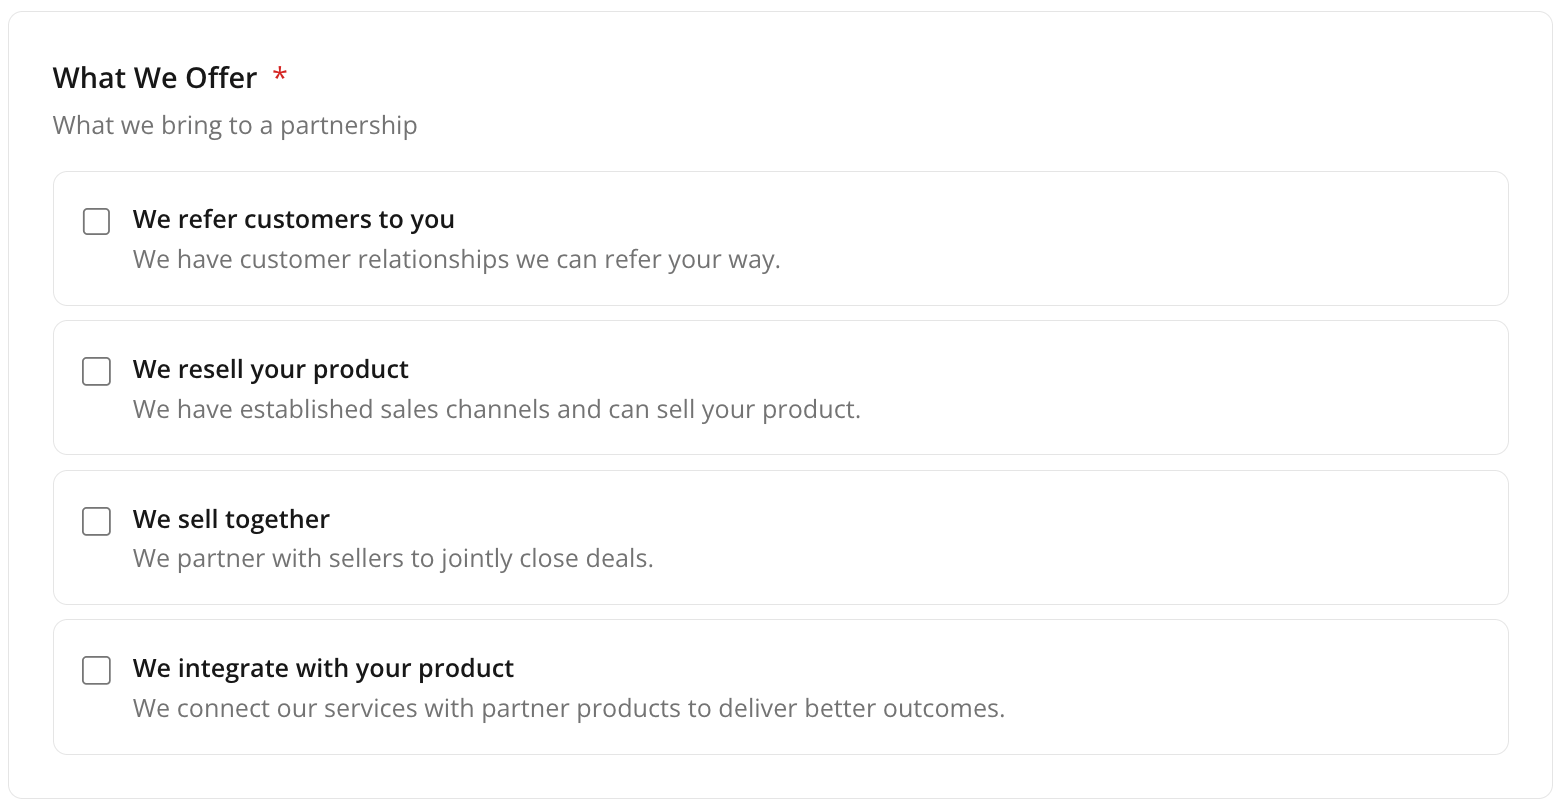
You’ll see a section called What We Offer (“What we bring to a partnership”). Check off any that apply:
-
We refer customers to you — You have customer relationships you can refer their way.
In practice: the mirror of “Refer leads to us” — you’re the one sending business, and the payout structure runs the other direction.
-
We resell your product — You have sales channels and can sell their product.
In practice: this puts you on the hook for a resale agreement (the marketplace calls this a Resale Authorization, or CPPO_IN, when you’re receiving it). You control the final markup and price to the end customer; the ISV won’t see those numbers.
-
We sell together — You partner with sellers to jointly close deals.
In practice: same co-sell tracking as above, just with you playing the reseller or partner role instead of the seller.
-
We integrate with your product — You connect your services with their product to deliver better outcomes.
In practice: another technical commitment — worth confirming your product team is aligned before you check this box.
If you selected “Both directions”
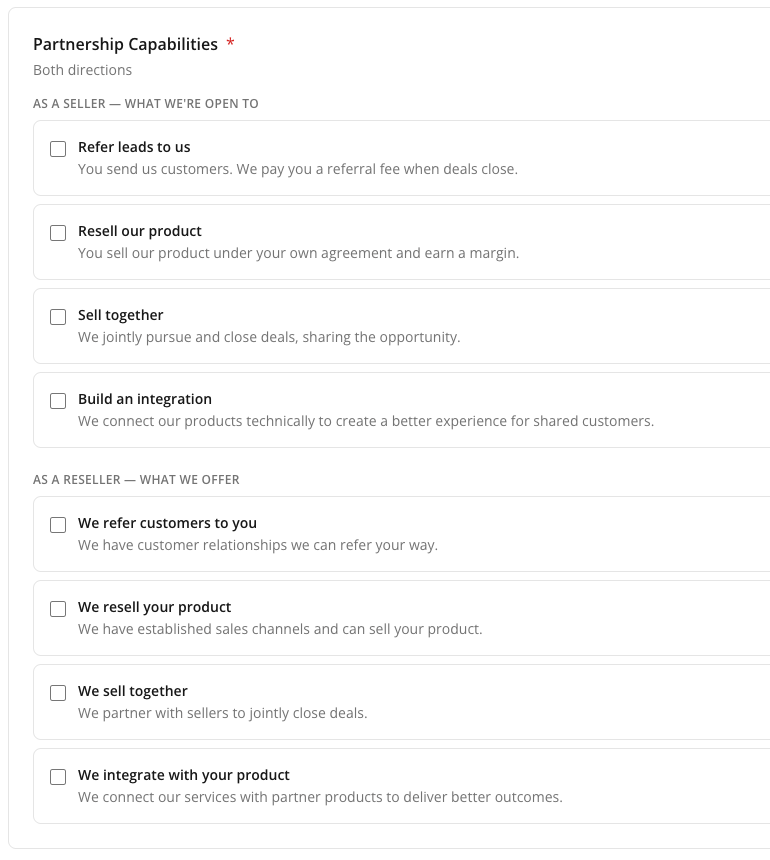
You’ll see a section called Partnership Capabilities, showing both the “What We’re Open To” and “What We Offer” options together, since either side could apply depending on the deal. Both sets of checkboxes appear on the same screen — see the two lists above.
Check off only the capabilities that reflect real, current arrangements you’re willing to support. These selections shape what partners understand is possible when they engage with you, so leave unchecked anything you’re not ready to do yet.
Step 5: Set your Partner Portal URL
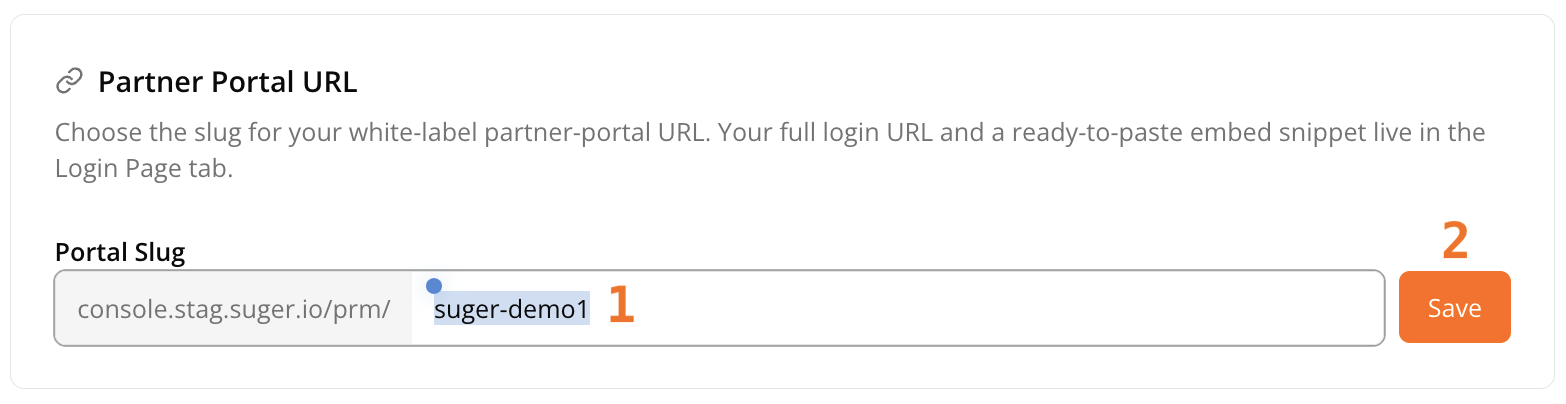
This is where you choose the web address partners will use to log in to your branded portal.
- Enter the unique part of your portal URL that comes after the Portal Slug. This is typically your company name (for example,
acme-partners). - Click Save to lock in the slug.
Step 6: Decide your Partnership Access
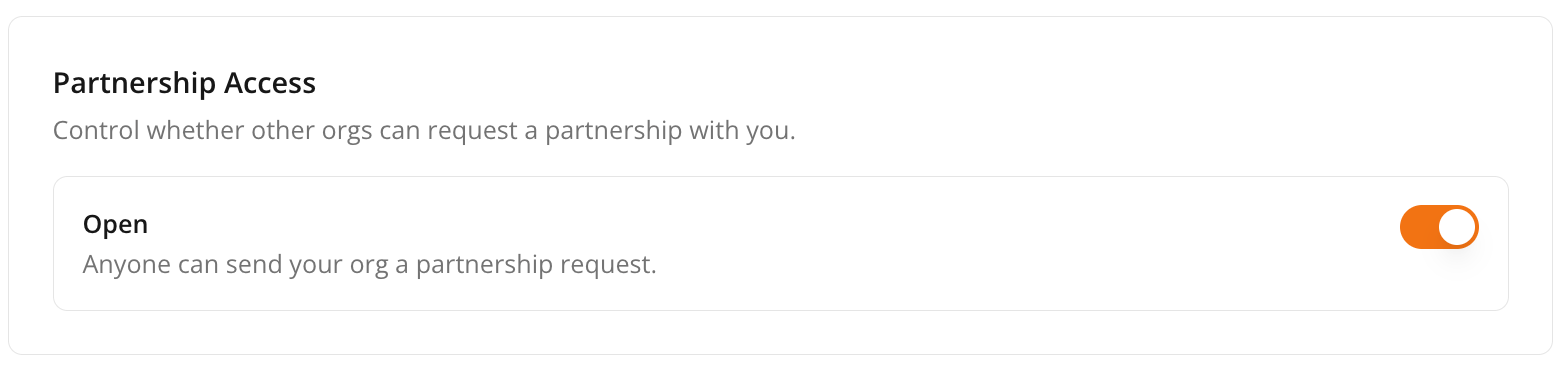
Under Partnership Access, use the toggle to choose how organizations can connect with you:
- Open (toggle on): Anyone can send your organization a partnership request.
- Invite Only (toggle off): Only organizations you invite can establish a partnership.
Step 7: Save your profile
Once every section above is filled in, click Save Profile at the bottom of the page. Nothing here is permanent — you can return and update your identity, capabilities, portal slug, or access setting at any time as your partner program evolves.
What partners see
Once saved, your Company Name, Website, and Description appear on your profile when a partner views their relationship with you.
Partners will also see additional details on this same page, like your tier in their program and company specializations, but those come from other Suger settings, not from Partnership Profile.