
Account
Manage user, organization & RBAC in Suger Console.
Signup & Login
- Suger use Auth0 as the authentication & authorization provider. Both
Sign inandSign upshare the same entry https://console.suger.io/login.
Standard Login (Email and Password)
Follow these steps if you have a registered Suger account with an email and password.
-
Email Address: Enter the email address associated with your Suger Console account.
-
Password: Type your password.
-
Complete Login: Once both fields are filled, click the “Continue” button to proceed to your account dashboard.
Alternative Login Options
Suger supports sso with Google, Microsoft and OKTA (available upon request). If you need sso with other identity providers like OKTA, please contact us at support@suger.io.
-
Continue with Google: Click the “Continue with Google” button to sign in instantly using your existing Google account credentials.
-
Continue with Microsoft: Click the “Continue with Microsoft” button to sign in using your existing Microsoft account credentials.
Creating a New Account
If you are a new user and do not yet have an account:
-
On the login form, look for the text “Don’t have an account?”
-
Click the Sign up button
-
Choose how you’d like to register — enter an email and password, or continue with Google, Microsoft, or Okta.
-
Follow the on-screen prompts to name and create your organization.
This will direct you to the registration page where you can create your new account credentials.
Password Management and Security
If you cannot remember your password:
-
Click the “Forgot password?” link located above the Continue button.
-
Follow the on-screen prompts to initiate the password reset process.
Multi-Factor Authentication (MFA)
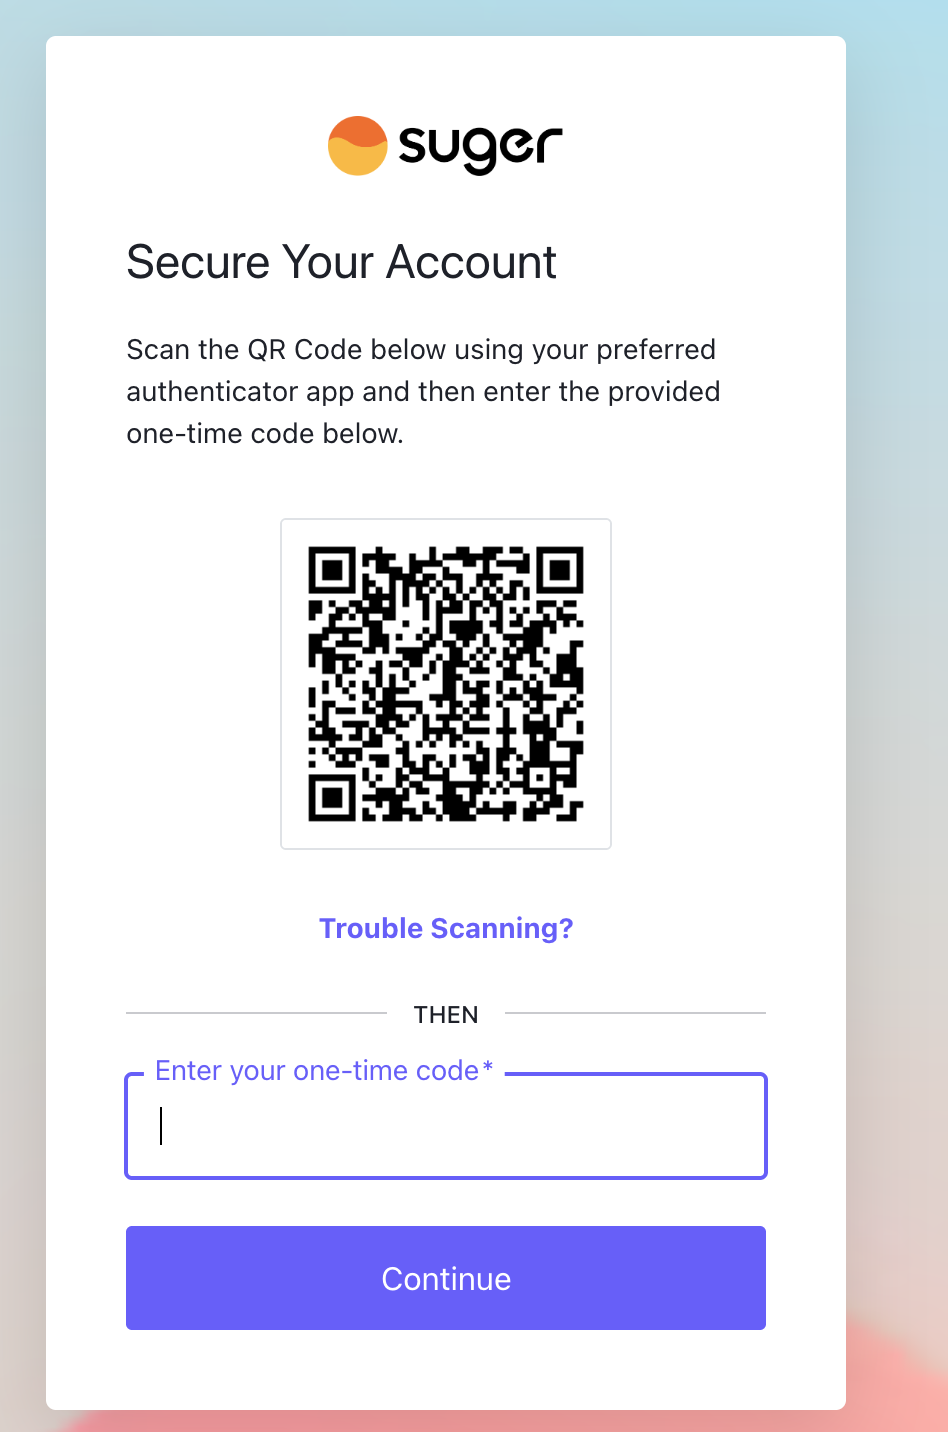
Suger supports Multi-Factor Authentication (MFA) for an additional layer of account security. When MFA is enabled, the “Secure Your Account” screen prompts you to register an authenticator during login.
Before you start, make sure your device’s clock is set to automatic date & time (e.g. Settings → Date & Time → Set Automatically on iOS, Settings → System → Date & time → Automatic date & time on Android). Your authenticator’s codes are generated from the current time, so a device with an incorrect or manually-set clock will generate codes that don’t match what Suger expects, and verification will keep failing even when you’ve entered the code correctly.
-
Open an authenticator app (for example, Microsoft Authenticator or Google Authenticator), or a password manager with a built-in one-time-password feature such as 1Password.
-
In your authenticator, add a new account and scan the QR code shown on the Suger screen.
-
Enter the 6-digit code generated by your authenticator in the “Enter your one-time code” field, then click Continue.
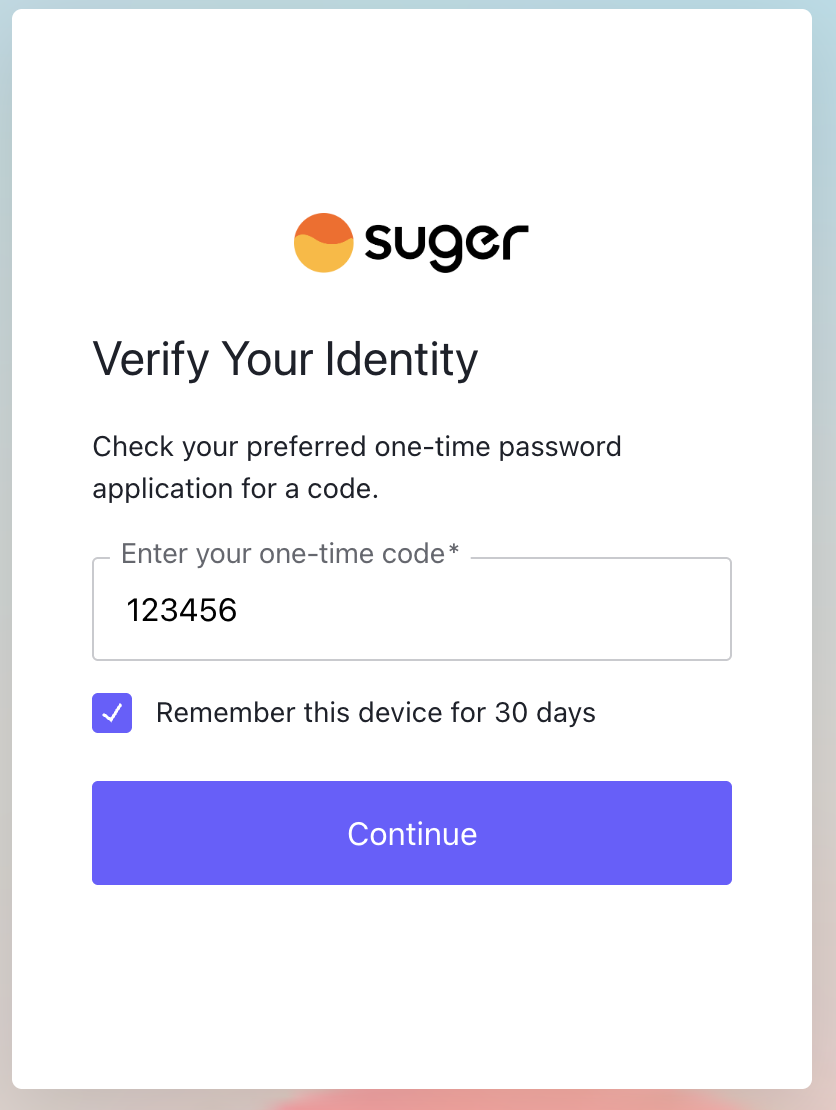
On later logins, the “Verify Your Identity” screen asks for the current 6-digit code from your authenticator. You can select “Remember this device for 30 days” to skip the one-time code on that device on future sign-ins — within the limits described below.
Organization
-
All Suger resources are organized & managed under organization. Each user must belong to at least one organization.
-
When you sign up for Suger for the first time, you will be prompted to create a new organization. However, please note that your organization will require approval from Suger in order to become active. To initiate the approval process for your newly created organization, please get in touch with Suger Support.
-
The user who creates the organization has the
ADMINrole as default. It is allowed to add new users, edit user role or delete the users. There are 3 predefined standard roles:ADMIN,EDITOR&VIEWER. Their permission scope is defined below:User Role Recommended for RBAC Permissions ADMINBusiness Technology, Sales Ops, IT/CRM Admins Full access, including management of users, organizations, API Client & Webhook. EDITORSales, Partnerships, Alliances, Deal Desk Full access, but excluding the access to management of users, organizations, API Client & Webhook. VIEWERFinance, Accounting, Executives Can only access Suger services with readaccess, no permission tocreate/edit/deleteany resources. Exception: Partner Management grants Viewers no access at all, not even read — see Who can use Partner Management
Invite Your Team
Once your organization is active, an Admin can add teammates. Inviting a user pre-approves their email for the Suger Console — it does not create an account. The invitee still has to sign up themselves to activate access.
Invite a New Team Member
- Go to Settings > Users.
- Click the Add User (or Invite User) button at the top right.
- Enter the user’s professional email address, then select a permission level from the dropdown — Admin, Editor, or Viewer (or a custom role).
- Click Save. Suger generates a secure invitation link and emails it to the user.
Manage Users
- Monitor status: Check the Status column in the user table to see whether an invite is still Pending or the user is Active.
- Update roles: Click the Edit icon next to a user, then select a new role from the dropdown.
- Revoke access: Click the Delete (or Revoke) icon next to a user to remove their access to the organization immediately.
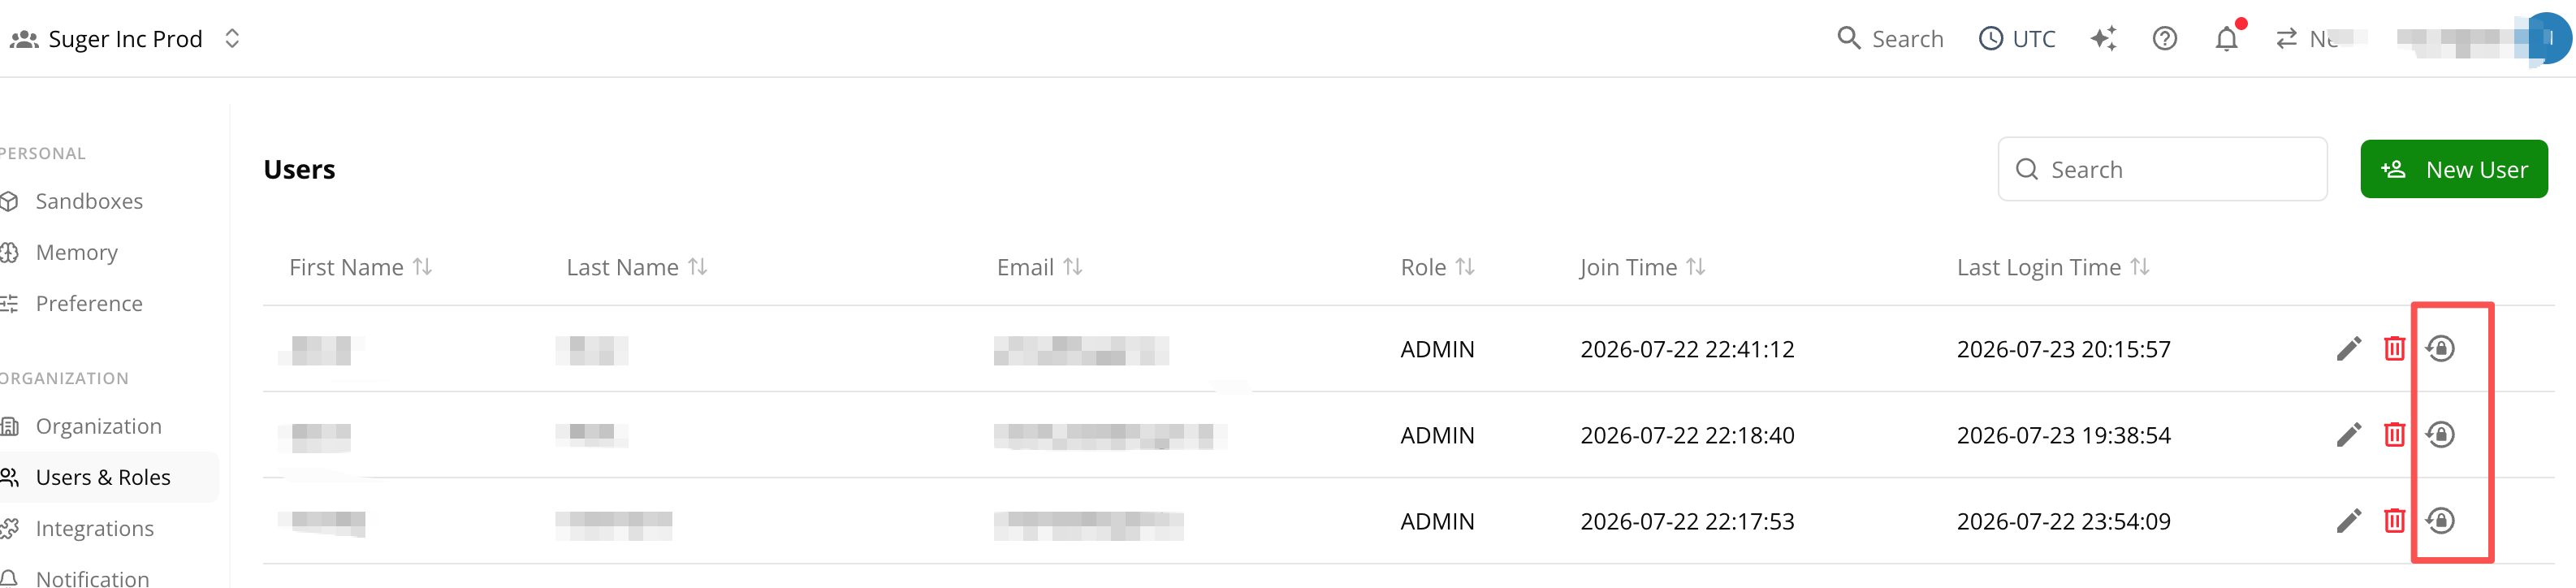
- Reset MFA: If a member is locked out of their authenticator, click the Reset MFA icon next to them to clear their registered factors so they can enroll a new one. See Reset a Member’s MFA.
Reset a Member’s MFA
If a teammate loses their phone, switches devices, or is otherwise locked out of their authenticator, an Admin can reset that member’s MFA so they can enroll a new one — no need to contact Suger Support.
- Go to Settings > Users.
- Find the member in the user table and click the Reset MFA icon in their row.
- Confirm the action in the dialog that appears.
What happens next:
- The member’s registered MFA factors (authenticator-app codes and passkeys) are cleared.
- On their next login, the “Secure Your Account” screen prompts them to register a new authenticator — the same as first-time MFA setup.
Complete the Onboarding (For Invited Users)
Once invited, a new teammate follows these steps to activate their account:
- Open the invitation email: Check your inbox for an email from Suger with the subject line “Hi [Your Name], you have been invited to Suger”, then click the Create your account button.
- Establish credentials: The button takes you straight to the Auth0 Sign Up form with your email address already filled in — you don’t need to switch over from the login form or retype your address.
- Standard signup: Set a secure password to create your account.
- If SSO is enabled: Use Continue with Google, Microsoft, or Okta/SSO to register with your company credentials instead of a password.
- Verify your email: After you set a password, a “Verify your email” dialog appears — “Your account is created. We sent a verification link to [your email address].” Open that link from your inbox to activate the account. Following the link brings you back to Suger and logs you in automatically; if you’d rather finish in the tab you already have open, click I’ve verified — continue there once you’ve opened the link.
- Access the console: After a successful login, you land on the Suger Dashboard with the access level your Admin assigned.
Custom Role with Granular Permissions
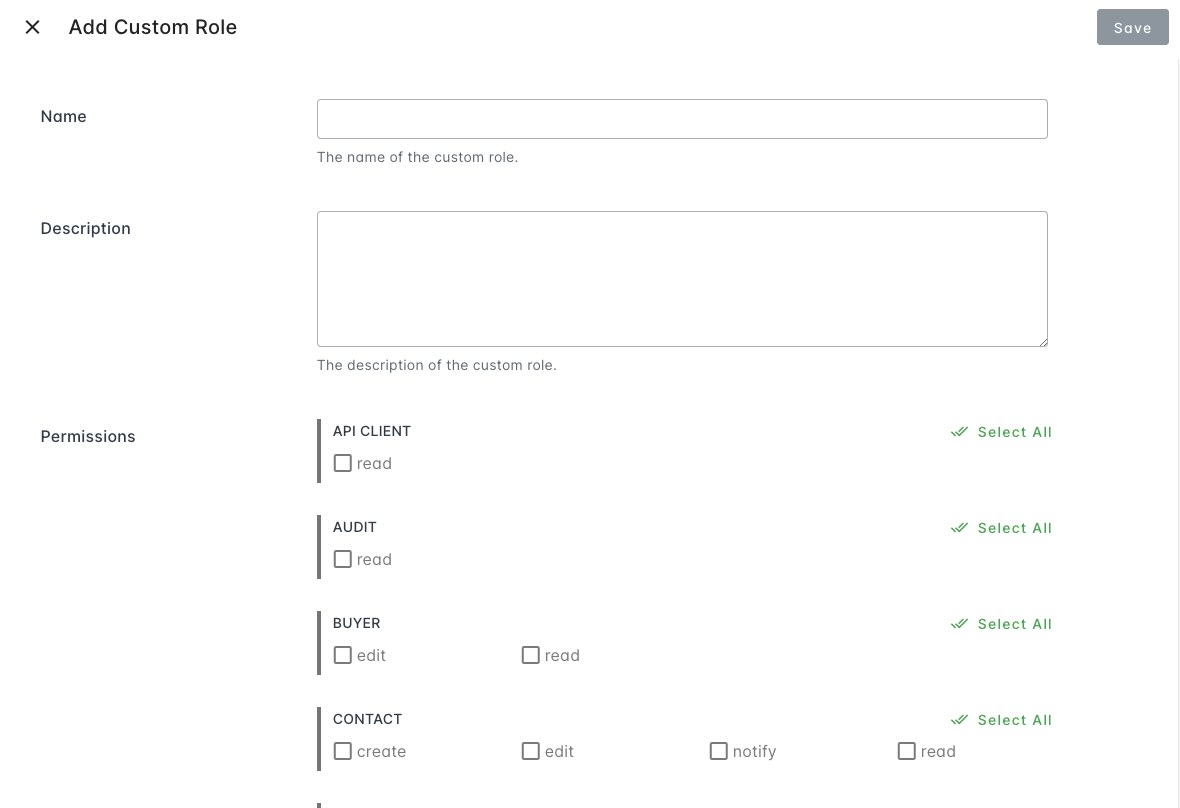
Custom roles offer precise control over permissions, allowing you to go beyond the limitations of predefined standard roles, which may be overly broad. This flexibility enables assigning specific permissions at a more granular level — you can toggle Read, Write, and Delete per console module (for example, Billing, Co-Sell, or Private Offers).
Create Custom Role
- Navigate to the settings page of your organization.
- Locate the
Rolessection under theOrganization & Userstab. - Click the
Add Custom Rolebutton. - Fill in the name and description fields.
- Set permissions according to your specific requirements.
Assign Custom Role to User
Once custom roles are created, you can apply them during the creation or modification of a user.
- Visit the settings page of your organization.
- Find the
Userssection under theOrganization & Userstab. - Add a new user by clicking the
Add Userbutton or edit an existing user by clicking the edit button in each user row. - Set the role field in the
Add User/Edit Userdialog to the desired custom role.
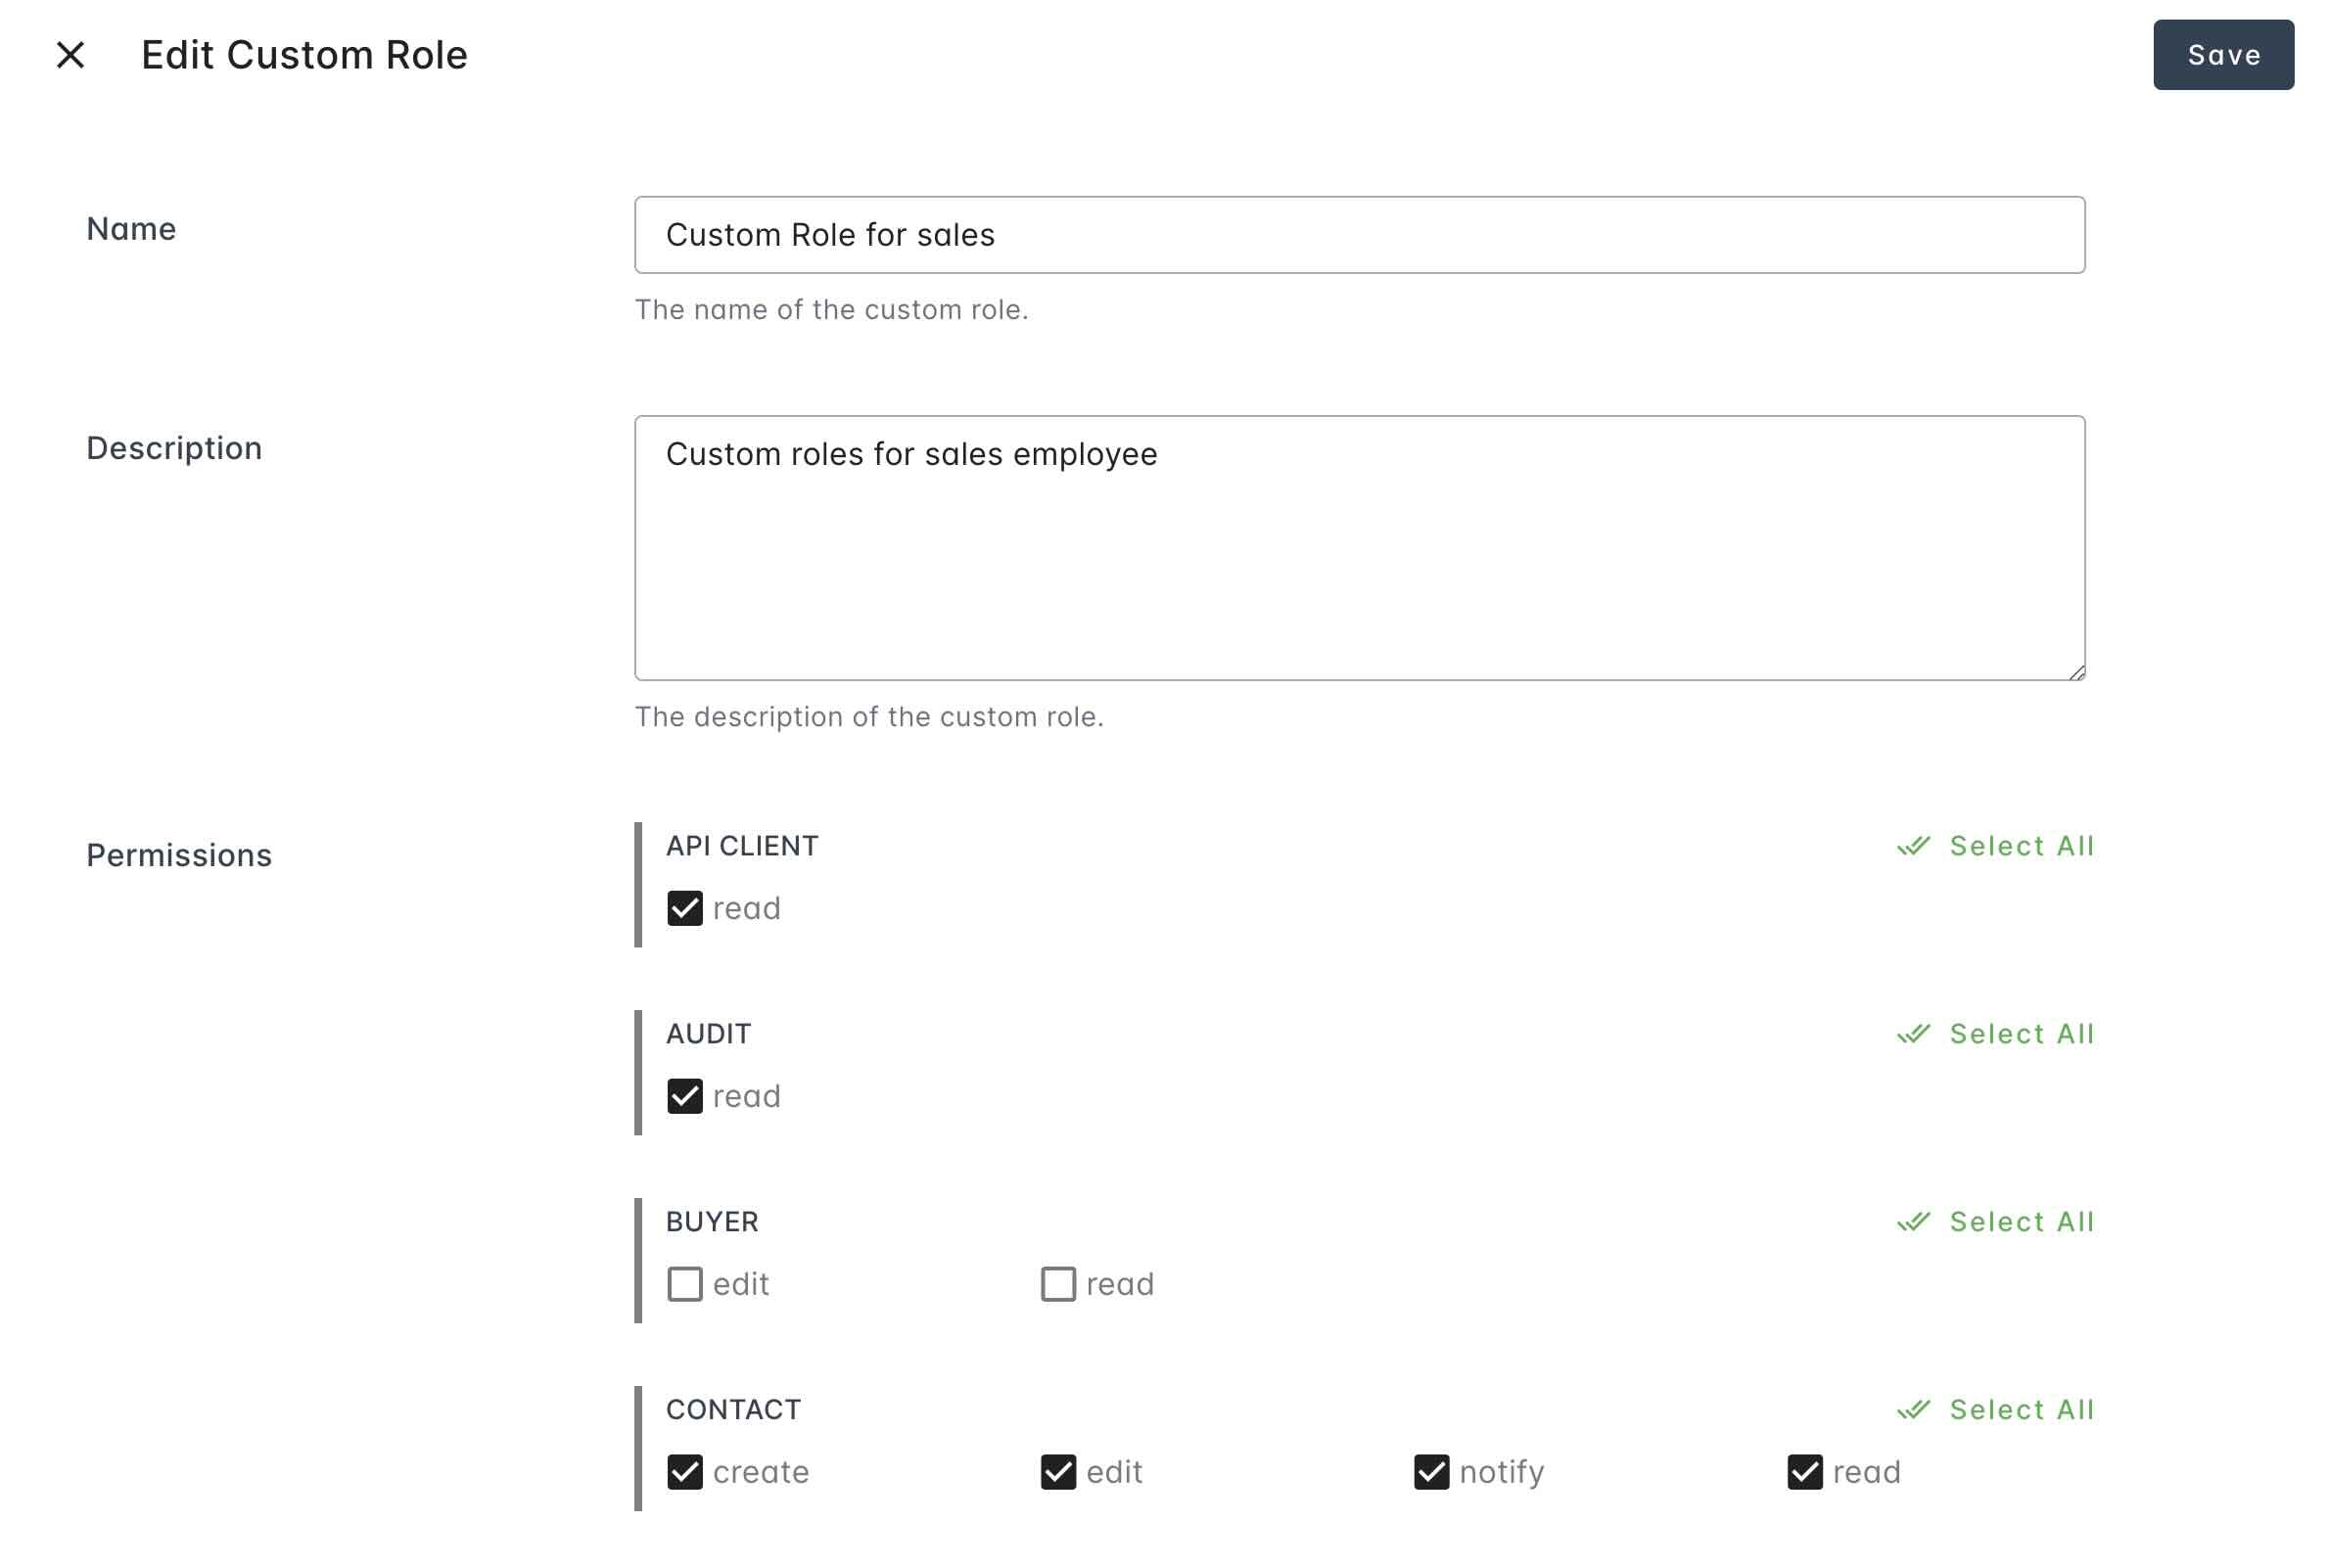
Edit Custom Role
-
Visit the settings page of your organization.
-
Locate the
Rolessection under theOrganization & Userstab. -
Click the edit button in each custom role row.
-
Modify the name, description, and permissions as needed. Once saved, the updated permission set applies to every user currently assigned to that role.
Use Okta as Identity Provider
Suger supports Okta as an identity provider, allowing centralized user authentication and access management through your Okta account.
Refer to Okta SSO for more details.
Troubleshooting
| Issue | Possible cause | Resolution |
|---|---|---|
| QR code won’t scan when setting up MFA | Common with Microsoft Authenticator specifically | Click Trouble Scanning? on the Suger screen to reveal the setup key. In your authenticator, choose Add account → Other account → Enter code manually, then type in the setup key. Scanning the QR code and entering the setup key register the exact same token. |
| MFA code is rejected even though you entered it correctly | Device clock isn’t set to automatic date & time, so the authenticator generates a code for the wrong moment in time | Turn on automatic date & time in your device’s settings, then wait for a new code to generate before retrying. |
| Invite doesn’t reach the intended person | Email address doesn’t share the organization’s domain | Confirm the invitee’s email matches your org’s domain. Suger only allows invites within the same domain. |
Frequently Asked Questions
Q: Does inviting someone create their Suger account? A: No. It only pre-approves their email for signup. They must complete registration themselves.
Q: Can I invite someone with a personal or different-company email? A: No — invites are restricted to users sharing your organization’s email domain.
Q: What’s the difference between a standard role and a custom role? A: Standard roles (Admin, Editor, Viewer) are fixed. Custom roles let you toggle Read/Write/Delete permissions per module for more granular control.
Q: Do I have to enter my MFA code every time I log in? A: No — select “Remember this device for 30 days” on the Verify Your Identity screen to skip MFA on that device for 30 days.
Q: A teammate lost the phone with their authenticator — how do they get back in? A: An Admin can reset that member’s MFA from Settings > Users. On the member’s next login, they’ll be prompted to set up a new authenticator. See Reset a Member’s MFA.
Spotted something wrong or out of date on this page? Tell us and we'll correct it.