
Quick Guide
Install the Suger Chrome Extension, sign in, and start working with Suger on the pages you already visit every day.
What is the Suger Chrome Extension
The Suger Chrome Extension opens Suger inside Chrome’s side panel, so you can work with Suger without leaving the page you are on.
It is built for people who spend their day moving between cloud marketplaces, a CRM, and the Suger Console — for example:
- A partner or co-sell manager sending a referral from a Salesforce opportunity.
- An account executive reviewing an AWS, Azure, or Google Cloud offer before a customer call.
- A revenue ops lead reconciling a HubSpot deal with a marketplace agreement.
- A marketplace operator checking an offer, entitlement, or co-sell referral during triage.
Instead of opening multiple Suger tabs, you ask Suger from the side panel — and the answer is already tied to the page in front of you.
Install the Extension
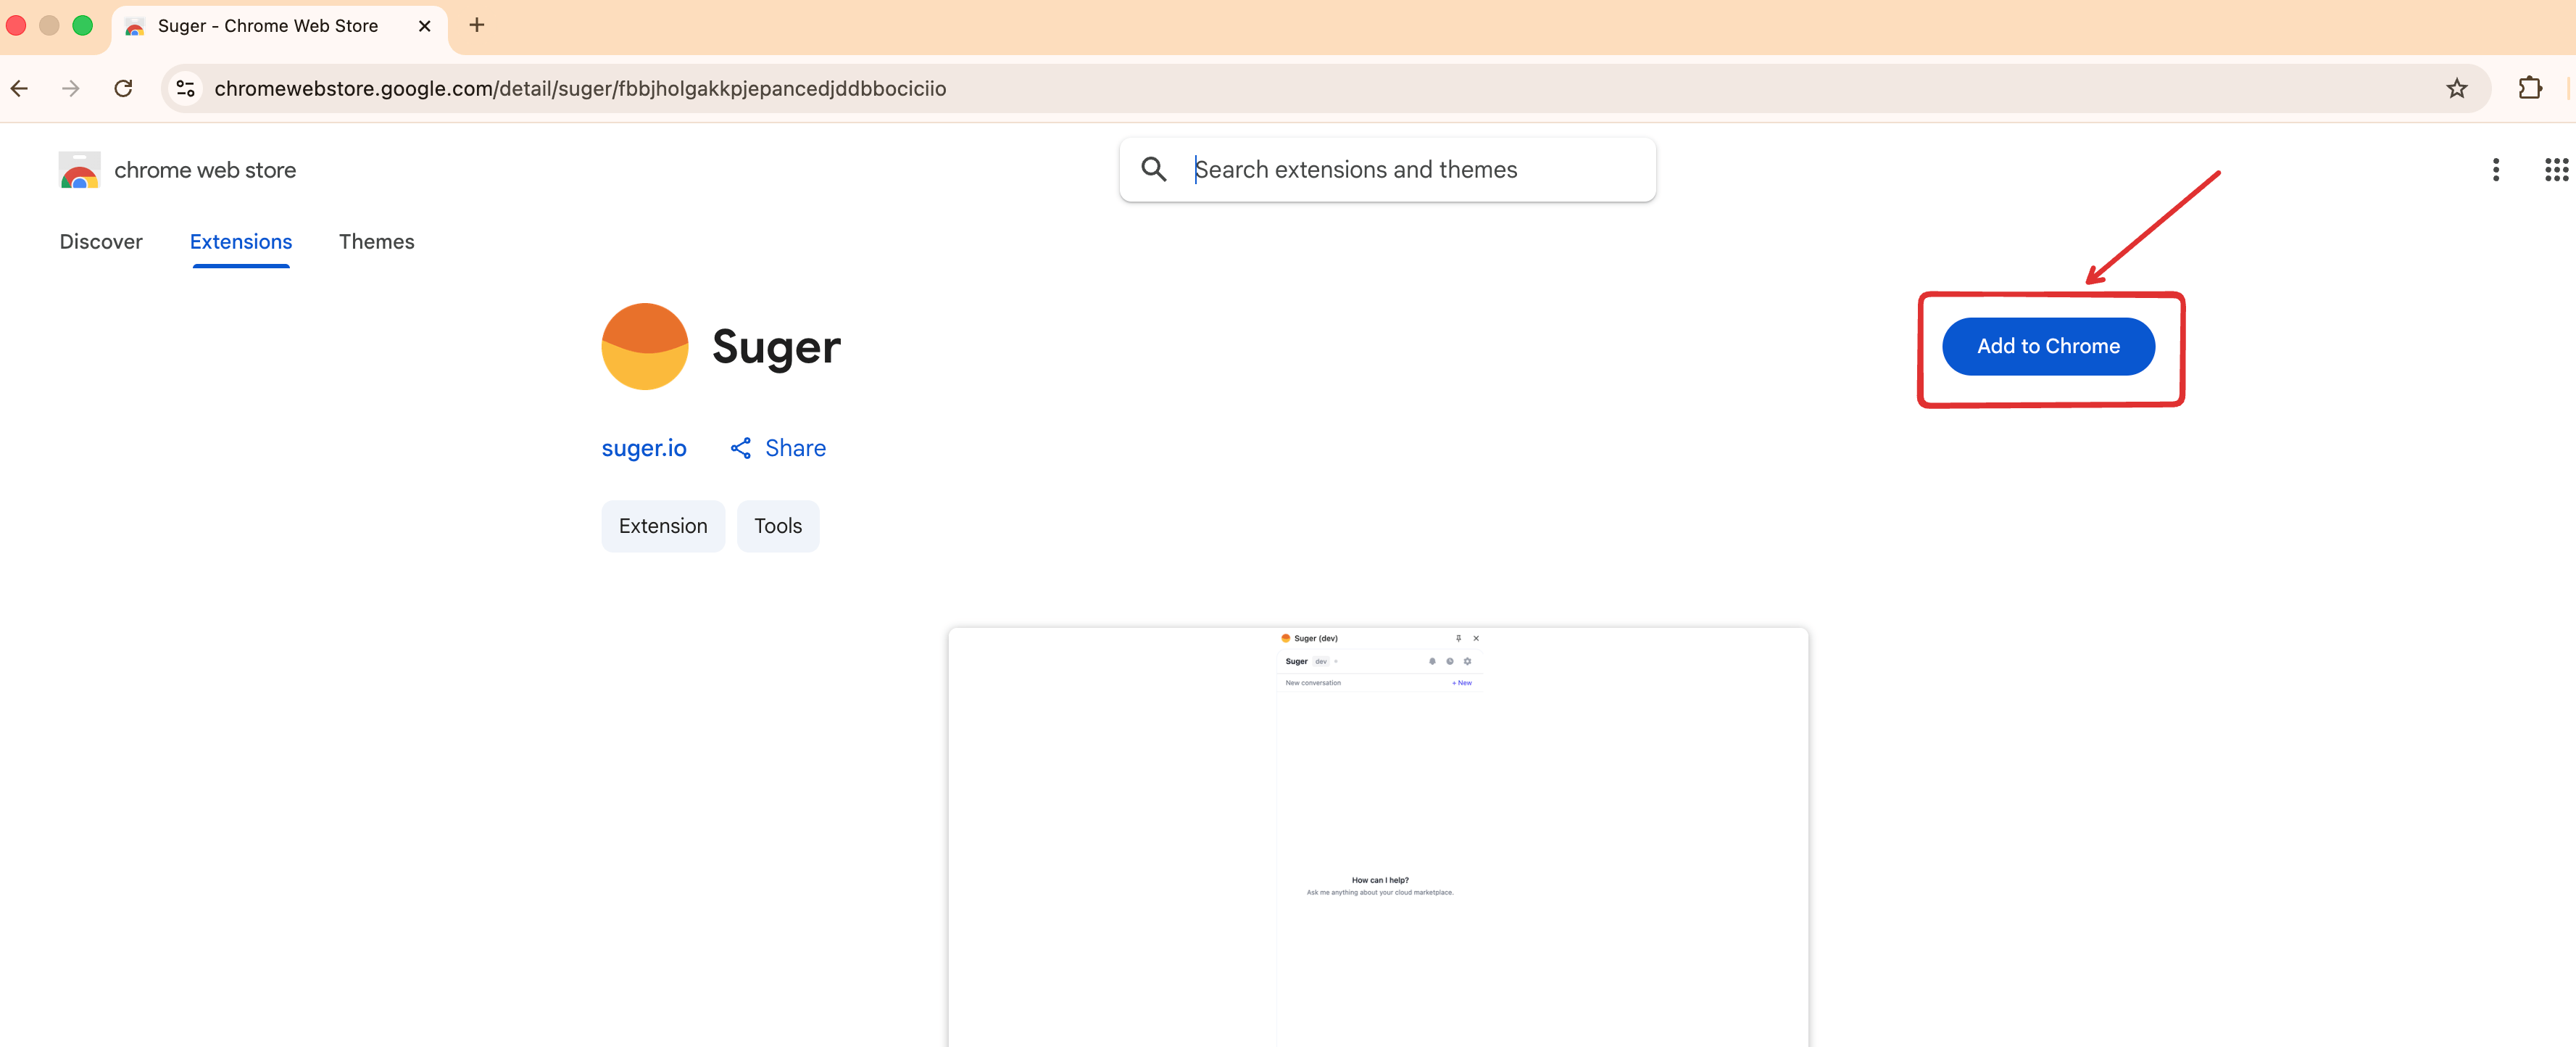
- Open the Chrome Web Store listing: Suger on the Chrome Web Store.
- Click Add to Chrome, then confirm the installation.
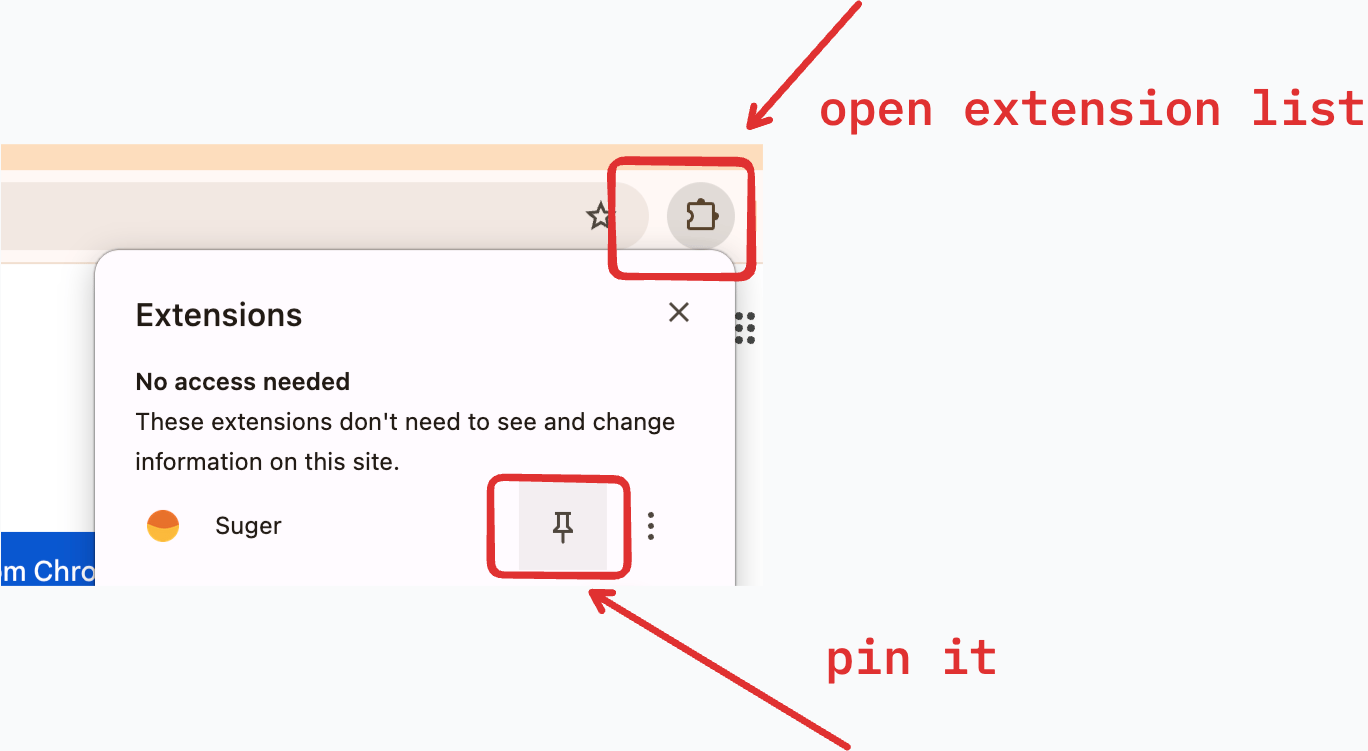
- Open the Chrome extensions menu in the toolbar and pin Suger so the icon stays visible.
- Click the Suger icon to open the side panel and sign in with your Suger account.
The extension uses the same account as the Suger web console. If you are already signed in there, the side panel picks up your session with no extra steps.
Pick the Right Organization
If your Suger account belongs to more than one organization, use the organization switcher (settings icon at top right -> organization) in the side panel to choose which one is active.
Before starting any workflow, confirm the active organization matches the environment you intend to work in. This matters most when you manage multiple tenants, business units, or customer environments.
Get to Know the Side Panel
The side panel is the workspace for everything you do with the extension. From the top header you can open and close it, switch conversations, view notifications, and adjust settings. The input area at the bottom is where you ask questions, run skills, and start recordings.
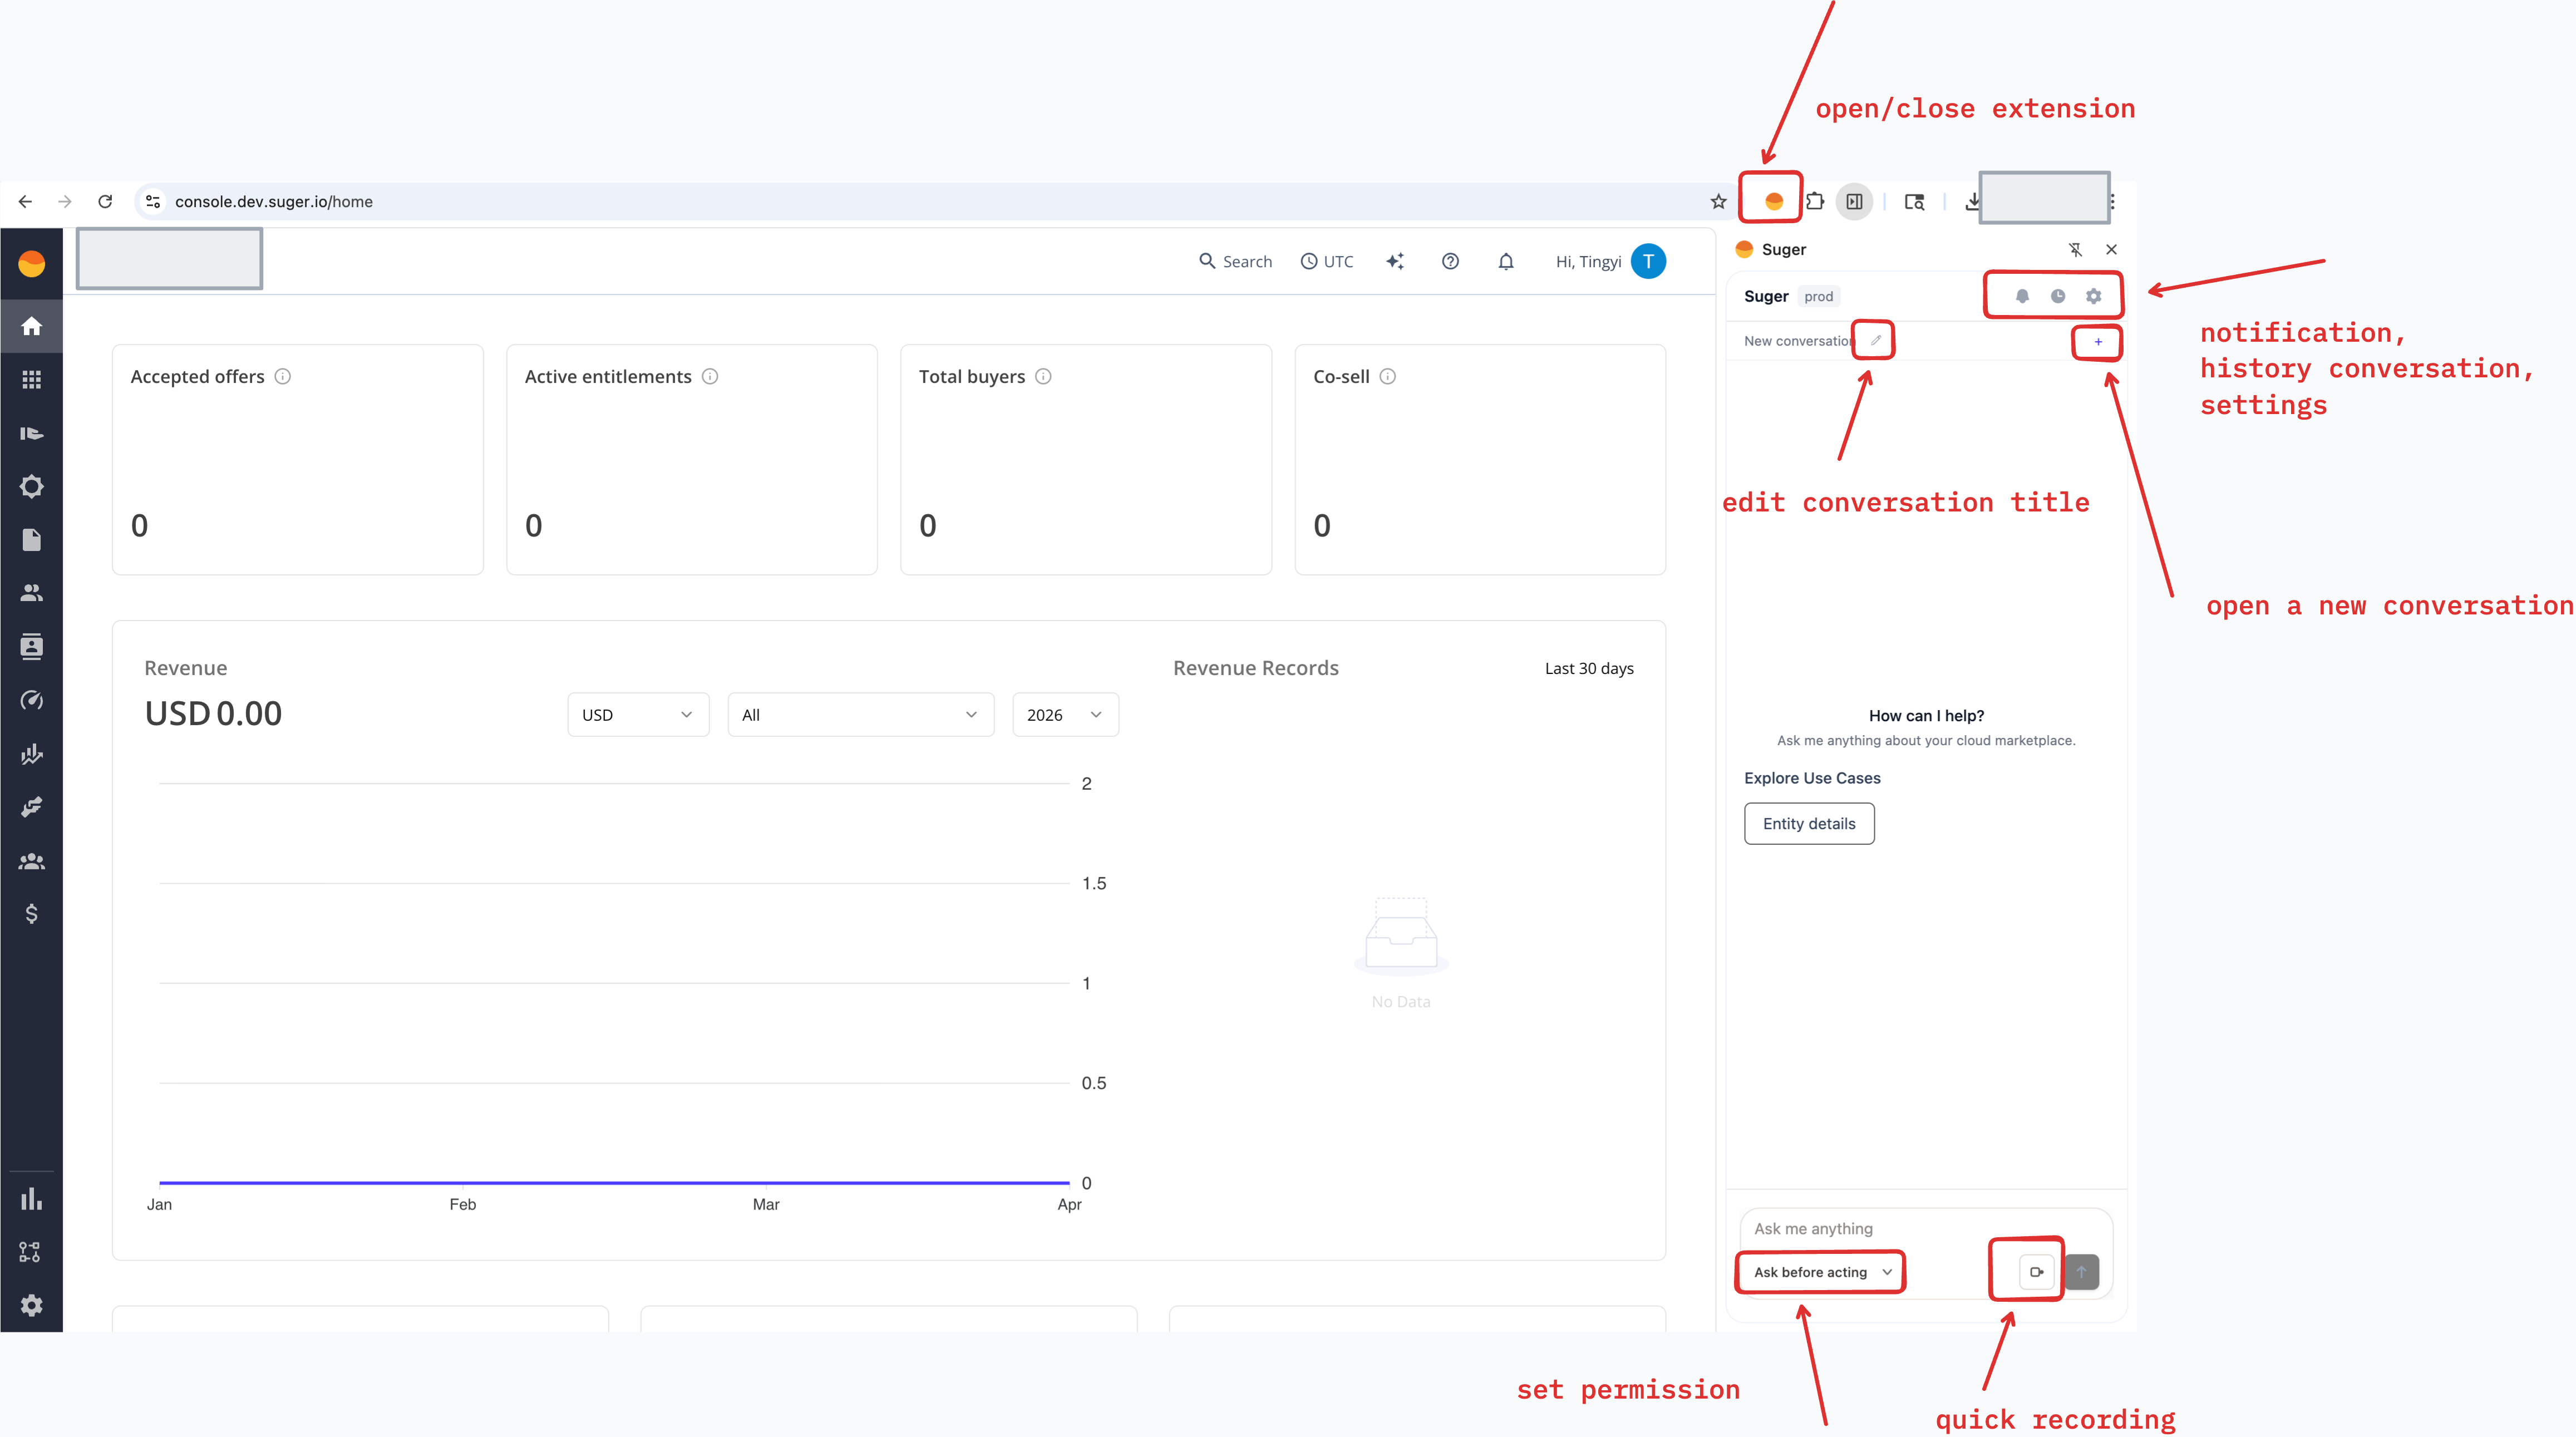
Key places to know:
- Suger icon in the toolbar — click to open or close the side panel on any tab.
- Organization and environment label — confirms which Suger workspace you are connected to.
- Notification, history, and settings icons — in the side panel header.
- New conversation — starts a fresh chat when you switch context.
- Edit conversation title — so you can find past conversations later.
- Permission selector — choose how much autonomy Suger has for the next request (for example, Ask before acting for guided mode).
- Quick recording — capture the active tab for troubleshooting.
What You Can Do
Ask Suger about the page you are on
Open the side panel on a page Suger supports and ask a question in plain language. Suger reads the context of the page and answers against your live data. It can also suggest follow-up actions as quick-reply buttons.
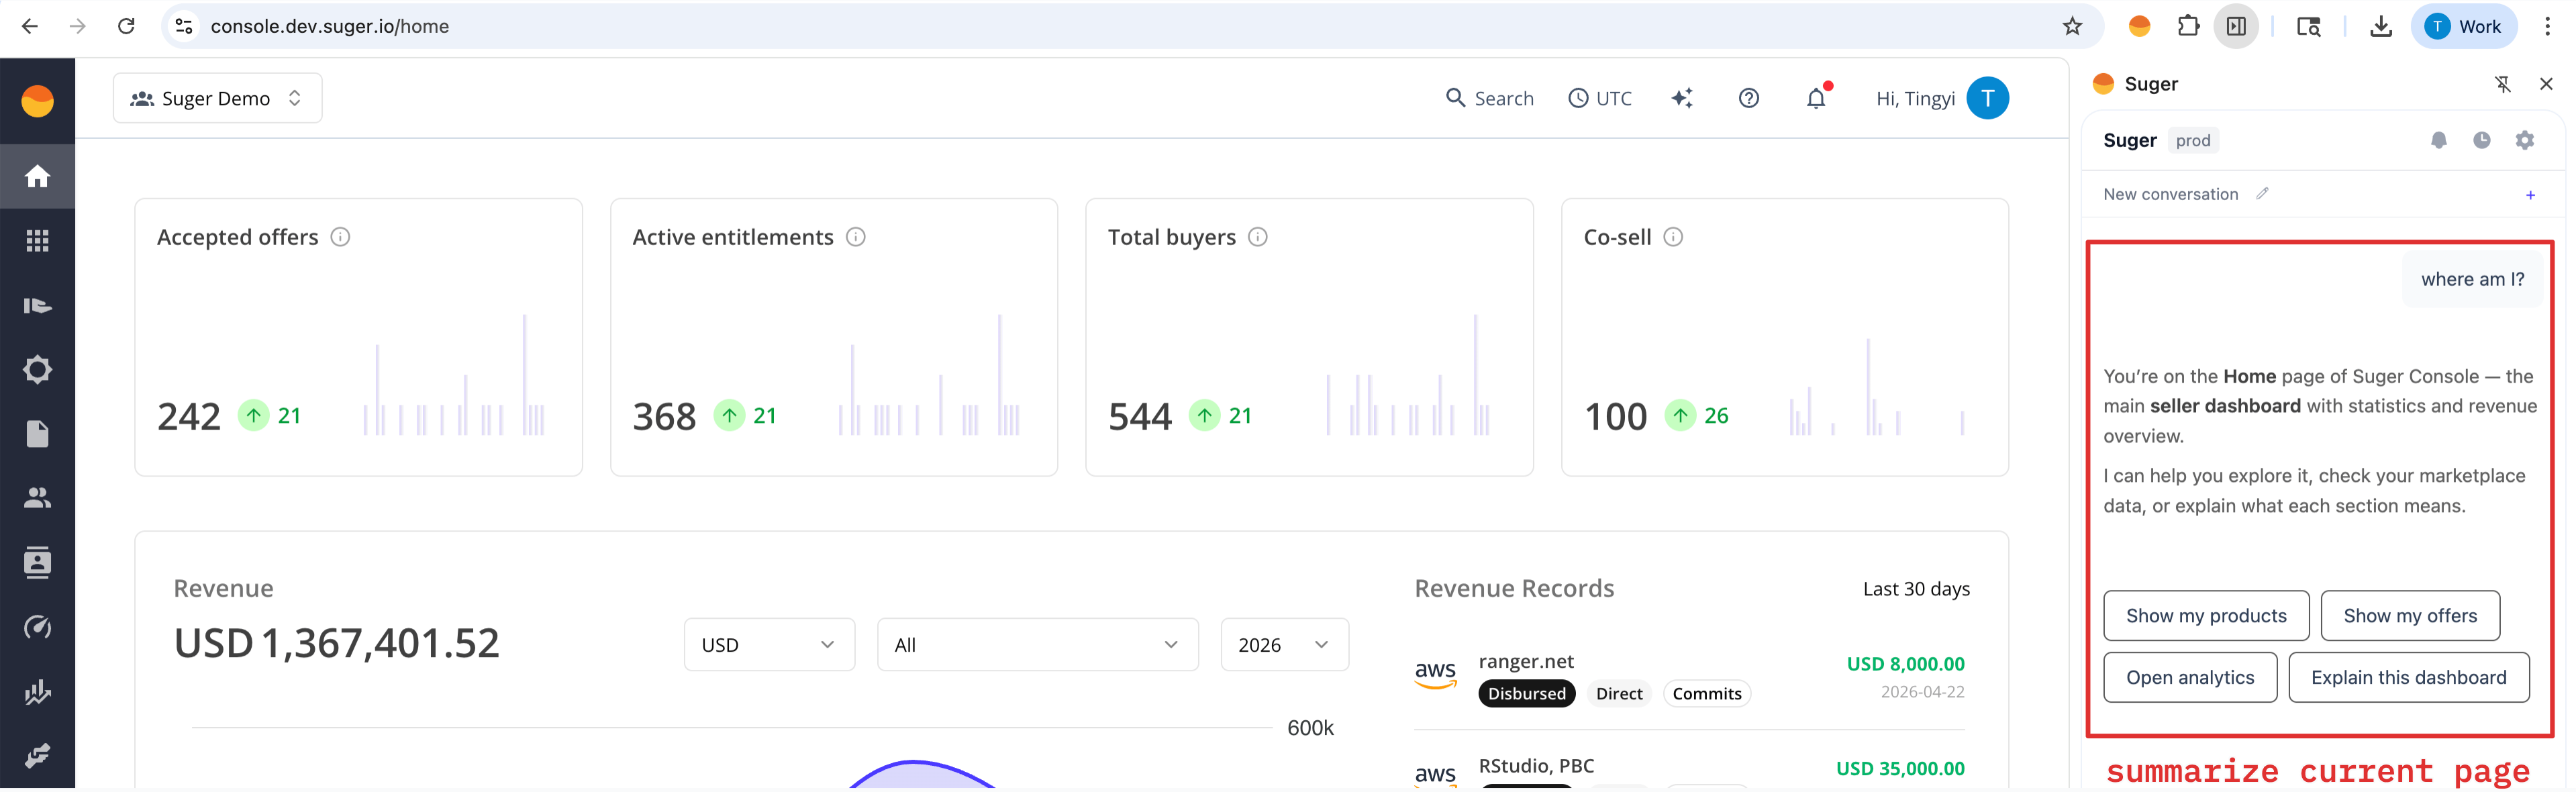
Examples of questions that work well:
- “Is this offer ready to send to the buyer?”
- “Do we already have an entitlement for this customer?”
- “What changed on this co-sell referral this week?”
- “Show me the last three offers linked to this opportunity.”
Run a skill with a slash command
Type / in the side panel to open the skill menu. Skills are pre-built flows that take you from a question to a concrete outcome, for example verifying that a marketplace integration is fully configured, diagnosing a failed offer, or drafting a new amendment offer.
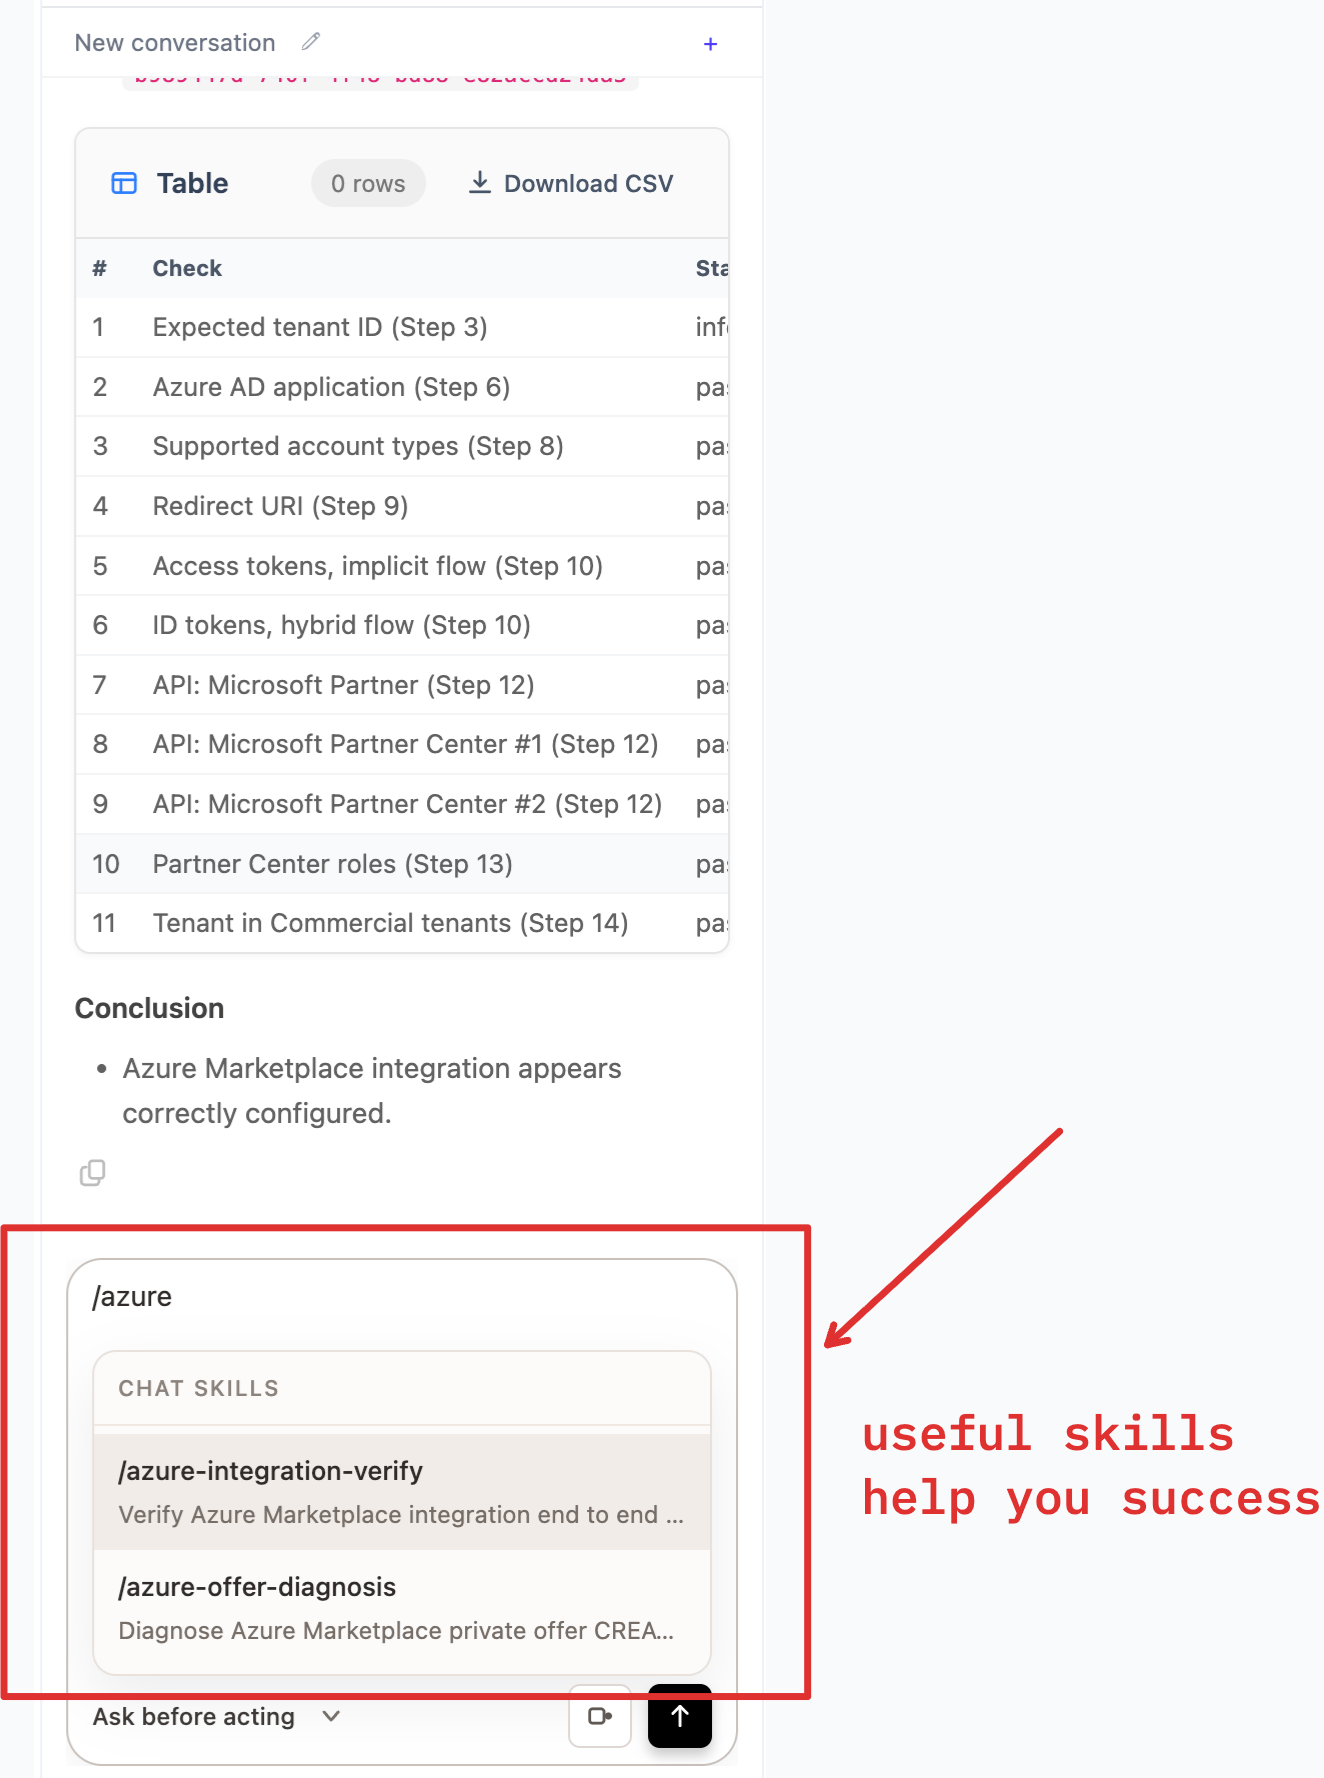
Each skill tells you what it is going to do before it runs and walks you through any decisions along the way. You can stop or skip a step at any time. See Available Skills for the full catalog.
Work from Salesforce
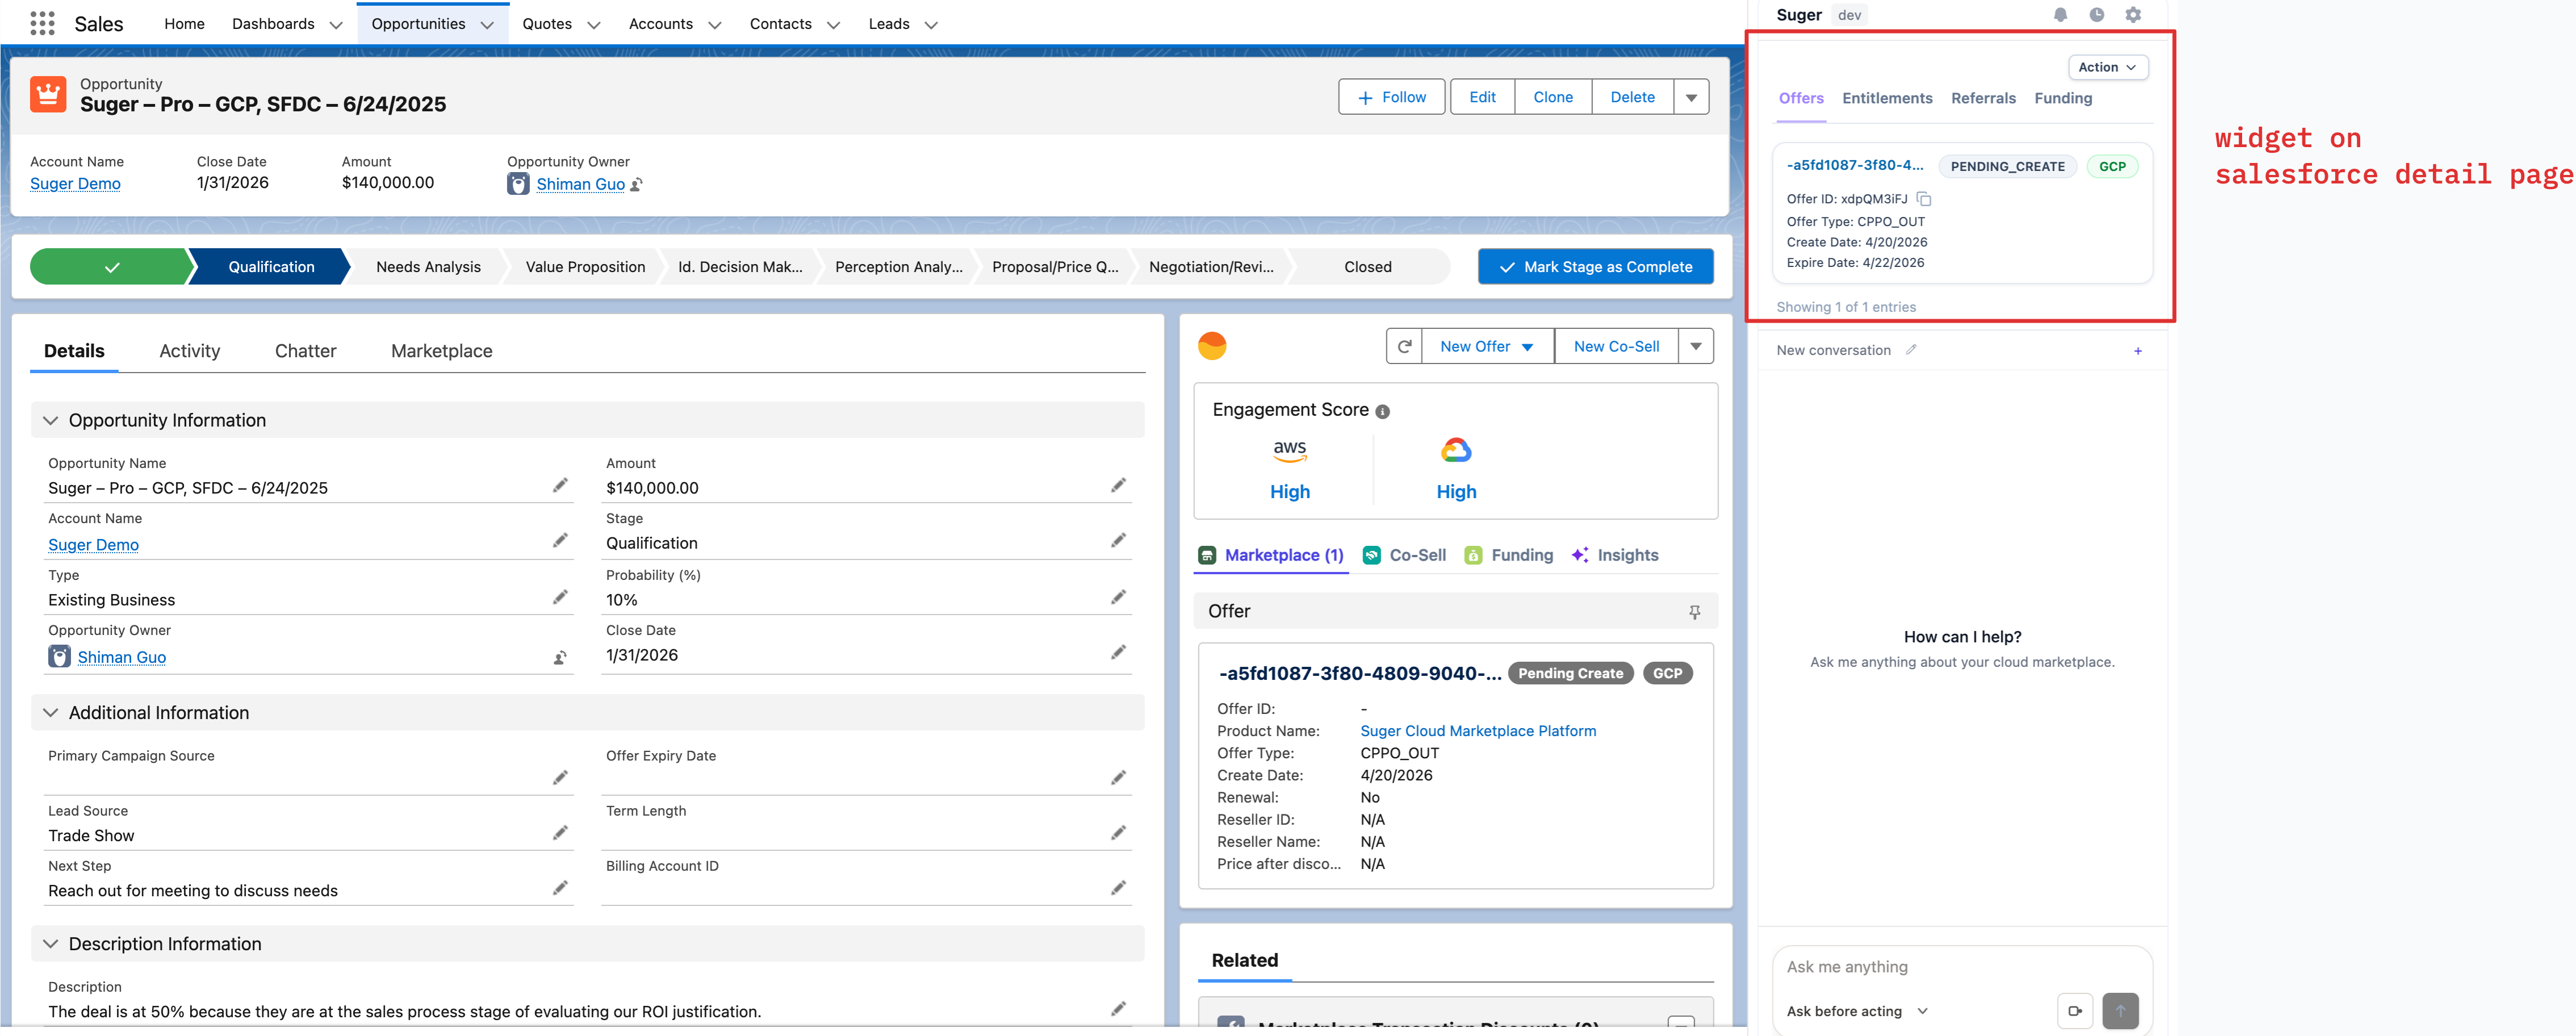
When you open a Salesforce opportunity, the extension shows a Suger widget beside the record. From the widget you can browse related Offers, Entitlements, Referrals, and Funding, and trigger the Action menu to start the next step without leaving the page.
Work from HubSpot
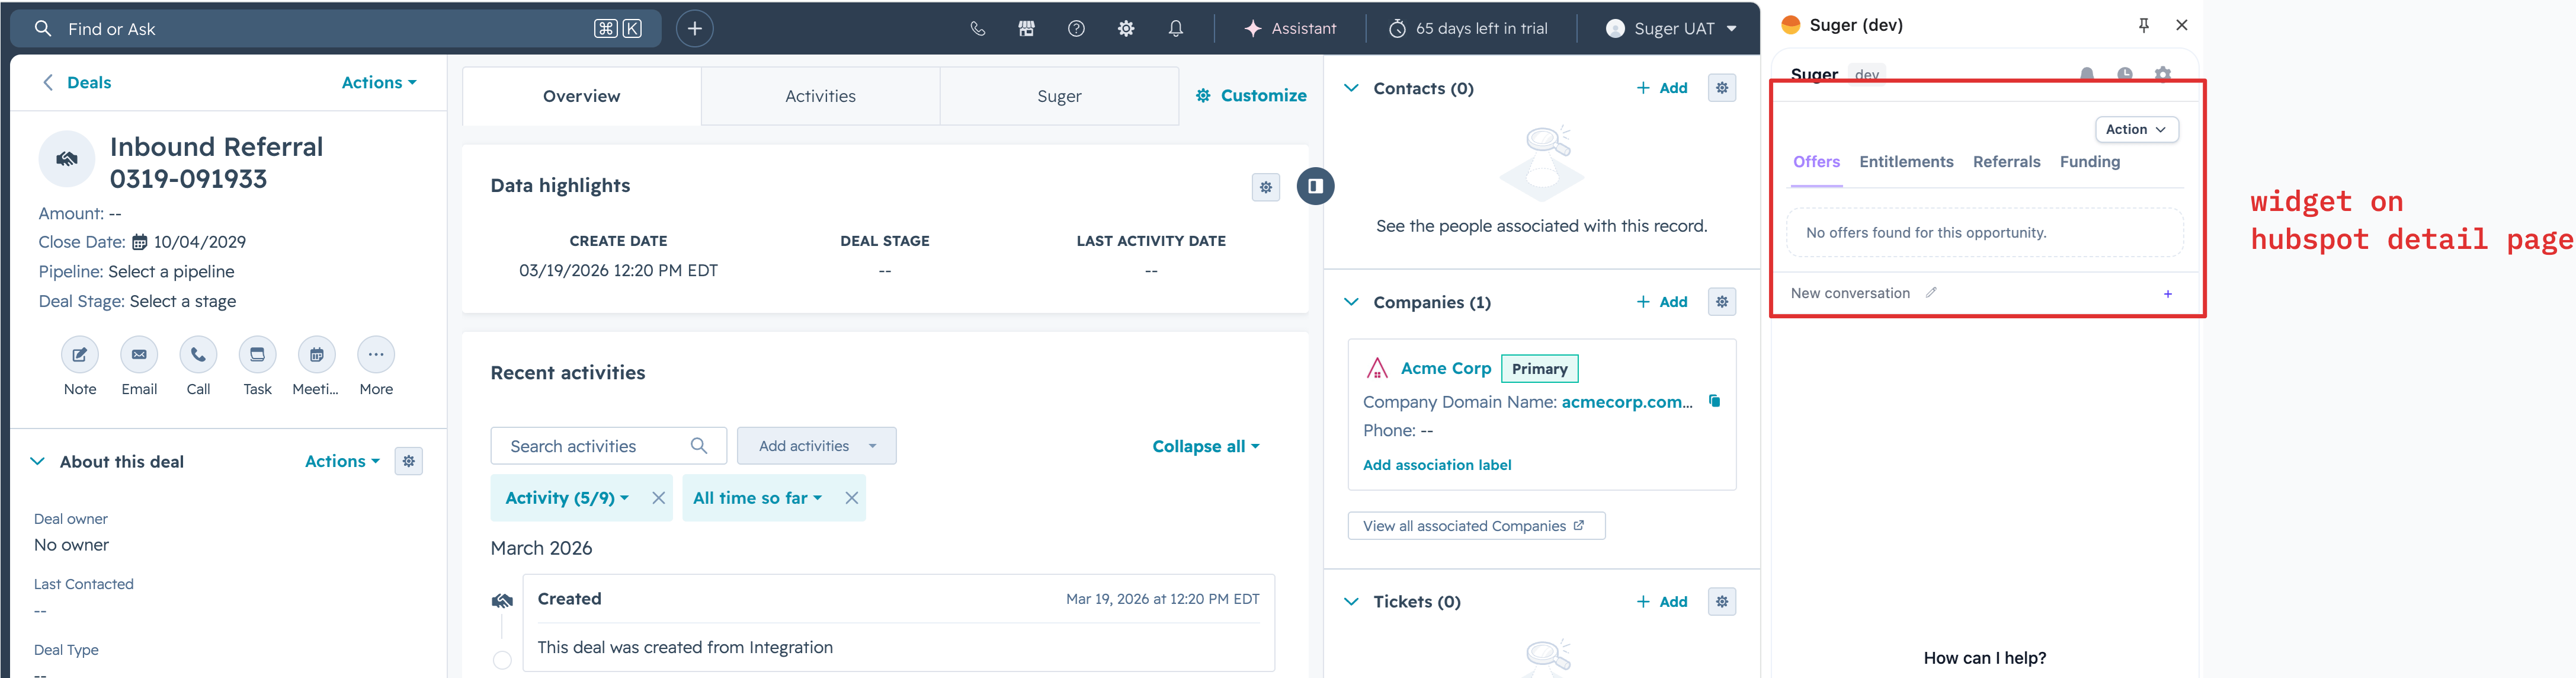
The same widget is available on HubSpot deals. Open a deal and the side panel shows Suger data linked to it so revenue and partner teams can stay in HubSpot while still working with marketplace records.
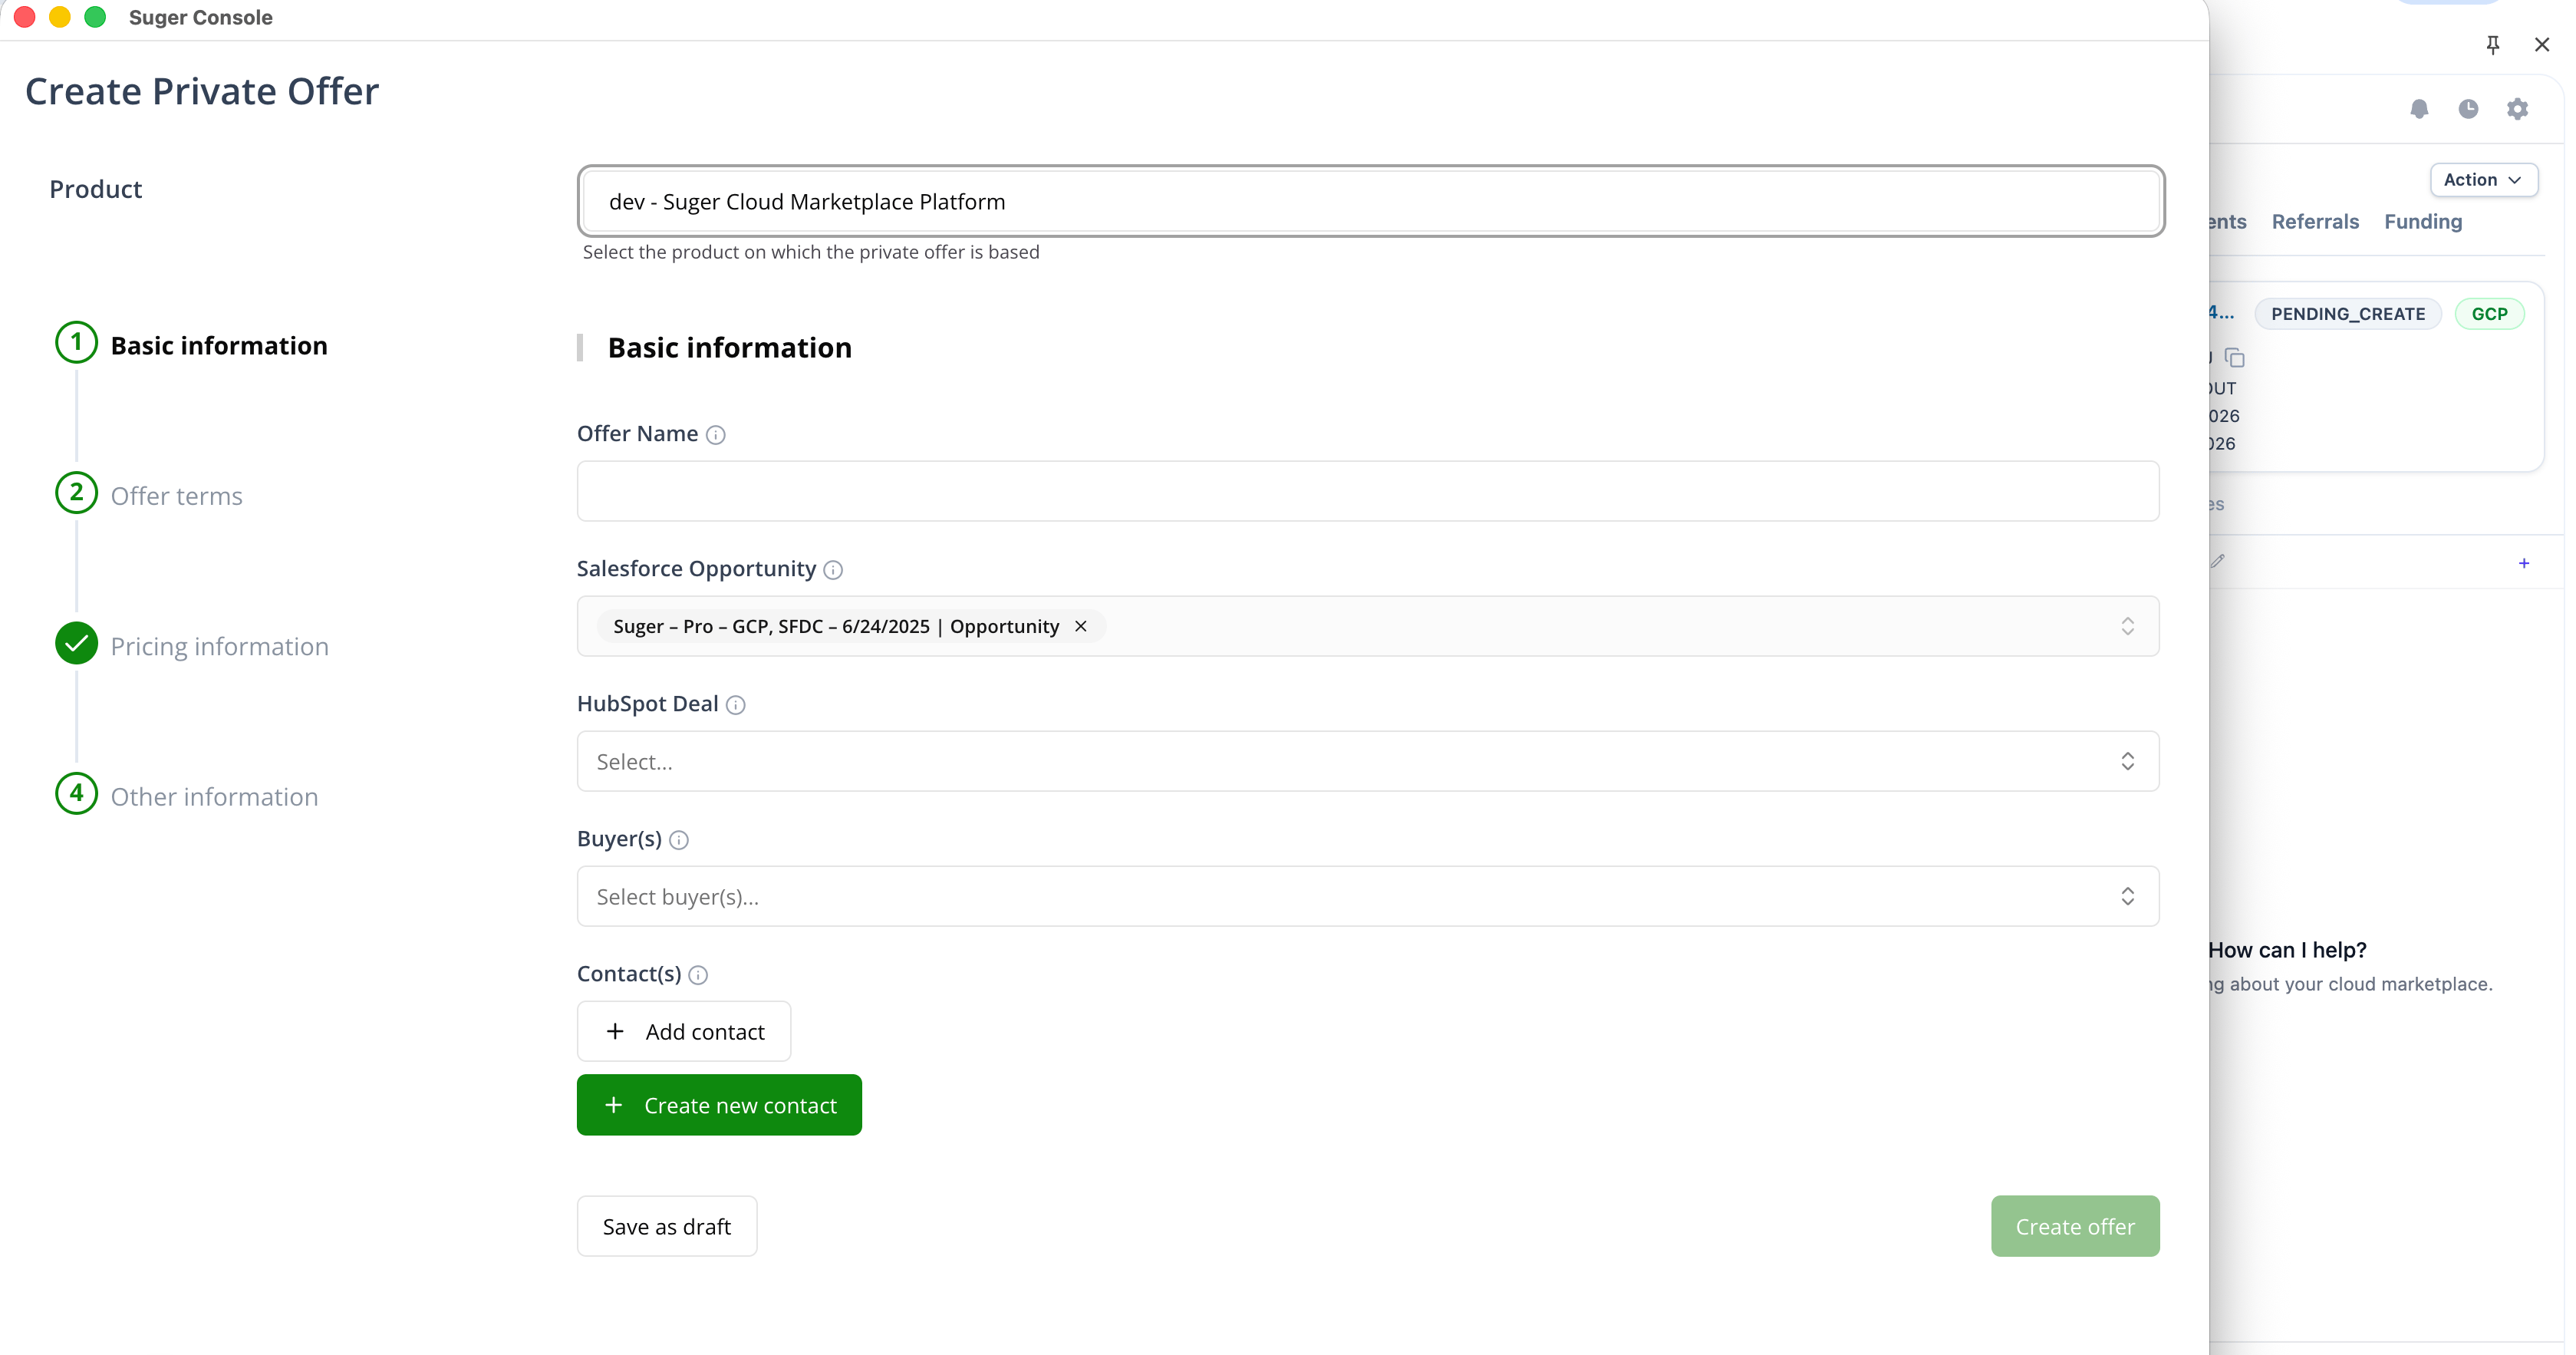
Start a new offer, co-sell, or funding request
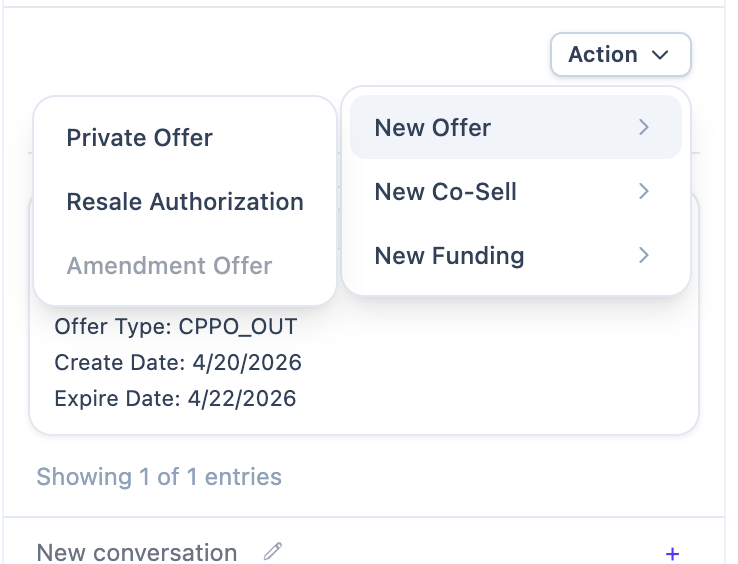
From the widget’s Action menu you can kick off the common follow-ups on an opportunity or deal:
- New Offer → Private Offer — a custom-priced offer sent directly to an end customer through AWS, Azure, or Google Cloud. The buyer receives a link to review and accept it in their marketplace account. Use this when you are selling directly.
- New Offer → Resale Authorization — a Channel Partner Private Offer (CPPO) that authorizes a reseller to sell your product at a price you set. Use this when selling through a channel partner, and make sure the CRM record is associated with the reseller, not the end customer.
- New Offer → Amendment Offer — an amendment to an existing offer, for example to change pricing or extend the term after acceptance. This is only available when the buyer already has an active entitlement.
- New Co-Sell — submit a referral to AWS, Azure, or Google Cloud. You can submit to multiple cloud partners from the same record by repeating the action and selecting a different partner each time.
- New Funding — create a funding request like an AWS MDF request linked to the account.
The flow opens in a focused popup with the opportunity or deal pre-filled, so you can finish the request without losing your place in the CRM tab. Anything you create is synced back to your CRM and linked to the record automatically.
Let Suger act for you, with your approval
For some workflows, Suger can do more than answer. It can also open a page, fill a form, or prepare a record for you. This is useful when a flow needs several steps across multiple pages. Suger previews each step, you approve it, and it executes — so you stay in control at every point.
- Every automated action is shown in the side panel before it runs.
- Anything that changes state — creating a record, submitting a form, modifying data — always needs your explicit approval each time, regardless of the autonomy setting.
- You can stop or skip any step at any time from the side panel.
Use the permission selector at the bottom of the side panel to pick how autonomous Suger is on the next request. It does not change what Suger can do — only how often it pauses to ask:
| Setting | What it means |
|---|---|
| Ask before acting | Suger previews every step and waits for your approval before executing. Recommended for most users and any time you are trying something new. |
| Higher autonomy | Suger moves through steps faster with fewer pauses. Use only when you are already familiar with how a specific workflow runs. |
Automation runs by default on Suger Console, Salesforce, HubSpot, AWS Console and AWS Marketplace, Azure Portal and Microsoft Partner Center, and Google Cloud Console pages. Suger will not take automated actions on pages outside this trusted list, even if you ask it to — this is a deliberate safety boundary, and the list is fixed. In Settings → Allowed websites inside the side panel, you can review and remove sites you previously chose to always allow (which suppresses future approval prompts on that domain).
The steps Suger takes stay in the side panel conversation, and you can review past conversations using the History icon in the side panel header.
Record a session to share with support
If something goes wrong on a supported page, use the quick recording button in the side panel to capture what happens on the tab. Attach the recording to a support request or an internal review to make the issue reproducible.
Recording only starts when you explicitly trigger it and stops when you end it.
Stay in the loop with notifications
The side panel receives updates from Suger as things happen — for example when an offer, entitlement, or co-sell referral changes status, or when a workflow needs your attention. You do not have to refresh a console tab to see them.
Tips for a Smooth Experience
- Pin the Suger icon in the Chrome toolbar so the side panel is always one click away.
- Keep the side panel open while you work — it stays attached to the active tab and updates as you navigate.
- Before running a skill or approving an action, double-check the active organization at the top of the side panel.
- If you start an automated flow, read the step preview before approving each action. You can skip a step or stop at any time.
Troubleshooting
If the extension does not behave as expected:
- Confirm you are signed in to Suger and the active organization is correct.
- Refresh the current page and reopen the side panel.
- Make sure you are on a supported page for the feature you are trying to use.
- Update the extension to the latest version from the Chrome Web Store.
- If local state seems stale, remove and reinstall the extension.
If the issue continues, contact the Suger support team.
Spotted something wrong or out of date on this page? Tell us and we'll correct it.