
App Settings
This guide covers configuration options available within the Suger App settings and Salesforce setup.
API Connectivity
To connect the Suger Salesforce App with the Suger platform, you need to configure API credentials and integration settings. This includes setting up authentication, mapping rules, and sync preferences.
For detailed instructions on configuring API connectivity, see the Salesforce Integration Setup Guide.
OAuth credentials are required for AI notes
Generate AI Notes in the Azure co-sell share wizard calls Suger’s AI service, which accepts Bearer tokens only. An org still authenticating with an API key alone gets a 401 back and the button fails with:
AI note generation requires OAuth. Add the Suger OAuth Client ID and Client Secret in Suger Settings, then try again.
Add the Suger OAuth Client ID and Client Secret in Suger Settings to enable it. Everything else in the app continues to work on the API key.
Managing Tab Visibility
The Suger App includes both V1 and V2 tabs. The key differences are:
- V1 tabs use Salesforce Lightning Record Tables that read from local Salesforce objects. Data may be delayed due to sync intervals between Suger and Salesforce.
- V2 tabs read data directly from the Suger platform via API, providing real-time, up-to-date information.
To streamline the user experience and reduce clutter, Admins can hide unused or legacy tabs using one of the following methods.
Method 1: Hide Tabs via App Manager
This method removes tabs from the default navigation bar for all users accessing the Suger App.
How to Configure:
-
Click the Gear Icon (⚙️) > Setup.
-
In the Quick Find box, type
App Manager. -
Locate the
Sugerin the list. Click the dropdown arrow (🔽) on the right and select Edit. -
Select Navigation Items from the left-hand menu.
-
Select the tabs you wish to hide from the Selected Items list (right side) and use the Remove Arrow (⬅) to move them to the Available Items list (left side).
-
Click Save.
Method 2: Disable V2 Access via Suger Settings
Unlike Method 1, which removes the tab from the navigation bar, this method does not hide the tab. Instead, it functionally disables the page content.
If a user clicks on a disabled tab, the page will load, but they will see a “Feature Disabled” message and cannot interact with any data.
How to Configure:
-
Open the Salesforce Suger App and navigate to the Suger tab.
-
In settings menu, scroll down to the Tabs Control section.
-
Locate the specific V2 page you wish to restrict.
-
Turn ON the toggle to disable the feature.
Adding the Referrals Tab
To streamline your referral workflows and ensure quick access to key information, we recommend adding the Referrals tab to your Salesforce navigation bar. This lets you easily track both inbound referrals from AWS and outbound referrals submitted by your team.
How to Configure:
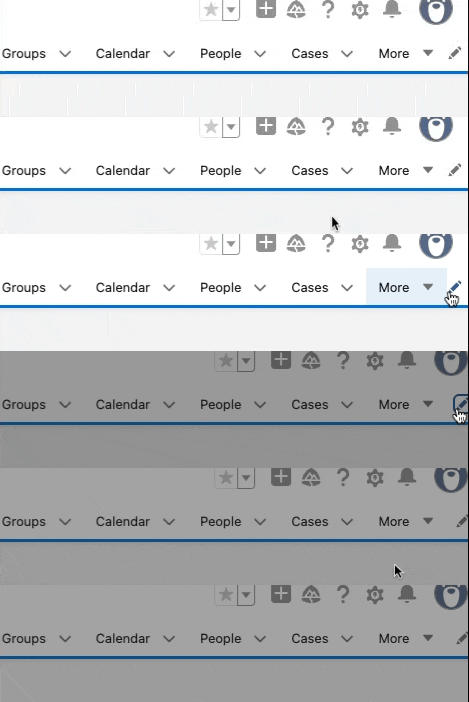
- On the top-right corner of your Salesforce screen, click the pencil icon (Customize My Navigation) to open the Navigation Editor.
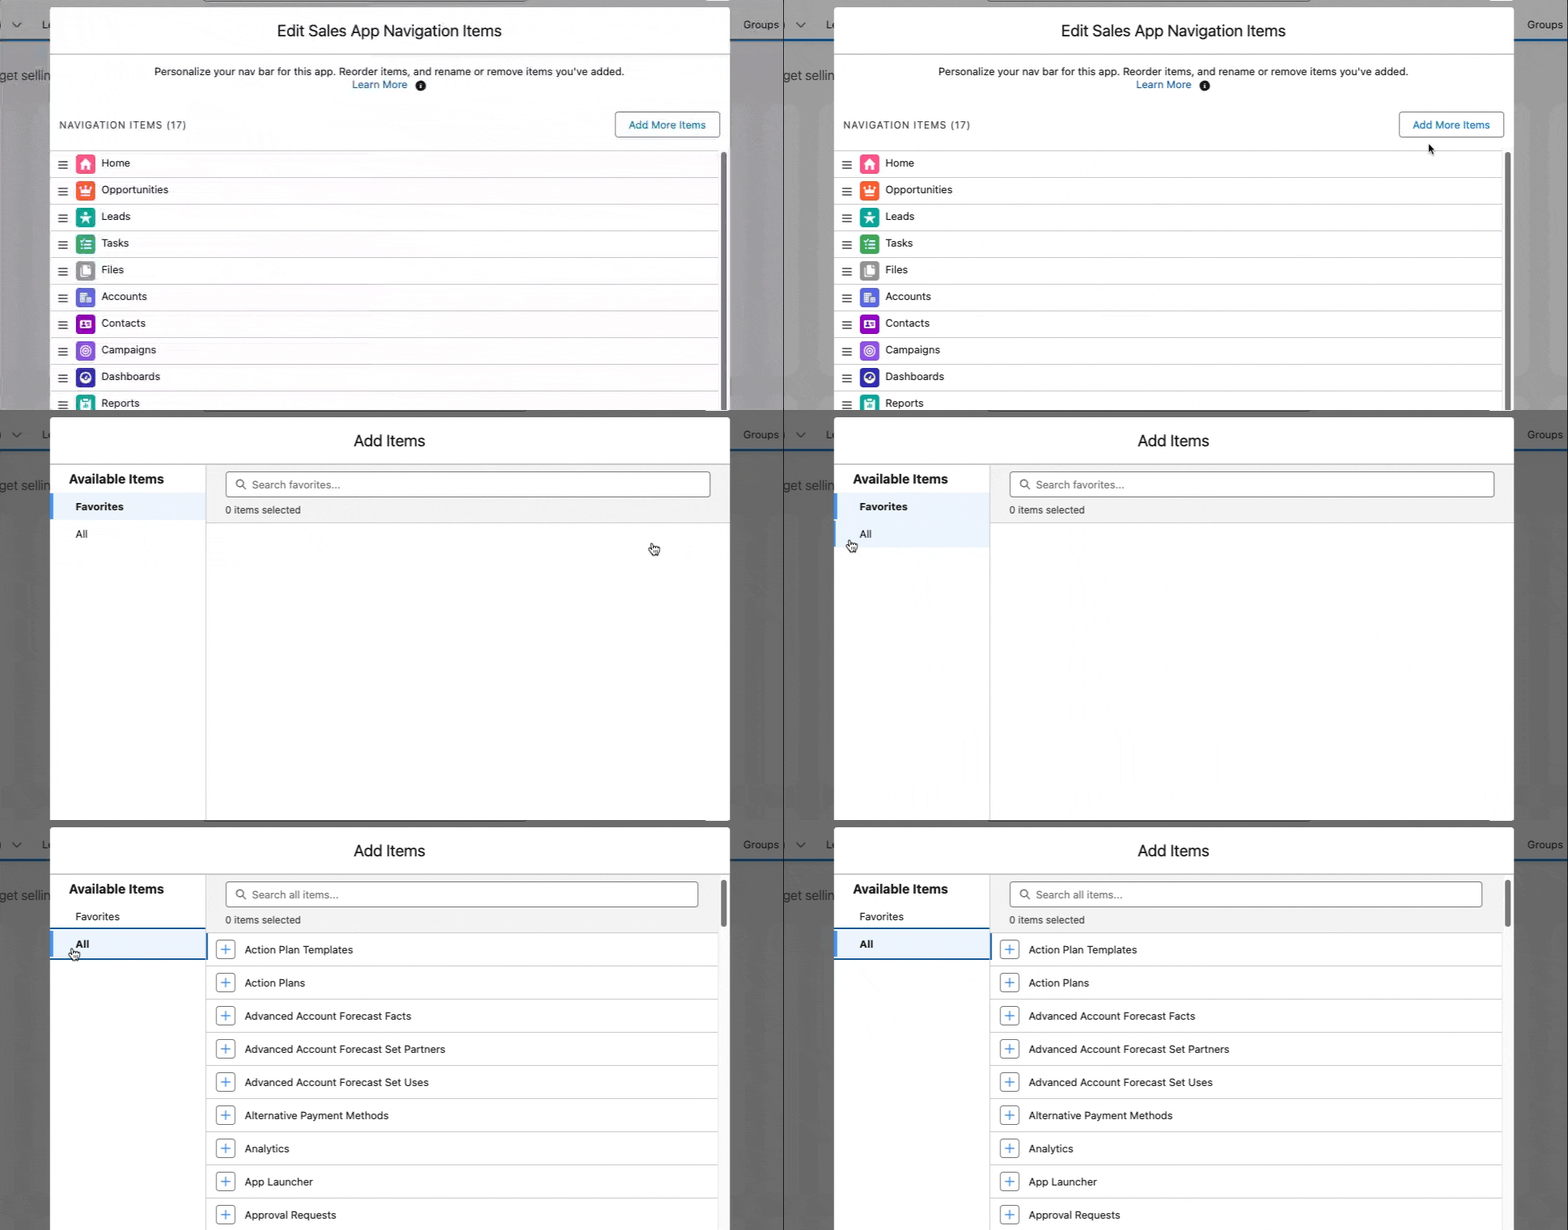
- In the editor, click Add More Items, then go to the All section to see a list of available navigation items.
- In the search bar, type
Suger. Find and select Referrals V2 (Suger), then click Add 1 Navigation Item. We suggest placing the Referrals tab directly below Opportunities, since they are commonly used together — use drag-and-drop to reposition it.
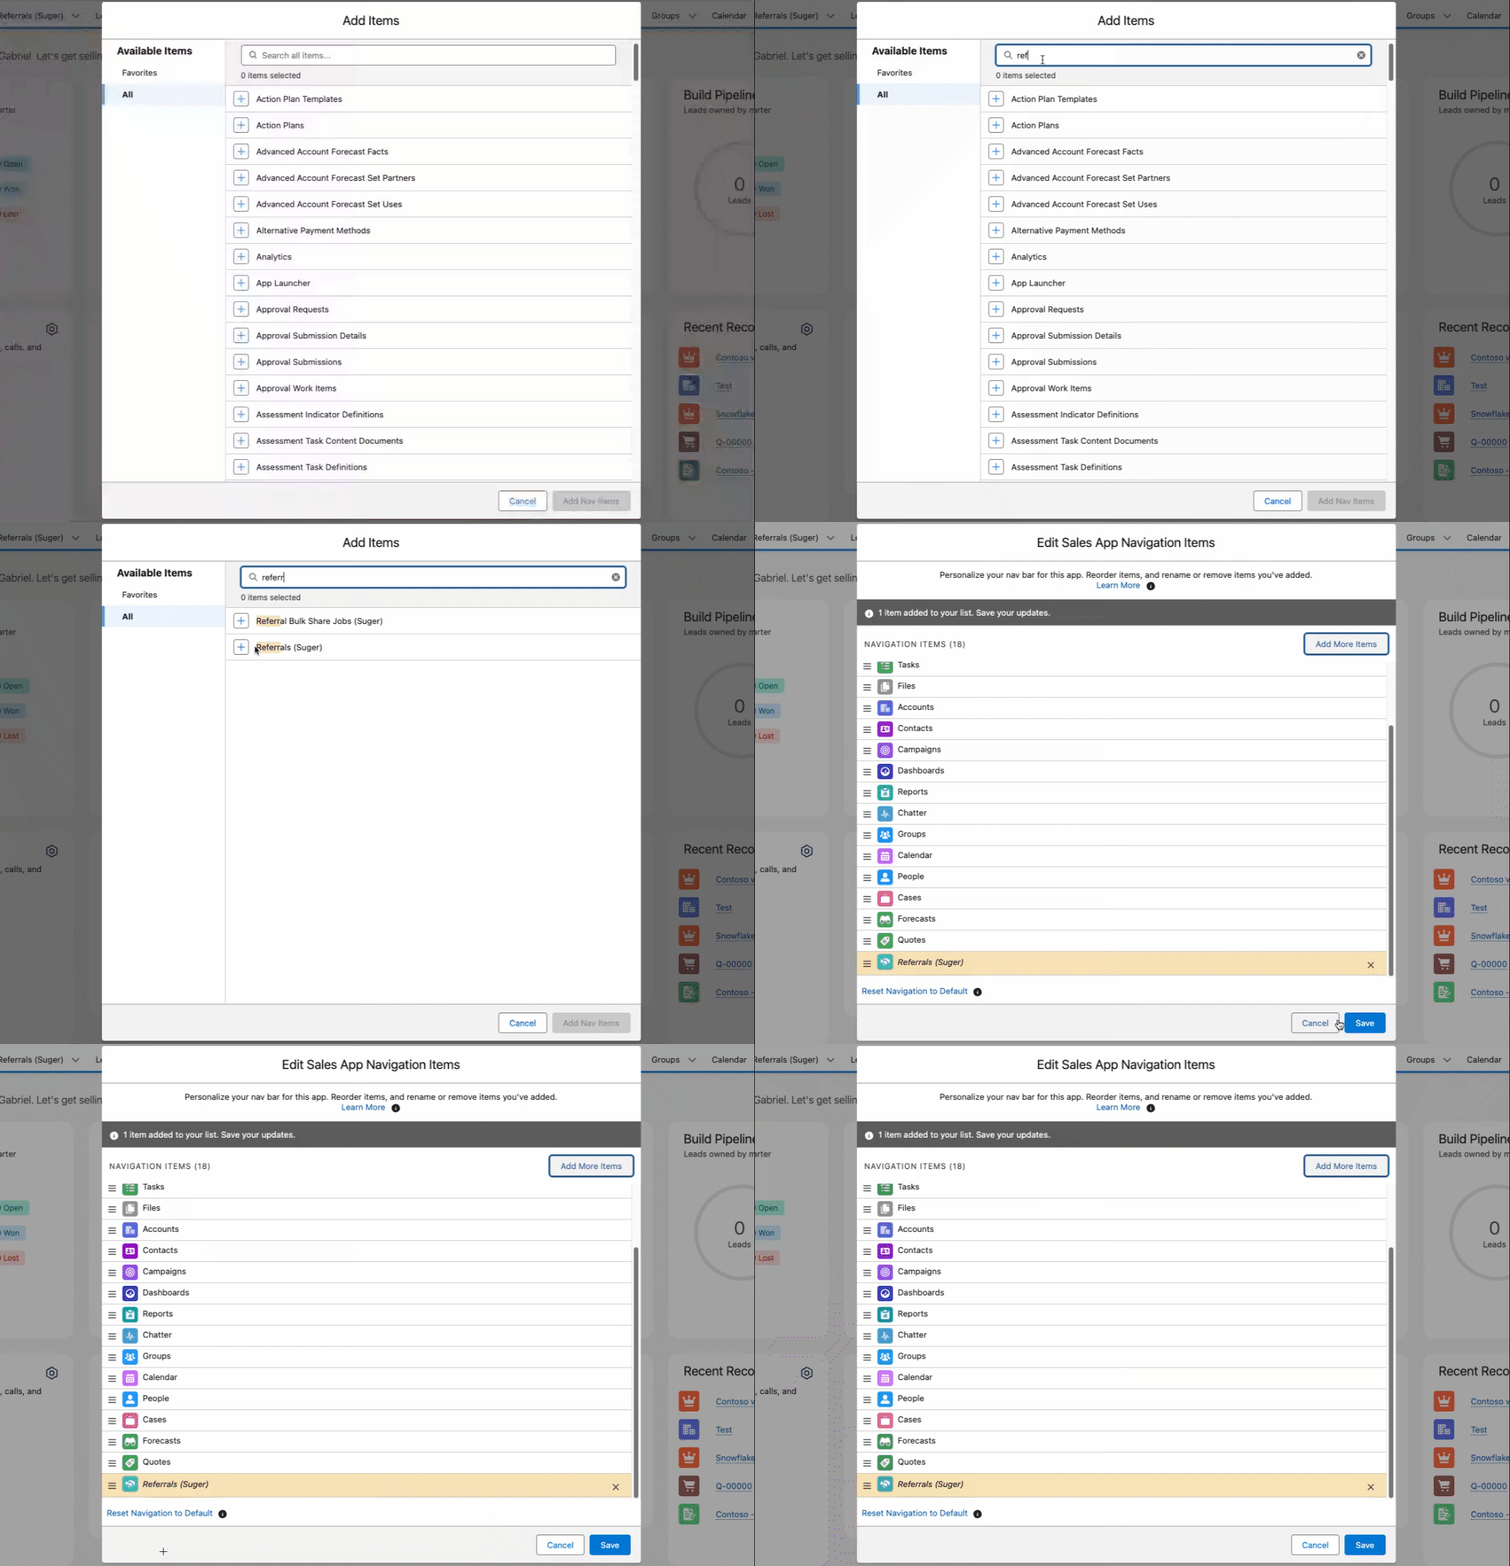
- Click Save to apply your new navigation layout.
Accessing and Using Referrals
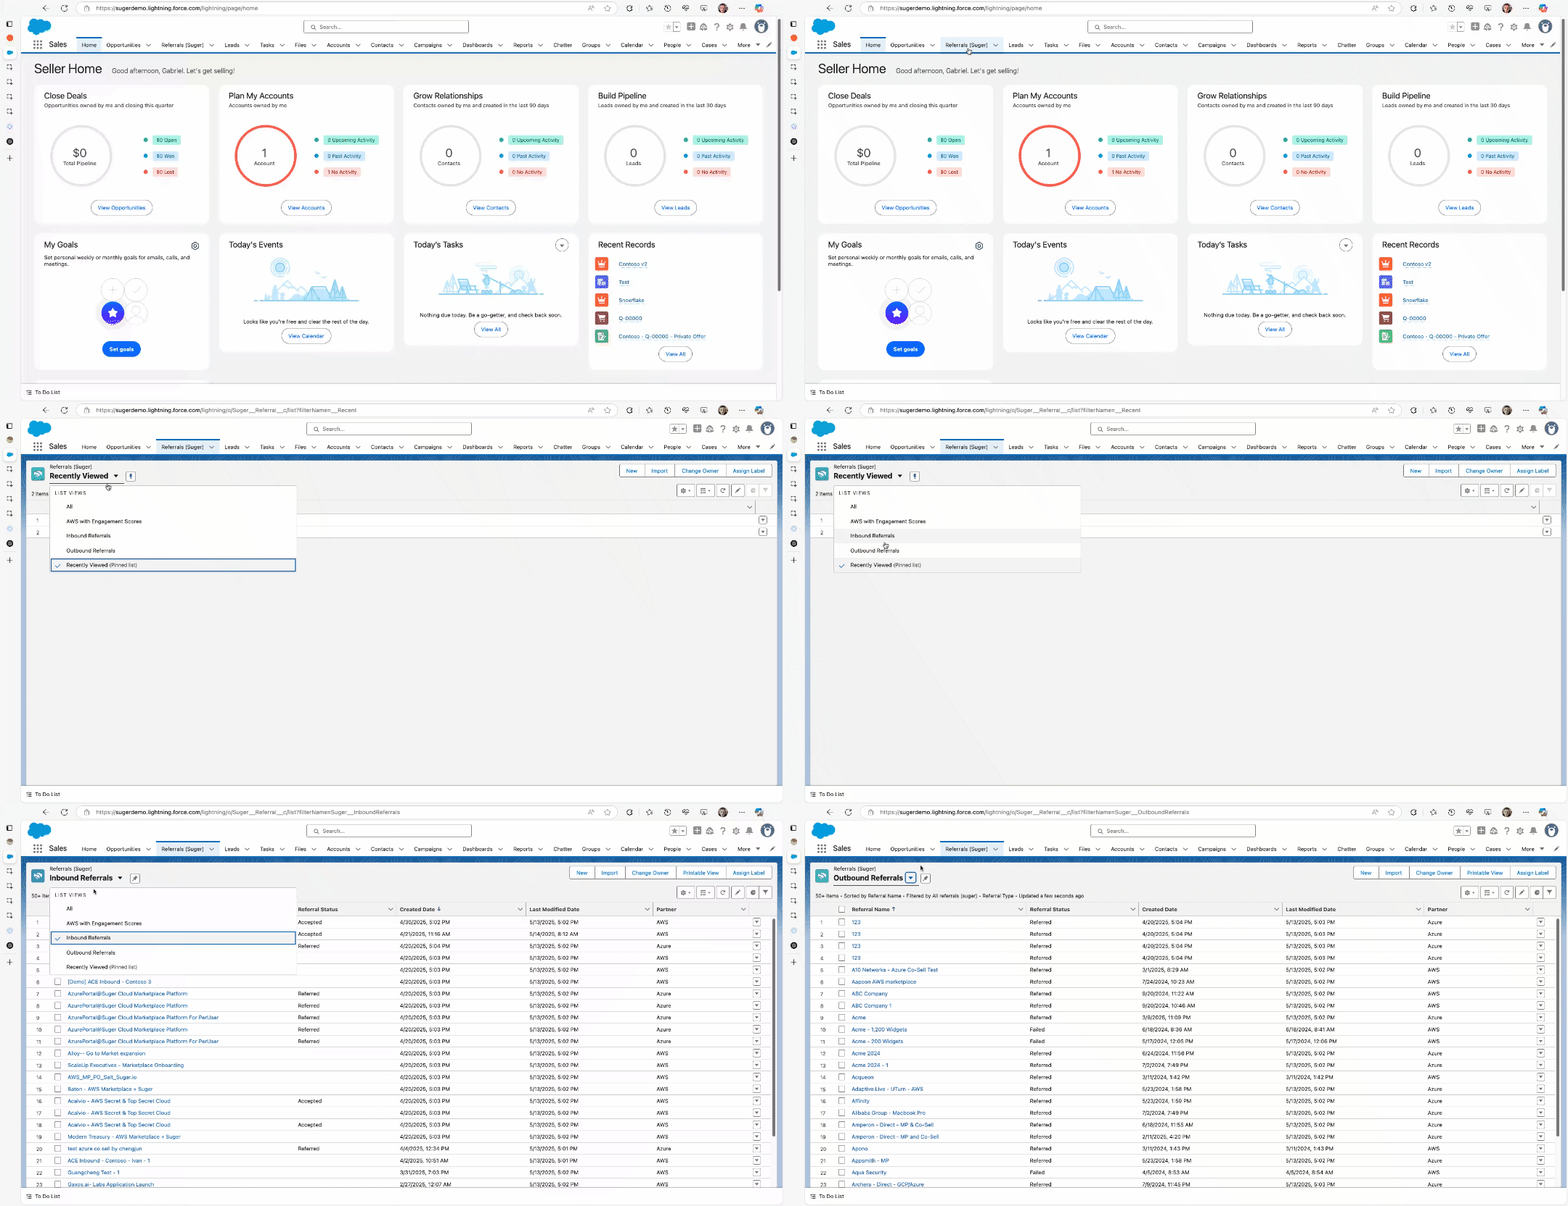
After saving, you’ll see the Referrals tab in your navigation bar. Click the tab to view and manage referrals, and use the Recently Viewed dropdown to switch between:
- All Referrals
- Inbound Referrals – Opportunities shared with you from AWS
- Outbound Referrals – Opportunities your team has shared with AWS
Referrals saved as a Draft and not yet submitted are listed in these views alongside
submitted ones, so you can find and finish them from the same table. A draft does not exist
on the cloud partner’s side yet, so its Partner Status and Stage columns show -
until it is submitted.
Drafts appear in Salesforce only — the co-sell list in the Suger console omits them.
How Funding records open
Opening a Funding record from anywhere in Salesforce — a list view, a related list, global search, or a report — redirects to the Suger Funding Detail page rather than the standard Salesforce record layout, so you always land on the live Suger view of the funding application. The redirect uses the record’s Suger funding application ID, the same value the funding cards and tables link with.
If the redirect cannot resolve (for example the record is not readable under your permission set), Salesforce falls back to the standard record view.
Find a Funding record. Funding records are returned by Salesforce global search, and each result shows the Funding Application ID, Partner, AWS Funding Program, AWS Activity Name, AWS Funding Request Status, Approval Status, Opportunity, AWS Planned Start Date, and AWS Planned End Date. The Suger app also has a tab for the Funding object itself, placed just before Funding V2 (Suger) in the app’s navigation; its All list view shows Funding Name plus those nine columns. Funding V2 (Suger) (formerly Funding (Suger)) is the funding table that reads straight from Suger, and its Project Name links open the Funding Detail page. The Suger Funding and Suger Funding (Read Only) permission sets make both tabs visible.
On a cash-based MDF or POC request, the Funding Detail page has a Cash Claim section with one tab per planned claim (Activity 1, Activity 2, … on MDF; Cash Claim 1, … on POC). Each tab shows the claim filed for it — its Fund Claim Id, Cash Claim Status, and Claim Due Date — and on an MDF request an Invoice & Payment block with Invoice Currency, Invoice Amount (Local Currency), and Scheduled Paid Date. AWS records each cash claim as its own application linked to the request, and the page reads those claims when it opens, so the values match the Suger Console. A tab whose claim has not been filed yet, or cannot be matched to it, shows a dash in those fields. The same claim dates also sync to the FundingCashClaim__c record once AWS records them.
On an MDF or POC cash request, the Cash Request Information section shows the request’s PO Number and its Payee Central Account Profile ID — the purchase order AWS issued and the Payee Central profile the cash is paid to. Both also sync to the Funding record (Funding__c).
Funding stage. Once AWS reports a stage for the request, the Funding Detail page shows a progress bar with the six stages AWS Partner Central shows for a fund request, in this order. The progress bar shows only the stage names; the diagram adds, under each, the stage value AWS records that maps to it:
The Funding Stage on the funding cards in Suger Account Insights and the Suger Opportunity Quick Panel, and the Stage column of the Funding V2 (Suger) table, use the same names for the five mapped stages, Business approval through Application completion. They show - when AWS has reported no stage, and show any other value exactly as AWS sent it. The table’s Fund Request Stage filter splits cash claims into Cash claim (invoice) and Cash claim (disbursement).
Widget Pin Control
In the Opportunity quick panel, each user can pin up to two sections (Offers, Entitlements, Co-Sell, Associated Contacts, Funding) to a Pinned tab for quick access. By default this is controlled individually per user.
Admins can instead enforce a company-wide set of pinned sections. When enabled, the chosen sections are pinned for every user, and individual users can no longer pin or unpin their own sections. Disabling it again restores each user’s previous personal pins.
How to Configure:
-
Open the Salesforce Suger App and navigate to the Suger tab.
-
In the settings menu, scroll down to the Widget Pin Control section.
-
Turn ON Enable Widget Pin Lock.
-
Select up to two sections to pin company-wide.
-
Click Save.
Spotted something wrong or out of date on this page? Tell us and we'll correct it.