
List & Update Product
List your SaaS products in GCP Marketplace and keep them up to date, fully managed by Suger on your behalf.
Overview
List your products/services via the GCP Producer Portal so your buyers can search and purchase your listings in GCP Marketplace. More details can be found in the official guidance.
Keep the following in mind as you work through the process:
- GCP uses a phased approval process. Each phase must be approved before you can move to the next.
- Changes made after submission restart the review for that phase and may delay your go-live timeline.
- Some steps are completed in the Suger Console, while others must be completed directly in the GCP Producer Portal because of GCP API limitations.
The more complete your information is upfront, the smoother the approval process will be.
Prerequisites
Make sure the following are already in place before creating your listing in Suger.
Google Cloud Marketplace
- Confirm your Producer Portal access — open the Marketplace Producer Portal and check that you can log in. If you don’t have access, you may need to complete the Solution Architecture Review first. This requires submitting the following through a Partner Support ticket:
- An architecture diagram
- A cost estimate from the GCP Pricing Calculator
- Year 1 and Year 3 sales projections
- Set up your payment profile and tax information — open the Payments tab inside the Producer Portal and complete your payment profile and tax forms (W-8 or W-9 depending on your location). See the step-by-step guide.
- Pricing details — finalize your pricing model, plan names, whether your pricing will be public or private, and any usage-based dimensions before you begin.
- At least one product feature — prepare a name and short description for each feature you want shown on your listing page. GCP requires at least one.
- EULA — decide whether you’ll use the Google Cloud Marketplace Standard EULA or your own. If using a custom one, have the public URL ready. GCP only accepts URLs, not uploaded documents.
Suger
You need Admin access to the Suger Console. If you don’t have access yet, ask your company admin to invite you to the organization. See Manage Users and Roles.
Create Your Product Draft in Suger
Before filling out the GCP Producer Portal, create a product draft in the Suger Console first. This draft acts as:
- A reference you can copy from while creating your GCP listing.
- The product record Suger will later link to your GCP Marketplace listing for private offers, entitlement tracking, and revenue reconciliation.
Because of GCP API limitations, listings must still be created manually in the GCP Producer Portal.
Step 1 — Start a new product draft
-
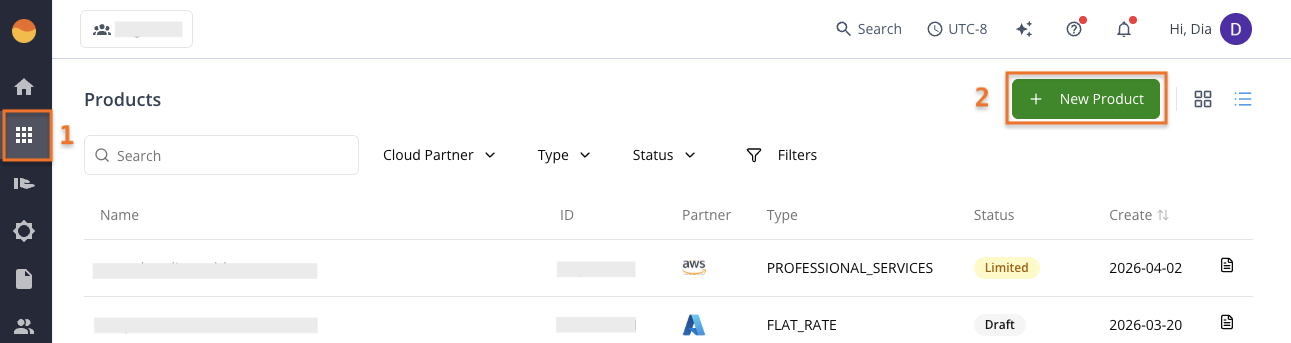
Go to the Product menu in the Suger Console, then click + New Product.
-
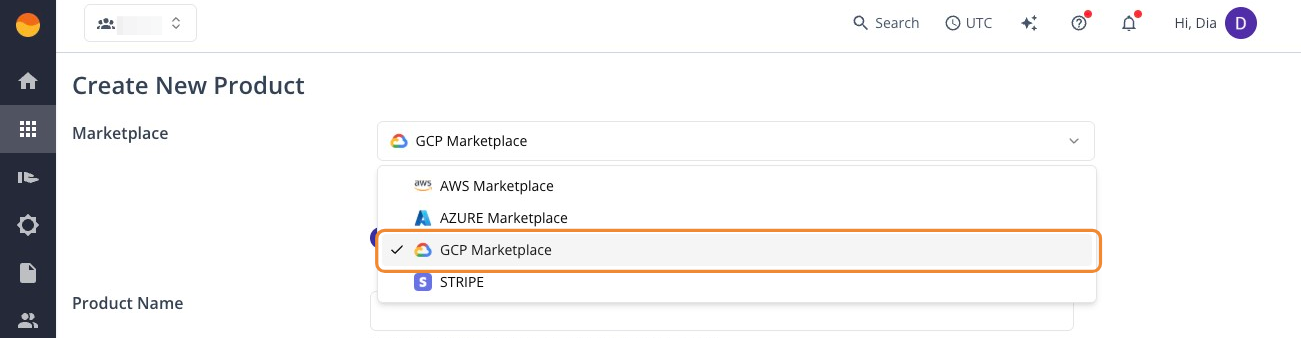
Select GCP Marketplace as the Marketplace.
-
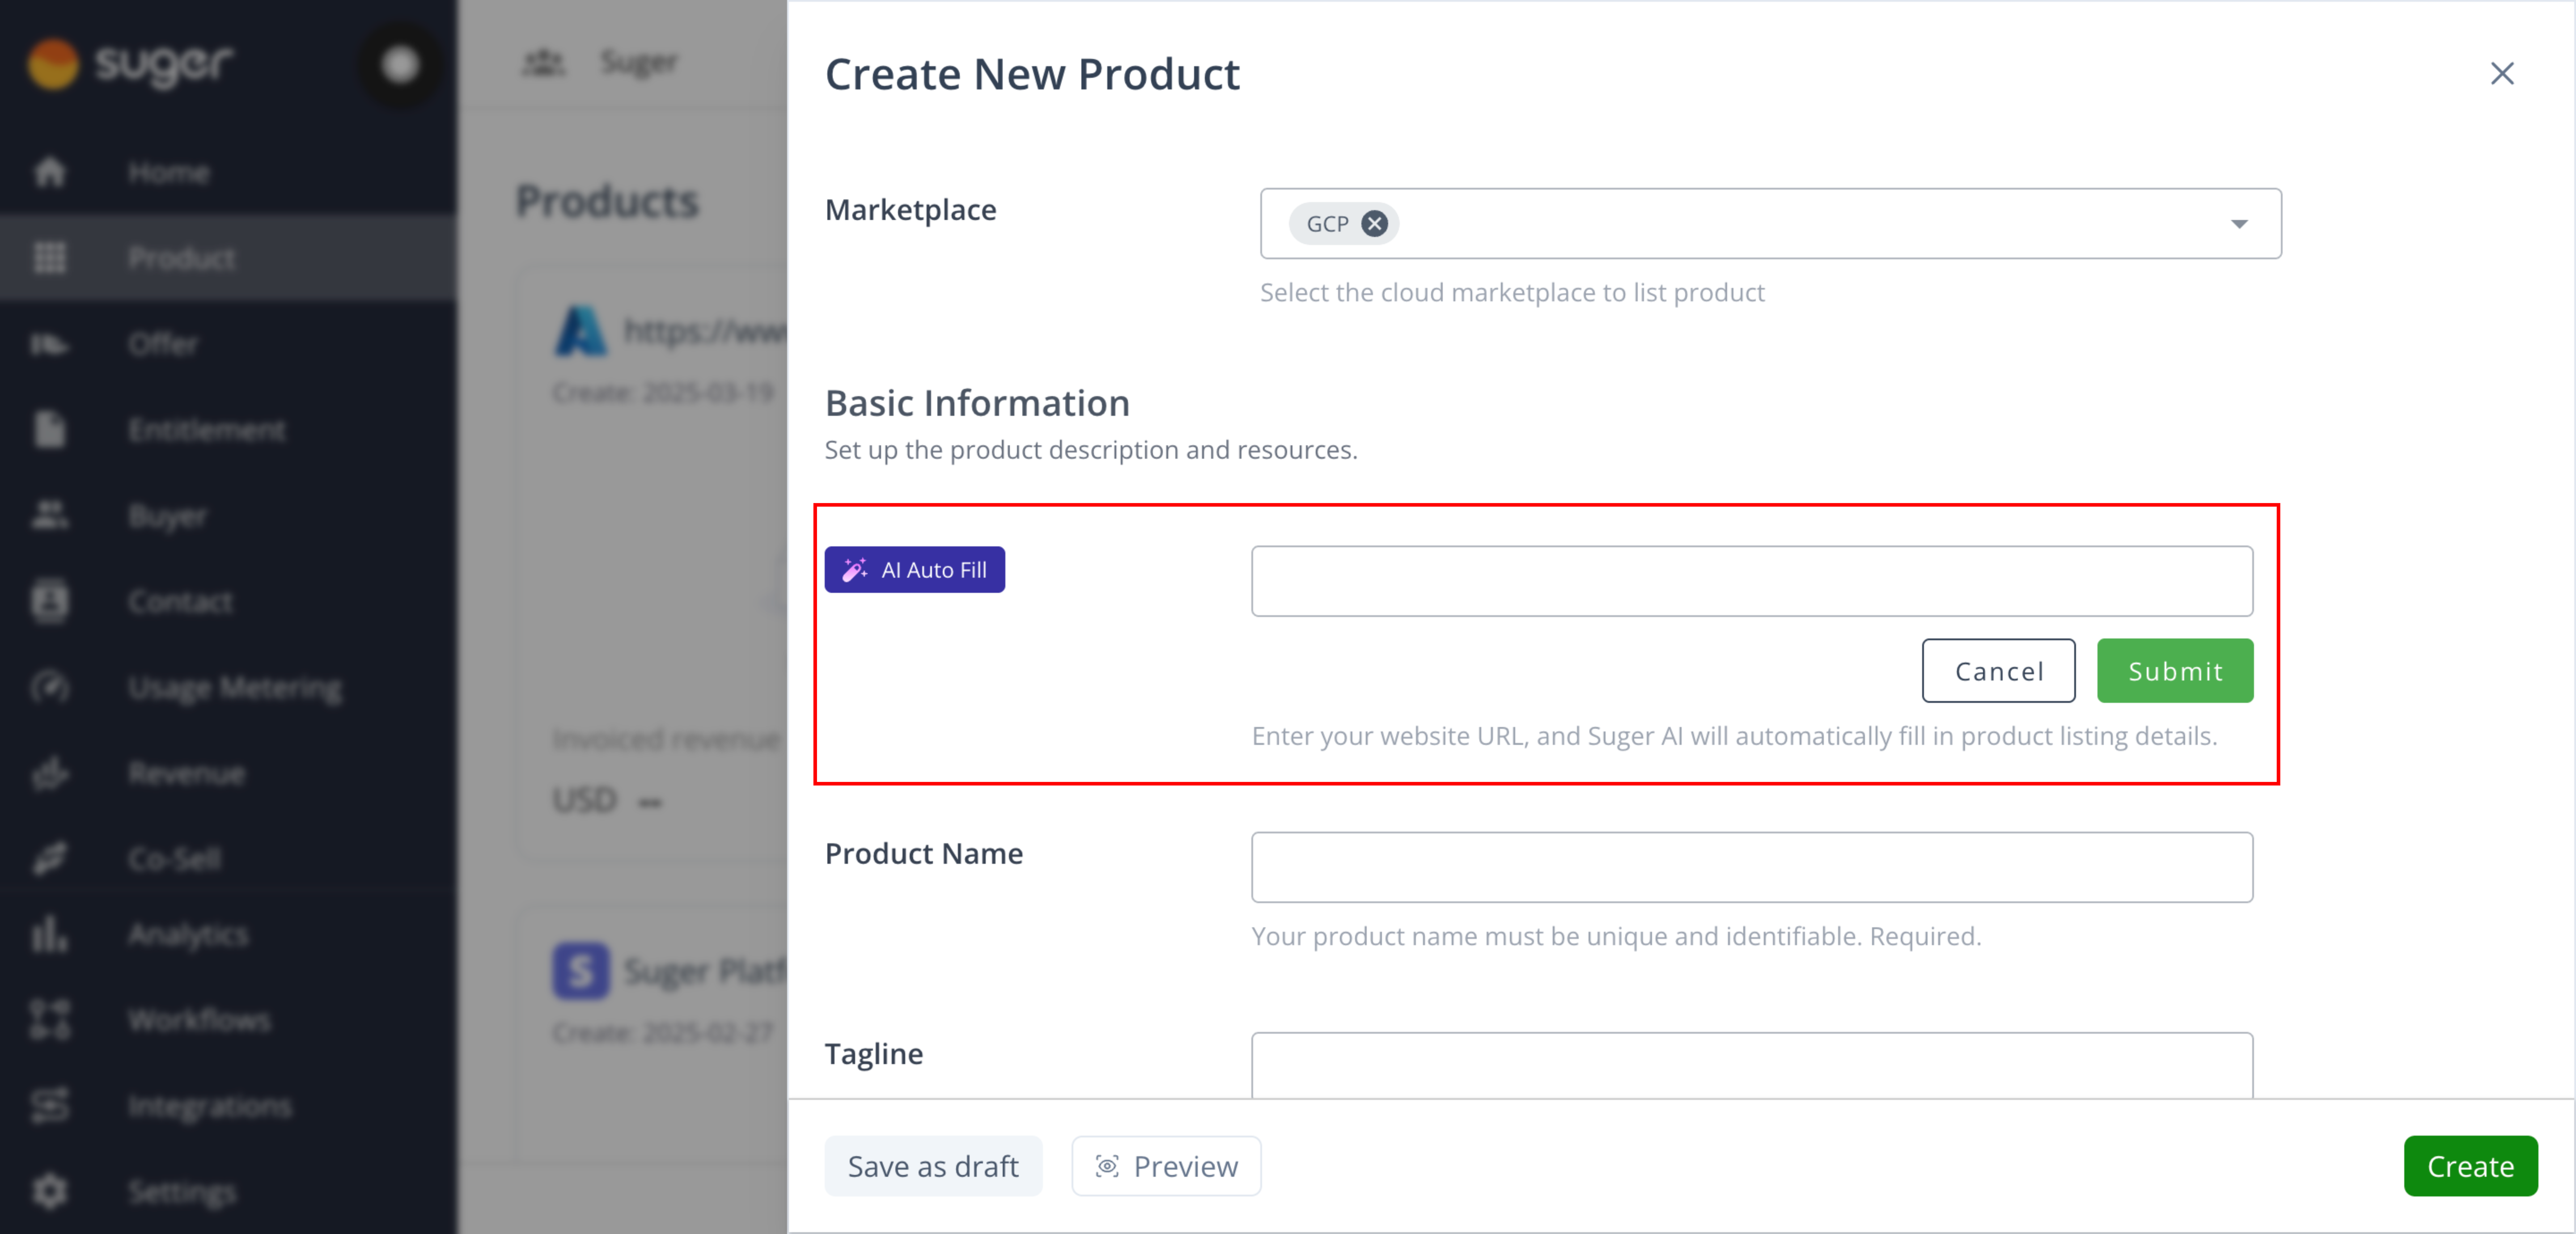
(Optional) Use AI Autofill to help generate initial descriptions, categories, and keywords. Click AI Auto Fill, insert your website, and click Submit.
Step 2 — Fill in the core product details
Complete the product detail fields:
- Product Name — a unique, identifiable name. Required.
- Tagline — a short, catchy snippet shown when buyers browse in Marketplace.
- Product Image — upload your PNG image for the listing. Requirements:
- Transparent background; horizontal or square layout.
- Minimum width and height: 130 × 130px.
- Maximum width and height: 512 × 512px.
- Maximum file size: 256kB.
- Product Overview — a brief summary highlighting your product’s features and capabilities.
- Product Info Link — a URL where users can get more details.
- Product Category — select up to 4 categories that describe your product.
- Documentation — links to guides, videos, FAQs, or other resources.
- Support Description — a brief description of the support you offer.
- Support URL — a link to your support or contact page.
- License — add license agreements; include multiple if needed.
- URL segment
- Search Metadata — a short description for SEO.
- Search Keywords — keywords for Marketplace search. Press Enter after each one.
Step 3 — Review and save
-
Review all entered details for accuracy and completeness.
-
Choose how to finalize:
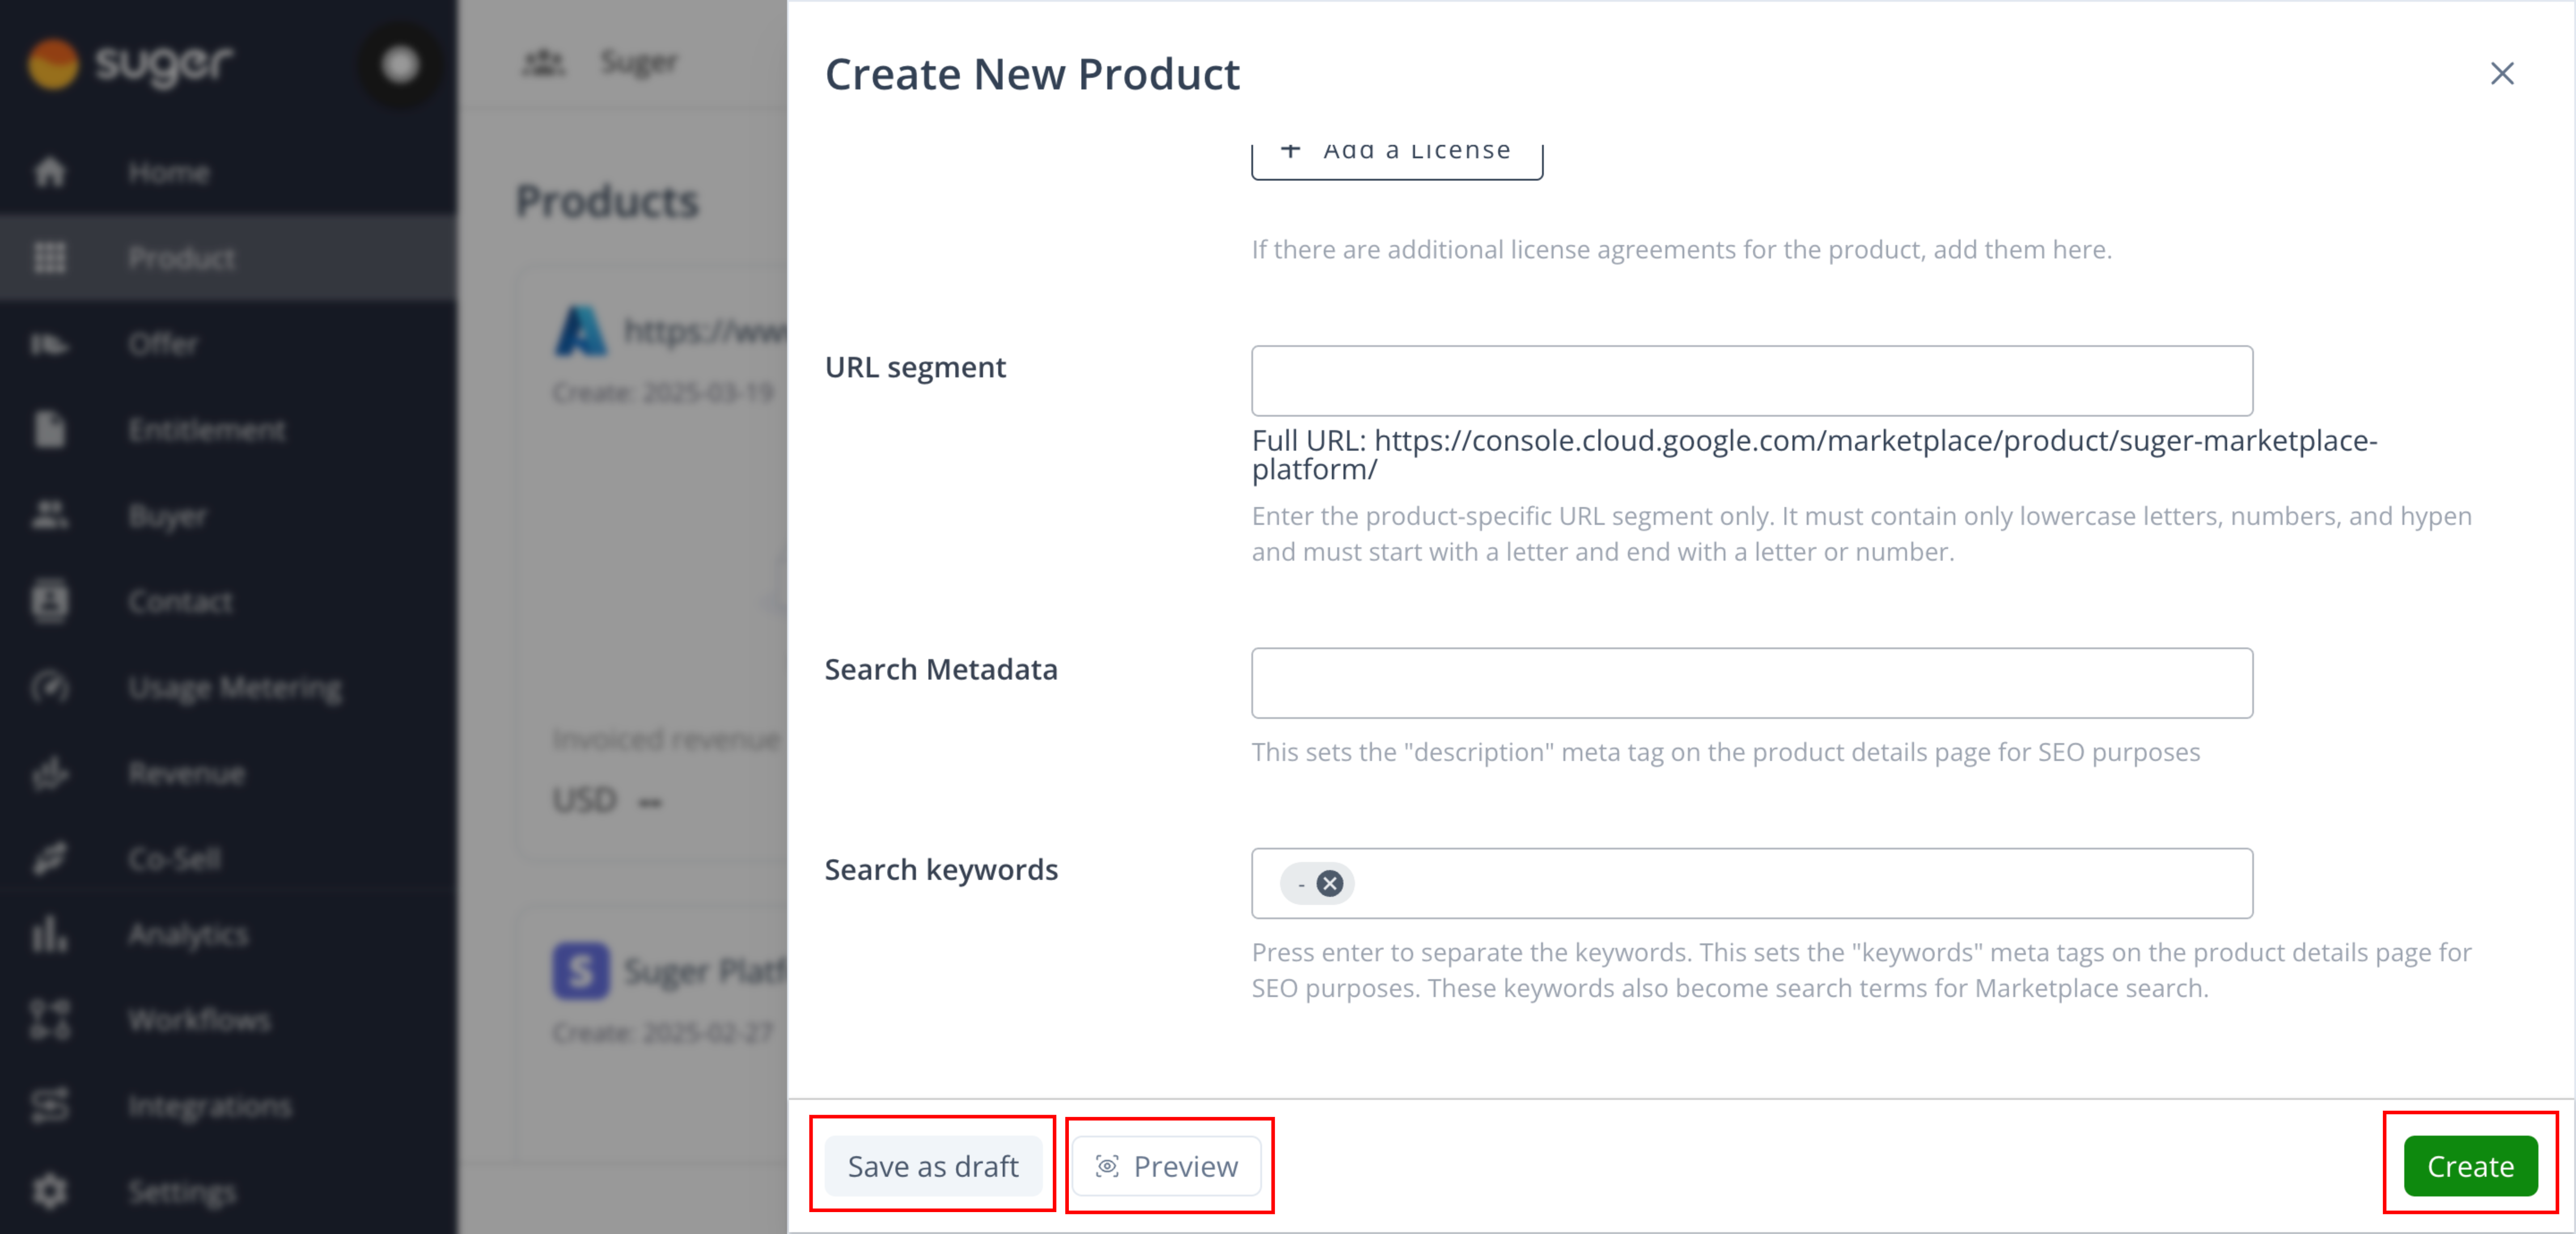
- Save as draft — use this while you’re still filling things out or if your GCP Marketplace integration isn’t yet complete.
- Preview — always check this before publishing to catch issues.
- Create — this finalizes your product.
Complete the GCP Approval Phases
Because of GCP API constraints, you must complete your pricing and technical configurations directly in the GCP Producer Portal instead of Suger. GCP reviews your listing in sequential phases; each one must be approved before the next can begin.
Step 1 — Define product information
- Go to the GCP Producer Portal and define your pricing model (Free, Subscription-based, Usage-based, or Combined).
- Set the public price for each plan and define your features.
Step 2 — Complete technical integration
The technical integration includes two parts: Billing Integration and Frontend Integration.
-
Billing Integration — on the Overview page of your product in the GCP Producer Portal, go to the
Technical integrationsection and clickBILLING INTEGRATION. Link two service accounts with three integrations, as listed below, to enable the Partner Procurement API, Cloud Pub/Sub, and Service Control API.Service Accounts Integrations - cloud-commerce-procurement@system.gserviceaccount.com
- The service account created in step 4 of GCP Integration
- Partner Procurement API integration
- Cloud Pub/Sub integration
- Service control API integration (only for products with usage fees)
-
Frontend Integration — on the Overview page of your product in the GCP Producer Portal, go to the
Technical integrationsection and clickFRONTEND INTEGRATION. Route your Sign-up URL and SSO Login URL through Suger’s endpoints so Suger can correctly capture entitlement IDs during buyer checkout. Enter the fields as shown in the image below, using the values in the table.
Input Field Value Sign up URL https://api.suger.cloud/public/signup/gcp/orgId/{your-suger-org-id}/{your-gcp-product-id}If Enable SSO login SSO URL: https://api.suger.cloud/public/login/gcp/orgId/{your-suger-org-id}/{your-gcp-product-id}If Disable SSO login Login URL: https://api.suger.cloud/public/login/gcp/orgId/{your-suger-org-id}/{your-gcp-product-id} -
Run the commands below in the GCP console terminal to grant the
serviceConsumerandserviceControllerroles tocloud-commerce-procurement@system.gserviceaccount.comfor your product listing.gcloud endpoints services add-iam-policy-binding \ {your-gcp-product-id}.endpoints.{your-gcp-marketplace-project-id}.cloud.goog \ --member='serviceAccount:cloud-commerce-procurement@system.gserviceaccount.com' \ --role='roles/servicemanagement.serviceConsumer'gcloud endpoints services add-iam-policy-binding \ {your-gcp-product-id}.endpoints.{your-gcp-marketplace-project-id}.cloud.goog \ --member='serviceAccount:cloud-commerce-procurement@system.gserviceaccount.com' \ --role='roles/servicemanagement.serviceController'To make the product listing publicly live:
gcloud endpoints services add-iam-policy-binding \
  {your-gcp-product-id}.endpoints.{your-gcp-marketplace-project-id}.cloud.goog \
  --member='allUsers' \
  --role='roles/servicemanagement.serviceConsumer'
Conduct Billing Tests and Publish
Before your product goes live on GCP Marketplace, it must pass a two-part billing test and final approval.
- Run the internal billing test. After finishing technical and frontend integration in the GCP Producer Portal, notify your Suger Customer Success Manager. The Suger team will run the internal test and authorize a test purchase to ensure data flows correctly.
- Run the Google billing test. Once the internal test passes, log into your GCP console and open a support ticket with GCP Marketplace Support. State that the internal test is complete and request a billing account ID for the external Google Billing Test. Provide the ID to your Suger representative, who will run the external test on your behalf.
- Submit a usage record (if applicable). If your product uses usage-based or metered pricing, submit a test usage record to Google before the listing becomes public.
- Make the product live. Run the Google-provided go-live script to officially publish your listing. This step must be executed by your cloud admin, since Suger does not have permission to trigger it in your GCP project.
Once the script runs successfully, your product is live. From this point, you can manage deals, track entitlements, and monitor revenue using the Suger Console.
Set Product Signup URL
Suger automatically syncs with GCP Marketplace and pulls all your listed product info. You can see all your listings on the Suger Console Product page. Select the product listed in the previous steps, click EDIT in the Product Info section, enter your product Signup URL in the Fulfillment URL field, and click SAVE.
Signup URL Redirect
- After purchasing the product, your buyer is directed to
https://api.suger.cloud/public/signup/gcp/orgId/your-suger-org-id/your-gcp-product-idfirst. - Then it is redirected to your product Signup URL with two query parameters,
sugerEntitlementIdandpartner, for examplehttps://your-product-signup-url?sugerEntitlementId=1234abcd&partner=gcp. - Your service needs to collect this
sugerEntitlementIdand save it with the account created by the buyer. - See how the sign-up URL redirect works.
Login URL Redirect
-
After the buyer has purchased the product and completed the signup process via the Signup URL Redirect, they are redirected to the
login URLspecified in the GCP Marketplace integration, as shown below. -
If the
login URLin the GCP Marketplace integration is empty, theFulfillment URLin Product will be redirected to.
Track Consumption with Labels
SaaS products with a hybrid architecture require integration with user labels to understand how the ISV solution impacts Google Cloud infrastructure consumption in the customer’s project. This type of architecture includes a data plane in the customer’s Google Cloud project and a control plane in your Google Cloud project. This data gives Google insights into your product’s impact in terms of its associated customer Google Cloud usage, which Google can use to showcase impact and guide go-to-market (GTM) investments.
Step 1 — Request a consumption tracking label
For each product that you offer through Cloud Marketplace, you must request a label and then integrate it into your product. To request a label, complete the Partner Consumption Tracking Initiative form. After you complete the form, you receive an automated email with the label that you must integrate with your product.
Step 2 — Integrate the tracking label with your SaaS product
There are four methods to add the consumption tracking label to the resources that your product deploys. The detailed guidance for Terraform can be found in the Google Cloud Provider Configuration Reference. For information about adding labels by using the Google Cloud console, Google Cloud CLI, or the REST API, see Create resources with labels.
- Terraform (recommended ✅)
- The Google Cloud console
- Google Cloud CLI
- REST API
Update a Product Listing
What you can change from Suger depends on your listing’s status. In Draft, the listing is private to Suger and you have full access to pricing, plans, and previews before submitting to GCP. Once a listing is Published / Live, most content changes must be made in the GCP Producer Portal — from Suger you can still update the fulfillment URL and create private offers.
| Status | Visibility | What you can edit in Suger |
|---|---|---|
Draft | Private (Suger only) | Full access — pricing, plans, draft, and preview before submitting to GCP |
Published / Live | All GCP buyers | Fulfillment URL and private offers. All other changes must be made in the GCP Producer Portal. |
Update the fulfillment URL
-
Go to the Product menu in the Suger Console.
-
Open the relevant GCP listing.
-
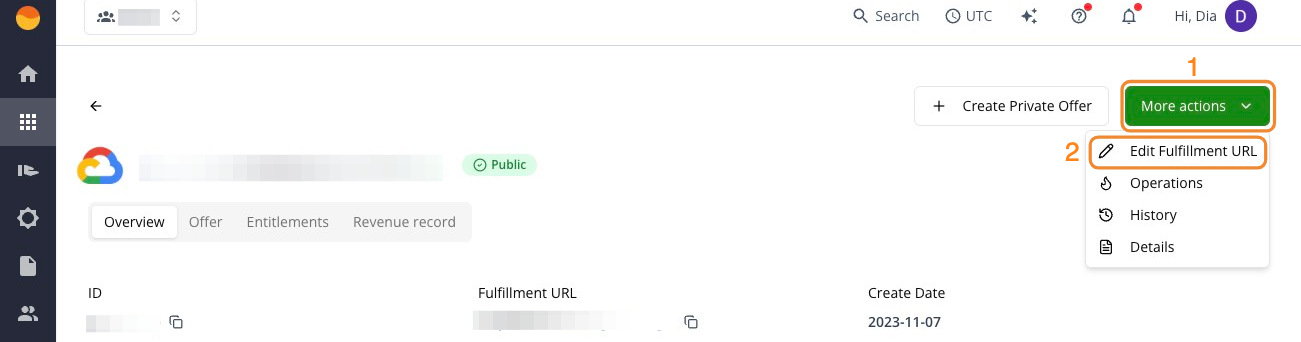
Click More actions in the top right corner, then Edit Fulfillment URL.
-
Make your adjustments and click Save to sync the changes to GCP.
Edit core listing details in the GCP Producer Portal
Editing a live GCP Marketplace listing’s descriptions, pricing, or metadata must currently be done directly in the Google Cloud Producer Portal, not via the Suger Console. Google reviews Product Details, Pricing, and Technical Integration separately, so approvals may happen at different times.
Prerequisites
- Access to the Google Cloud Producer Portal.
- Editor or Owner permissions on the project and listing.
- A published GCP Marketplace listing.
Steps
- Log in to the GCP Producer Portal — navigate to https://console.cloud.google.com/producer-portal using your Google Cloud credentials with the proper permissions.
- Locate the product listing — on the main dashboard, find your product under Your listings and click the listing you want to edit.
- Choose the section to edit — available sections include:
- Overview — product name, logo, descriptions.
- Plans & Pricing — pricing tiers, SKUs, metering setup.
- Technical Setup — URLs, onboarding flow, containers/images.
- Support & Documentation — links to help content, privacy policy, and EULA.
- Make edits and save — click into the specific section, edit the fields as needed, and click Save.
- Submit for review — navigate to the Publish tab and click Submit for Review.
See Publish your SaaS product for full instructions.
Change a listing’s visibility
Visibility changes can’t be made from the Suger Console. They must be done directly in the GCP Producer Portal.
- Publish a listing publicly — see Publish your SaaS product.
- Deprecate or remove a live listing — see Delete a product.
FAQ
How long does the GCP listing approval process take?
The GCP approval process typically takes 1–3 weeks and involves multiple sequential steps: product details review, pricing approval, and technical validation. Unlike AWS, where everything can be submitted at once, GCP requires each stage to be completed before moving to the next. Plan for extended timelines, especially during busy periods.
Why do I have to configure my listing in the GCP Producer Portal instead of the Suger Console?
Due to strict GCP API limitations, third-party platforms like Suger can’t fully automate listing creation, description updates, or pricing modifications. You must complete your core product details natively in the GCP Producer Portal. Once live, Suger acts as your central command center for generating private offers and tracking revenue.
Why does the GCP approval process take multiple steps?
GCP requires a sequential approval workflow where content changes, pricing updates, and technical integration are submitted and approved separately. You can’t bundle these changes together, and each phase can take several days to weeks for Google’s review team to approve.
Why does my listing show different statuses in Suger vs. GCP Marketplace?
GCP’s API provides limited real-time status updates compared to other marketplaces, so there can be sync delays between what Google reports and what appears in Suger. Always check the GCP Producer Portal for the most current listing status, and contact support if you see persistent discrepancies.
I don’t have permission to make changes to our GCP listing. How do I get access?
GCP Marketplace permissions are managed separately from Suger. Ask your GCP admin or IT team to grant you “Marketplace Publisher” permissions in your Google Cloud Console.
How do I update pricing on my GCP listing without affecting existing customers?
Pricing changes must be submitted through the GCP Producer Portal and go through Google’s review process — you can’t make instant pricing updates. Plan for 1-2 weeks of approval time. Existing customer contracts typically remain at their original pricing terms until renewal.
Do I really need to enter a public price if I only want to sell via private offers?
Yes. GCP uses a base-plan structure, meaning every private offer must be built upon an approved public plan. However, you can submit an artificially high placeholder price and hide the plan from public view:
- Placeholder price — enter any number that satisfies GCP’s requirement. This doesn’t have to be the price your enterprise buyers will pay.
- Hidden visibility — you can hide all public pricing on your listing.
- “Talk to Sales” experience — hiding public pricing automatically sets the listing to “Talk to Sales,” giving your team flexibility to negotiate private offers.
Is a Google Cloud Validated Solution designation required to list in the marketplace?
Yes, it is required.
I saw a company on GCP that lists no pricing; they default to “talk to sales.” Is it common for vendors not to disclose pricing?
You can hide all your pricing plans in the public GCP Marketplace listing. Some of our clients have this configuration. It is a very common strategy in the B2B SaaS industry, giving sales more flexibility to negotiate deals. It is relatively straightforward to configure.
Why is the IAM binding setting the principal to “allUsers” instead of a specific group or service account?
Setting it to “allUsers” makes the listing publicly live, so any GCP client can view, purchase, and subscribe to your listing service.
Spotted something wrong or out of date on this page? Tell us and we'll correct it.