
Onboarding
Step-by-step guide to becoming a Google Cloud Marketplace seller and listing your first product.
Overview
Getting listed on the Google Cloud Marketplace involves several technical, legal, and business readiness steps — from creating a GCP Organization to initiating your product listing. This playbook walks you through the full onboarding journey, then summarizes the listing stages and typical approval timelines once Suger takes over most of the technical work.
Prerequisites
Before you begin, make sure the following are in place:
- A registered legal business entity
- A Google Workspace (Gsuite) or Cloud Identity account
- Your product passes a Solution Architecture Validation conducted by Google
- Agreement to Google’s Marketplace Vendor Agreement (MVA)
Onboarding Steps
Step 1: Set up a GCP Organization
- If you haven’t already, create a GCP Organization. Set it up in the Google Cloud Console.
- This requires a Google Workspace (Gsuite) or Cloud Identity account.
Step 2: Register on Partner Hub
- Go to Partner Hub and enroll under the Build engagement model. This is where you initiate the Marketplace Approval process.
- In View tasks, under Partner tasks, click Initiate onboarding your product to Marketplace.
Make sure:
- Your organization is properly registered in Partner Advantage.
- Your Cloud Identity setup is complete.
Partner Hub access is required to:
- Accept the Marketplace Vendor Agreement (MVA)
- Manage onboarding workflows
- Submit product and business details
Step 3: Accept the Marketplace Vendor Agreement (MVA)
After enrolling in Partner Hub, accept the MVA:
- Review the Marketplace Vendor Agreement first.
- Then accept it via the Marketplace Vendor Agreement link in Partner Hub.
Step 4: Initiate Solution Validation
Google requires a Solution Architecture Review to confirm your product is deployable on GCP. Access the Solution Architecture Review form and prepare the following:
Architecture diagram
- Clear and legible, with readable text and GCP icons.
- Shows where resources run: GCP, on-prem, or other clouds.
- Identifies customer vs. partner tenancy.
- Highlights all GCP services used.
Infrastructure estimate
- Use the GCP Pricing Calculator.
- Match the estimate to your diagram.
- Provide both Single-Tenant and Multi-Tenant deployment models, if applicable.
Sales projections
- Estimate Gross Transaction Value (GTV) for Year 1 and Year 3.
Step 5: Submit for Solution Validation
- Open a support ticket via Partner Support to submit your architecture materials for review.
- Google engineers will validate your design and deployment model.
- A GCP engineer will reach out via email under the ticket you opened. Keep that ticket open and follow up regularly so the GCP team can review your architecture quickly.
Step 6: Enable the Google Marketplace Producer Portal
Create a GCP Project named companyname-public and grant the following GCP service accounts the roles listed for your GCP Project and services:
| Service account | Roles |
|---|---|
cloud-commerce-marketplace-onboarding@twosync-src.google.com | Project Editor, Service Management Administrator |
cloud-commerce-producer@system.gserviceaccount.com | Service Config Editor |
cloud-commerce-saastester@system.gserviceaccount.com | Commerce Producer Viewer |
cloud-commerce-procurement@system.gserviceaccount.com | Service Controller, Service Usage Admin, Service Management Administrator |
Then submit the Marketplace Producer Portal Enablement Form.
Once approved, you’ll gain access to the Producer Portal, where you can:
- Create your product listing
- Manage versions, billing, and pricing
- View performance metrics
Creating the GCP Project
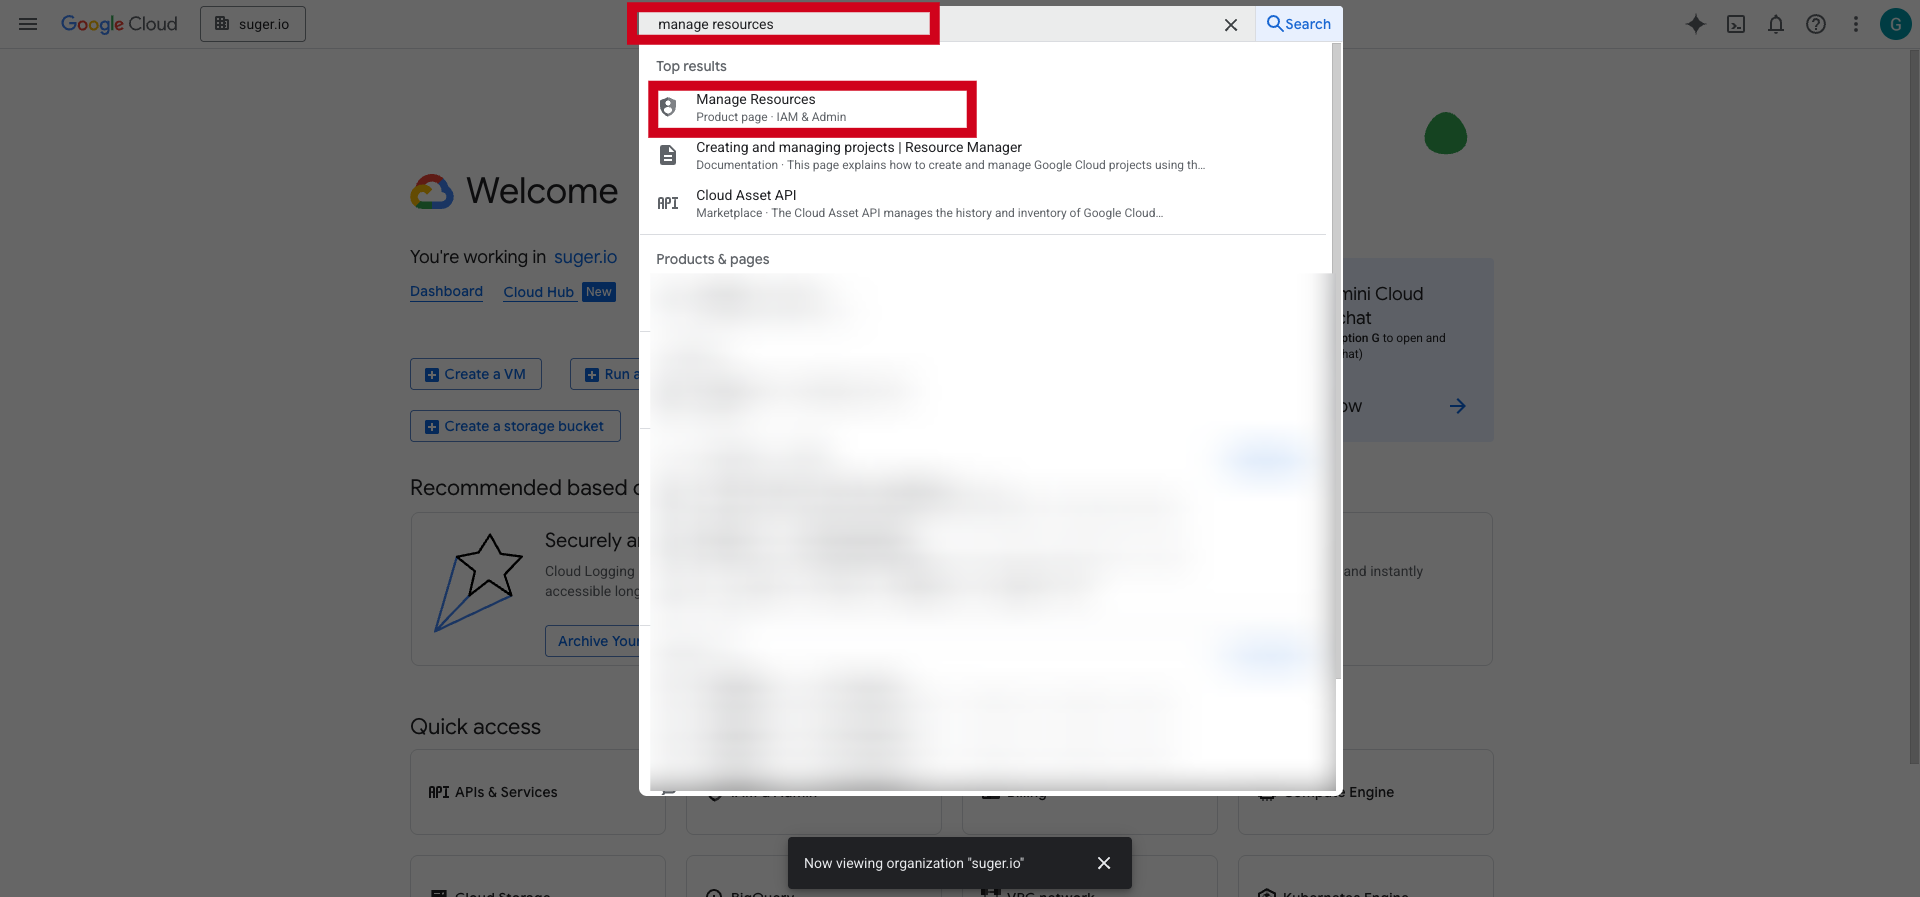
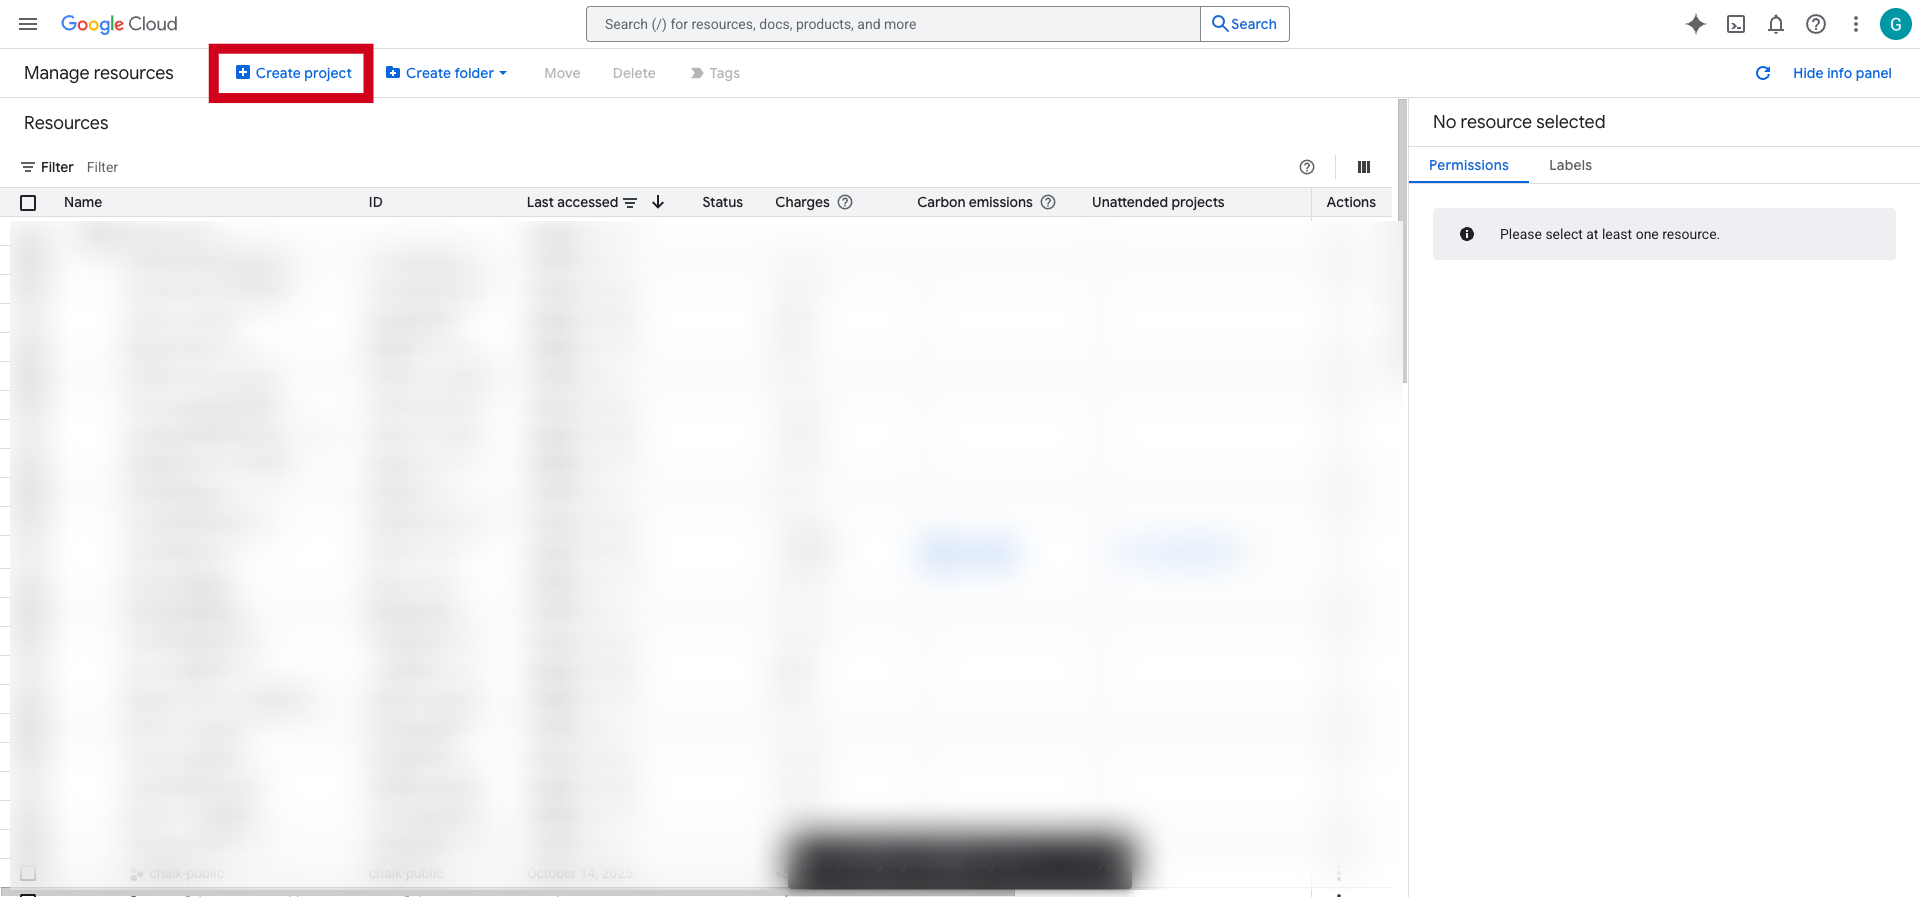
To create a new project in the Google Cloud Console, you need the resourcemanager.projects.create permission, typically included in the Project Creator role. In the console, go to Manage Resources, select your organization (if applicable), and click Create Project. For more detail, see Creating and managing projects.
Enter a project name, choose a billing account, and select a parent organization or folder in the Location field — or choose “No organization” to create it at the top level. Once all details are filled in, click Create to finalize your project.
Listing Stages and Approval Timelines
Once onboarding is complete, Suger simplifies listing your SaaS product in the GCP Marketplace by handling most of the technical and administrative steps. There are four key stages:
- Product Listing Details
- Pricing Model Configuration
- Technical Integration
- Billing Integration
Estimated total time to go live: ~3–4 weeks
1. Product Listing Details
Submit your product name, logo, description, support and sales contact info, URLs, and keywords in the GCP Producer Portal.
Approval time: 3–4 business days
2. Pricing Model
Choose your pricing model (flat-rate, usage-based, etc.) and define metrics. To offer a free trial, submit this trial intake form.
Approval time: 3–4 business days
3. Technical Integration
Complete both billing and frontend integration steps:
- Link service accounts and enable:
- Partner Procurement API
- Cloud Pub/Sub
- (Optional) Service Control API
- Set up SSO or login URLs using Suger’s endpoints.
- Grant required IAM roles using
gcloudcommands.
Approval time: ~1 week
4. Billing Integration
Google reviews your service account setup, entitlement flow, and metering requirements.
Approval time: 1–2 weeks
Product activation in the Suger Console
Once approved, Suger syncs the listing to the platform and the listing status becomes Public.
Consumption tracking (optional)
If your solution includes a data plane in the customer’s project, apply for a Consumption Label via the Partner Tracking Initiative form, and implement tracking via Terraform, CLI, or API.
Summary timeline
| Step | Estimated approval time |
|---|---|
| Listing Details | 3–4 business days |
| Pricing Review | 3–4 business days |
| Technical Integration | ~1 week |
| Billing Integration | 1–2 weeks |