
Private Offer Best Practices
Follow these best practices to create and manage AWS Marketplace private offers through the Suger Console and the Suger Salesforce App so your offers are accurate, timely, and aligned with AWS Marketplace requirements.
Overview
Private offers let you sell to a specific buyer at negotiated terms. Before you create one, keep these general considerations in mind:
- Eligibility — Only SaaS, Professional Services, AMI, and Container products with public listings can be used to create private offers.
- Offer visibility — Private offers are not visible in the public AWS Marketplace; only the targeted buyer sees them.
- Start and end dates — Offers can be future-dated. AWS only triggers entitlement events on the offer start date, which may delay sync visibility.
- Acceptance timeline — Buyers typically have 90 days to accept a private offer. As the seller, you set the expiry (acceptance) date when creating the offer.
For step-by-step instructions on each offer type, see Create Private Offer.
Required Information
Before you create a private offer in Suger, collect or define the following:
- Buyer ID (AWS Account ID) — Always request the 12-digit AWS Account ID directly from the buyer.
- Start and end dates — Be clear with the buyer about when the offer becomes active.
- Pricing details — Confirm all pricing terms before submission, including upfront fees, recurring charges, and usage dimensions (if applicable).
Best Practices for Creating Private Offers
- Double-check the Buyer ID. Mistyped Buyer IDs cause offer failures. Copy-paste directly from a confirmed source.
- Use clear offer naming. A standardized naming convention helps your team track offers easily.
- Add notification contacts. Always include your internal contact and the buyer’s email for visibility and acceptance tracking.
- Use the comments field. Include internal notes or specific buyer context for internal visibility.
- Create from your CRM. If you have a CRM integration, create most offers from a CRM Opportunity or Deal. This gives sellers in your company visibility into acceptance status, dates, expiration, and more.
Field Reference and Best Practices
Use this table as a reference for each field when creating a private offer.
| Field | Description | Best practices |
|---|---|---|
| Offer Name | The name of the offer that is visible to the buyer. | Use a clear, consistent format such as CustomerName - ProductName - MM/YYYY. |
| Buyer(s) | AWS Account ID(s) of the customer. Supports multiple IDs. | Always request the 12-digit AWS Account ID directly from the buyer and verify accuracy to avoid offer failures. |
| Contact(s) | Internal and customer contacts notified when the offer is sent. | Include the customer’s name and email. Optionally add your internal email to receive a copy of the notification. |
| Expiry Date | Date by which the buyer must accept the offer before it expires. | Align with your internal deal timeline and communicate the deadline clearly to the buyer. |
| Start Date | When the offer becomes active. Defaults to the buyer’s acceptance date unless a future date is set. | Only visible if you enable Future Start Date. If enabled, it must be after the offer’s expiry date — for example, if the expiry date is June 30, 2025, the future start date must be July 1, 2025 or later. |
| End Date | When the offer ends. Used to calculate term length and enforce usage cutoffs. | Only visible if you enable Future Start Date. Typically set to 1 year after the start date unless contract terms specify otherwise. |
| Commit Term Length | Duration during which commits can be used by the buyer. | Disabled if you enable Future Start Date (replaced by the Start Date and End Date fields). Make sure it matches the expected usage or contract period (e.g., 12 months). |
| Payment Installments | Splits payment into multiple scheduled installments. | Ensure payment dates are in the future and match your billing plan — AWS doesn’t allow back-dated installments, and installments must be listed in chronological order. Even for one-time, upfront payments, enable Payment Installments with a single installment. This is especially important when the offer includes multiple SKUs, as it ensures consistent processing and clearer tracking across all line items. |
| Commits (SKUs) | Defines the services and amounts the customer is purchasing. | Add the relevant SKU(s), set the quantity, and confirm all pricing before submitting. Define a generic SKU you can reuse across most deals — suggested format is Dimension Name {{Your Company Name}} Private Offer and Description Access to {{Your Company Name}} Platform. This helps avoid reaching the AWS limit of 72 SKUs; once hit, you can’t create additional SKUs without removing or consolidating existing ones. |
| Usage Dimensions & Unit Price | Pricing for metered usage (optional). | Set appropriate prices if using usage-based billing. |
| EULA | End User License Agreement attached to the offer. | Use AWS’s default EULA or upload your own. If uploading, ensure it’s a signed PDF, and optionally merge it with the default contract. |
| Renewal | Indicates whether the offer renews an existing subscription. | Toggle Migration Renewal for non-Marketplace to Marketplace conversions. Use Direct Renewal if renewing a prior AWS Marketplace deal. |
| Internal Notes | Notes visible only to your internal team. Not shown to the buyer. | Use to track context, approvals, or internal comments to help with team collaboration. |
After Offer Creation
- Use the Suger Console or your CRM to track the status of the private offer. Share the offer link with teammates who need to follow it.
- Expect a delay in sync updates for offers with a future start date. While Suger automatically tracks acceptances using triggering events from AWS, AWS does not report the acceptance of a future-dated private offer until the offer’s actual start date. On that day, Suger retrieves the acceptance status through scheduled syncs, which may take up to 3 hours. Offers without a future start date typically trigger an immediate update upon acceptance.
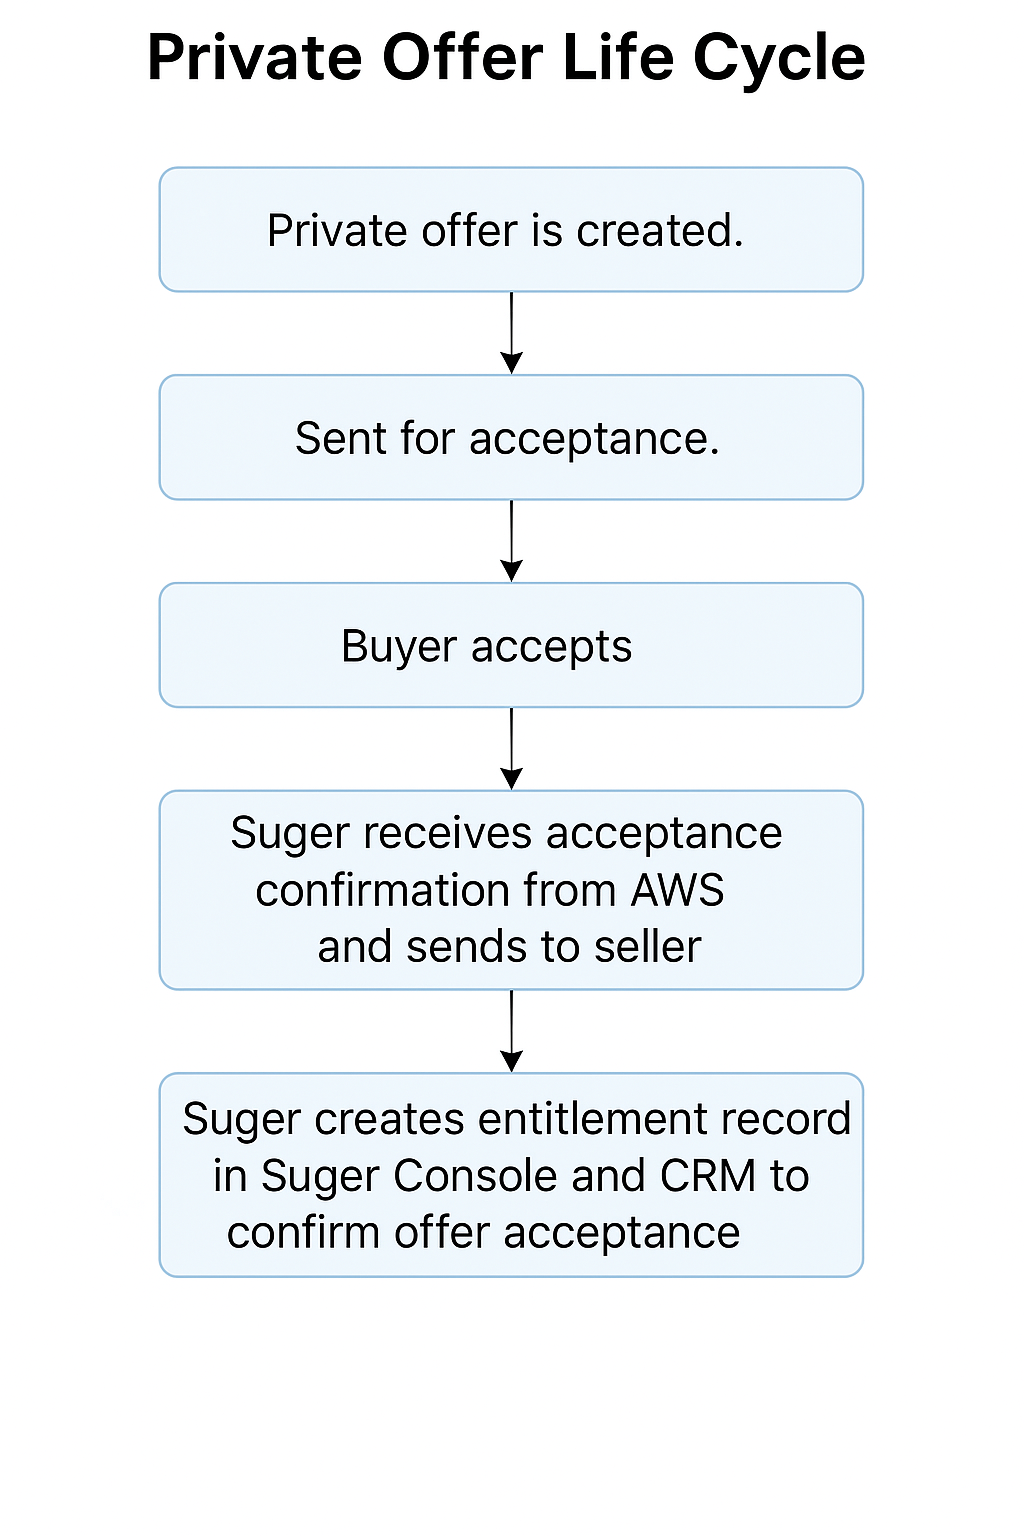
Private Offer Lifecycle
- Offer creation. A private offer is created in the Suger Console or via the Salesforce App, with all required details including buyer ID, pricing, and terms.
- Offer sent to buyer. The offer is automatically pushed to AWS Marketplace and made available to the buyer for review and acceptance.
- Buyer accepts offer. The buyer logs in to their AWS Marketplace account and accepts the private offer.
- Suger syncs acceptance status. Upon acceptance, AWS triggers an event or exposes the accepted status (depending on the start date). Suger captures this update and notifies the seller.
- Entitlement created in Suger. Suger creates a new Entitlement record in both the Suger Console and your CRM, confirming the buyer now has access under the accepted offer.
For channel partner (reseller) deals, see CPPO for the equivalent best practices and lifecycle.