

OAuth 2.0
Connect any external service that speaks the OAuth 2.0 standard — such as Salesforce, HubSpot, or a compliant provider of your own — to Fours with the Generic OAuth 2.0 Integration.
Overview
The Generic OAuth 2.0 Integration lets you connect Fours to any external service that uses the OAuth 2.0 security standard, without needing custom development for each provider. You supply the API credentials from your service provider, and Fours handles the connection, token storage, and renewal.
| Term | Meaning for you |
|---|---|
| OAuth 2.0 | A security protocol that lets Fours access data in your service (the provider) without storing your user credentials. |
| Generic Integration | The ability to connect Fours to any compliant service provider, without provider-specific code. |
Why use Generic OAuth 2.0?
- Secure vaulting: Your client secrets and access tokens are encrypted and isolated in an AWS Secrets Manager vault, not left sitting in a database.
- Self-healing connectivity: Fours monitors each token’s time-to-live. When a token is within 5 minutes of expiring, it refreshes silently in the background — no manual intervention.
- Versatile flow support: From server-to-server data syncing to user-authorized workflows, Fours supports every standard grant type.
Choose Your Grant Type
Before you start, determine which OAuth 2.0 flow your service provider uses. The configuration form adapts to the grant type you select.
| Grant Type | Best for | Key requirements |
|---|---|---|
| Client Credentials | Server-to-server sync, where no user login is required. | Client ID, Client Secret, Token URL. |
| Authorization Code | When a specific user must manually “Allow” access. | Redirect URI, Authorization URL, Client ID/Secret. |
| Refresh Token | Maintaining long-term access via an existing token. | Existing Refresh Token, Client ID/Secret. |
Client Credentials
- Usage: Ideal for server-to-server integrations with no direct interaction from the provider’s end user.
- Additional required fields: None beyond the basic fields.
Authorization Code
- Usage: Required when the integration needs explicit authorization from an end user to access data (for example, Sign in with Google or Azure AD).
- Additional required fields:
- Authorization URL: Where the user is redirected to grant permission.
- Redirect URI: The Fours address where the provider sends the code back after authorization.
- Scope: The specific permissions Fours should have (for example,
read,write,api_access).
Refresh Token
- Usage: Lets Fours request a new access token using a long-lived refresh token, minimizing re-authorization.
- Additional required fields: Refresh Token (obtained from a previous authorization).
Create Integration
You configure the integration in the Fours Console. Obtain the API values from the developer panel or API documentation of your service provider.
Start Setup
- In the Fours Console, go to Settings > Integrations.
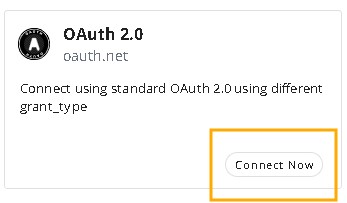
- Click Connect Now on the OAuth 2.0 Integration card.
Enter Provider Details
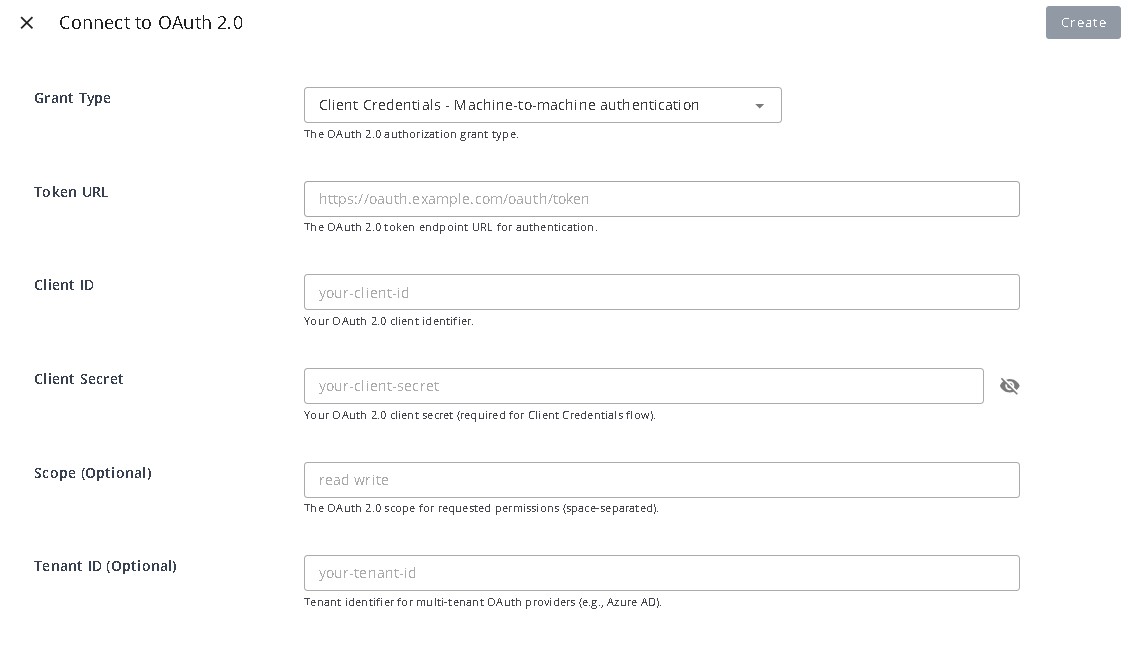
Fill in the configuration fields. The form shows only the fields relevant to your selected grant type.
| Field | Description |
|---|---|
| Label | A friendly name to identify this integration (for example, “Salesforce Production Integration”). |
| Grant Type | The OAuth 2.0 flow you want to use (Client Credentials, Authorization Code, or Refresh Token). |
| API Base URL | The root address for accessing the provider’s resources after obtaining the token. |
| Token URL | The endpoint where Fours requests its tokens. |
| Client ID | The public identifier provided by your service provider. |
| Client Secret | The secret key provided by your provider. Keep this confidential. |
| Scope | (Optional) The specific permissions Fours should have (for example, read, write, offline_access). |
| Tenant ID | (Optional) Unique identifier that represents a customer. |
Whitelist the Callback URL
If you use the Authorization Code flow, whitelist Fours’ Redirect URI in your service provider’s settings before saving:
- Redirect URI:
https://api.suger.cloud/public/integration/generic_oauth/callback
Security and Maintenance
This section describes what happens behind the scenes to keep your connection secure and functional.
Initial Acquisition and Validation
When you click Save, Fours performs three actions:
- Validation: It immediately fetches a test access token from your provider using the credentials you supplied. If the credentials are wrong, you’ll know instantly.
- Secure storage: On successful validation, the Client Secret and initial tokens (
access_token,refresh_token) are stored in the AWS Secrets Manager vault, not the main database. - Registration: The non-confidential configuration (Token URL, Client ID, and a pointer to the secure vault) is recorded in the database.
Automatic Token Maintenance
After the integration is saved, Fours keeps the connection active on every request:
- Expiration check: Before using the access token, Fours checks whether it is close to expiring (with a 5-minute safety buffer).
- Renewal: If the token is near or past expiration and a refresh token is available, Fours requests a new token pair from your provider.
- Secure update: The new access and refresh tokens replace the old ones in the secure vault.
- Usage: The valid access token is provided to whatever service needs to communicate with your provider.
This automation ensures you never have to worry about expired tokens.
Delete Integration
Click the Trash icon to remove the integration. Deleting permanently wipes all secrets, access tokens, and refresh tokens from both the Fours database and the secure AWS vault.
Spotted something wrong or out of date on this page? Tell us and we'll correct it.