# AWS ACE Migration S3 to Partner Central API
## Overview
This guide explains how to migrate your existing **S3-based AWS APN integration** to the **Partner Central API (ACE API)**.
The migration ensures your integration uses the latest API-based method, providing improved stability, real-time updates, and full support for AWS ACE features.
The migration process includes:
- Updating IAM role permissions using AWS CloudFormation.
- Upgrading the integration in the Suger Console.
- Verifying the updated integration.
- Running inbound and outbound synchronization to complete the migration.
## 1. Prerequisites
Before starting the migration, make sure you have:
- An **AWS Seller Account** linked to your APN account.
- Access to **AWS Partner Central** with an Alliance Lead or Cloud Admin role.
- An **AWS IAM administrator** who can configure roles via CloudFormation.
- An **existing IAM role** used for your current S3-based integration.
:::warning
If you don’t have an IAM administrator available, please engage your internal AWS admin team before proceeding.
:::
## 2. Migration Steps
### Step 1: Open Partner Central API Configuration via Console UI
1. In the **Suger Console**, go to **[Integrations](https://console.suger.io/settings?tab=integrations) → AWS ACE**.
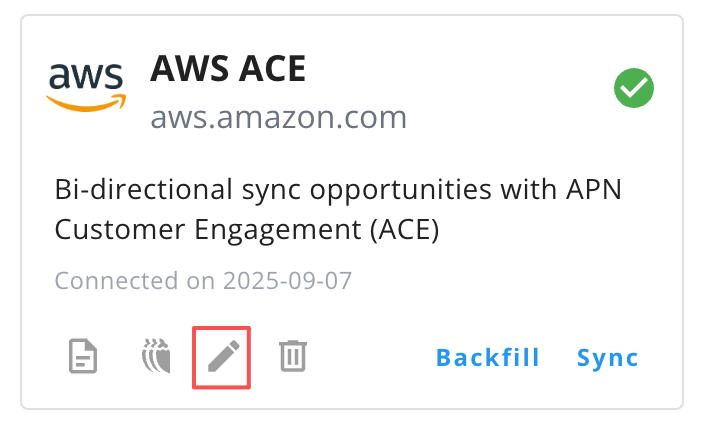
2. Click **Edit** on your existing AWS ACE integration.
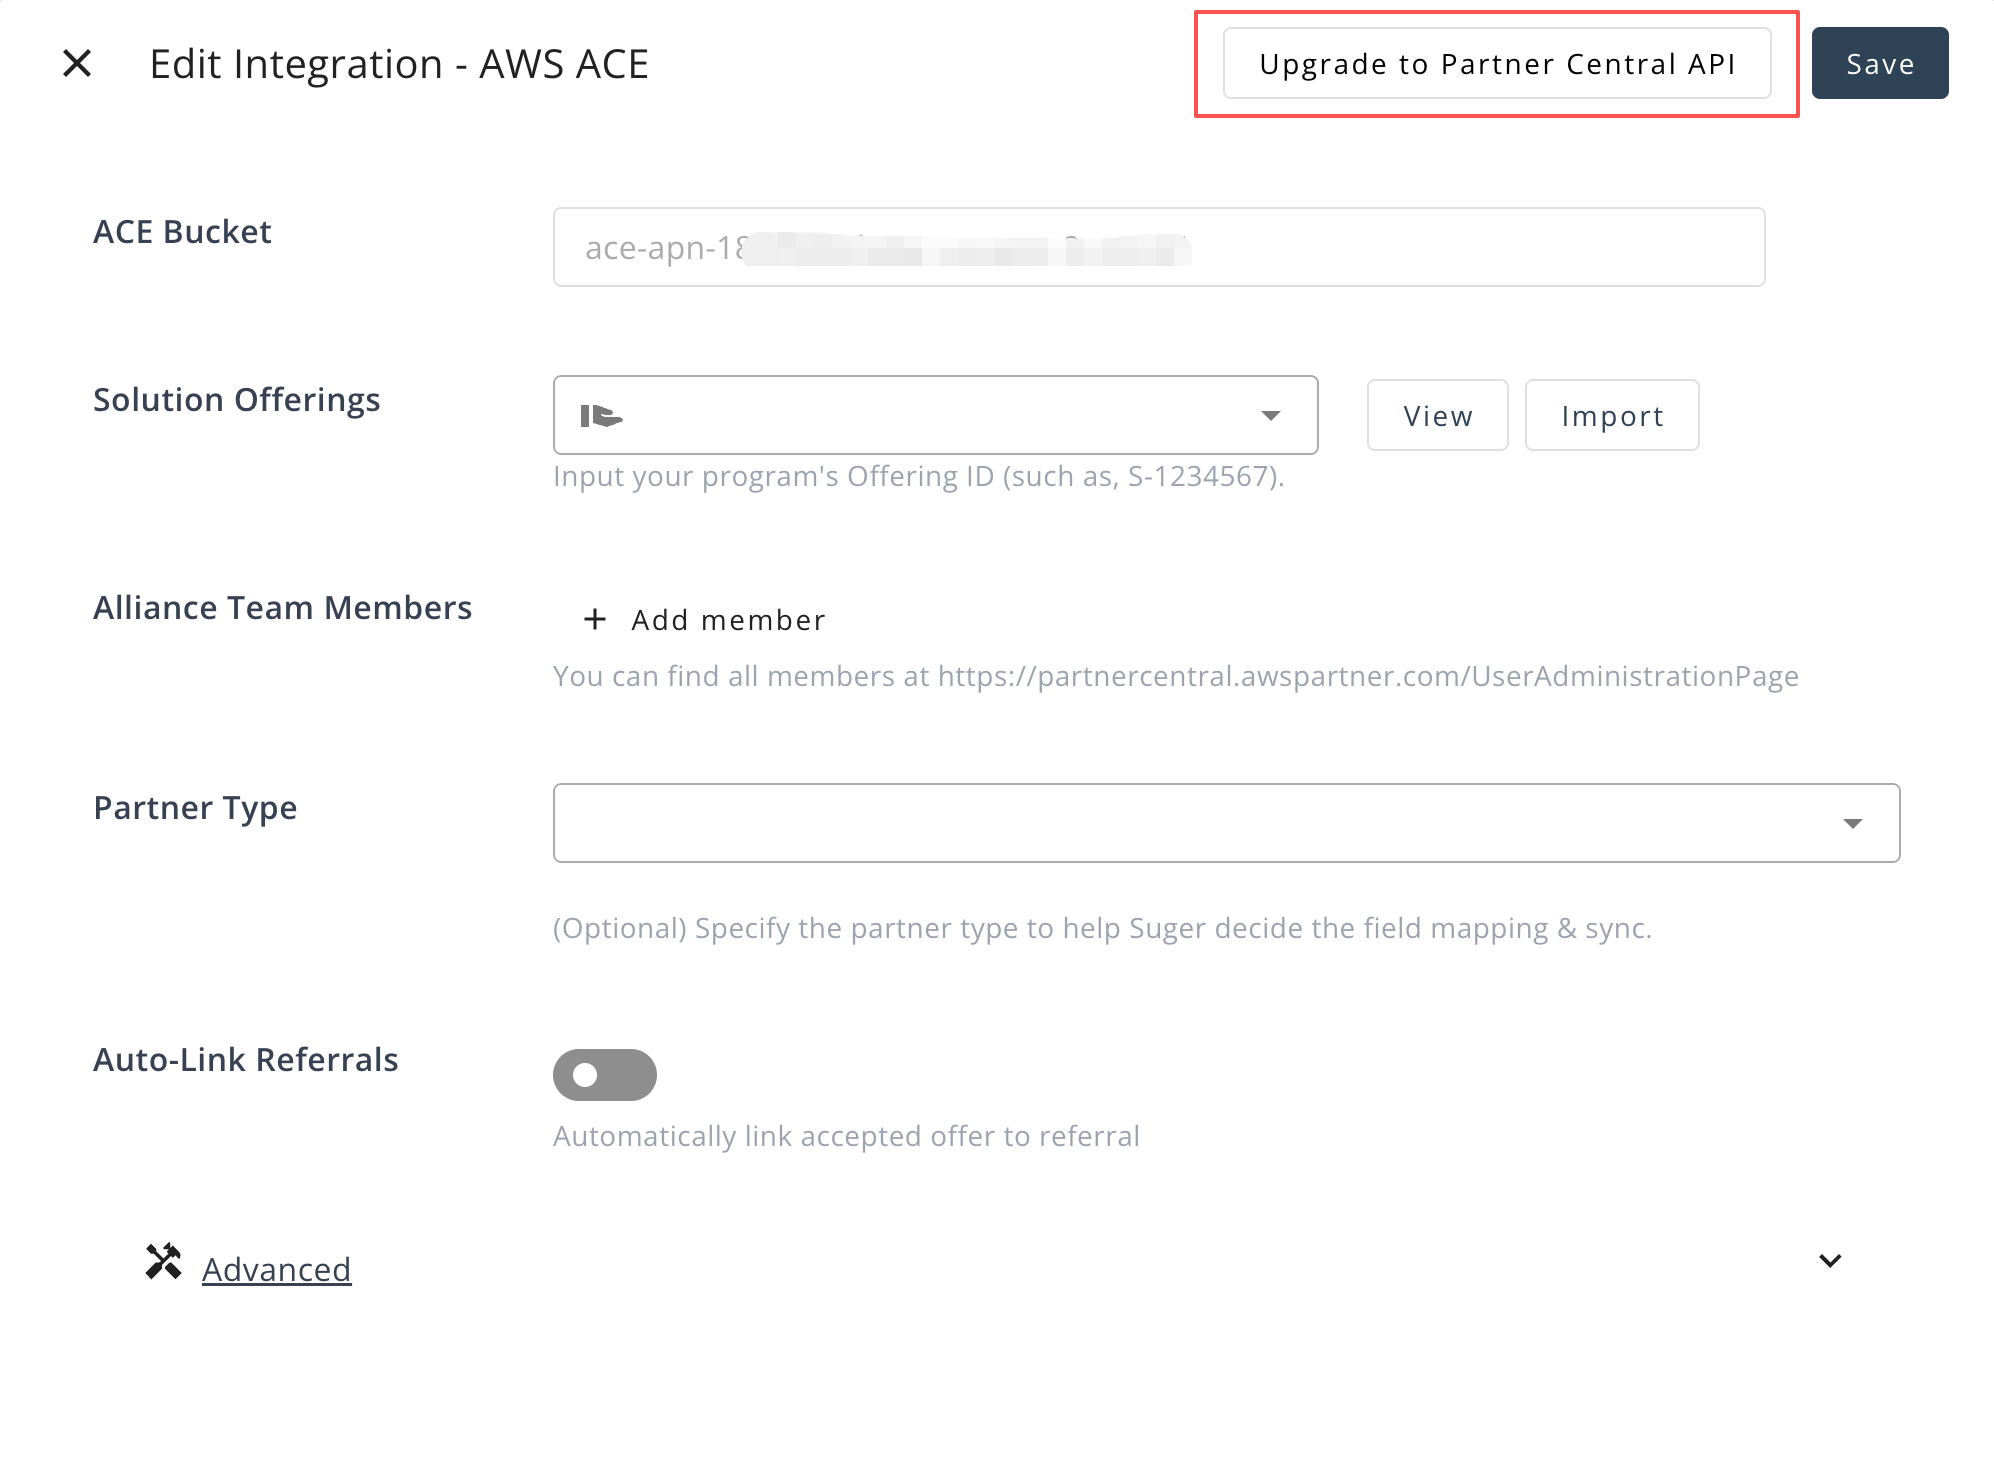
>  3. Click **Upgrade to Partner Central API** in the top-right corner.
>
3. Click **Upgrade to Partner Central API** in the top-right corner.
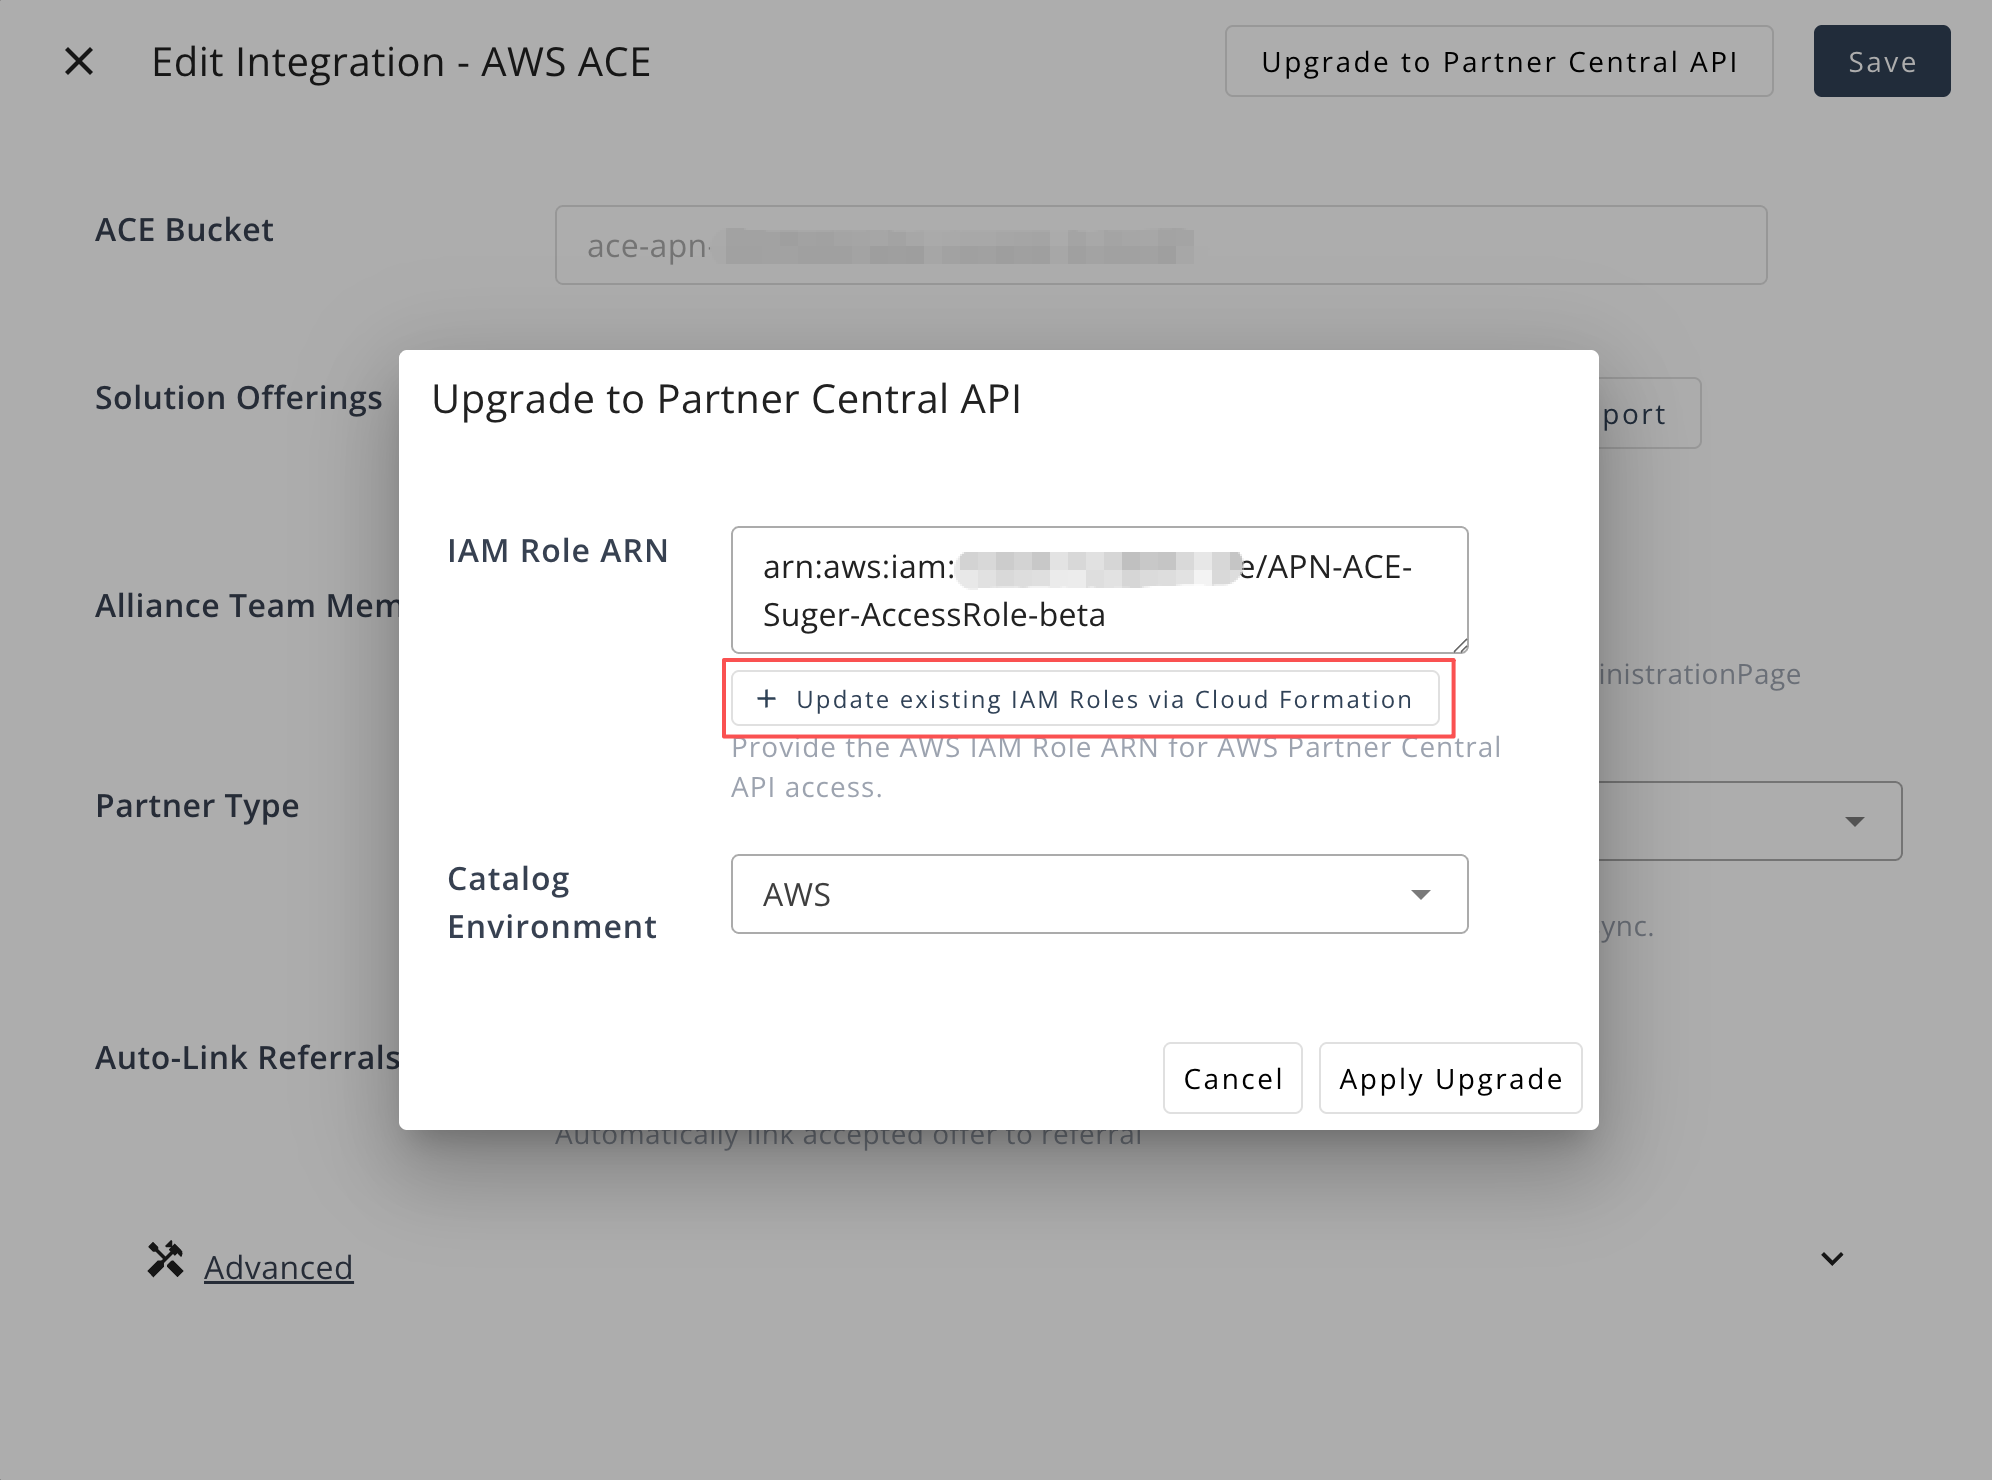
>  4. Click **Update Existing IAM Roles via CloudFormation**.
This will redirect you to the AWS **CloudFormation Console**.
>
4. Click **Update Existing IAM Roles via CloudFormation**.
This will redirect you to the AWS **CloudFormation Console**.
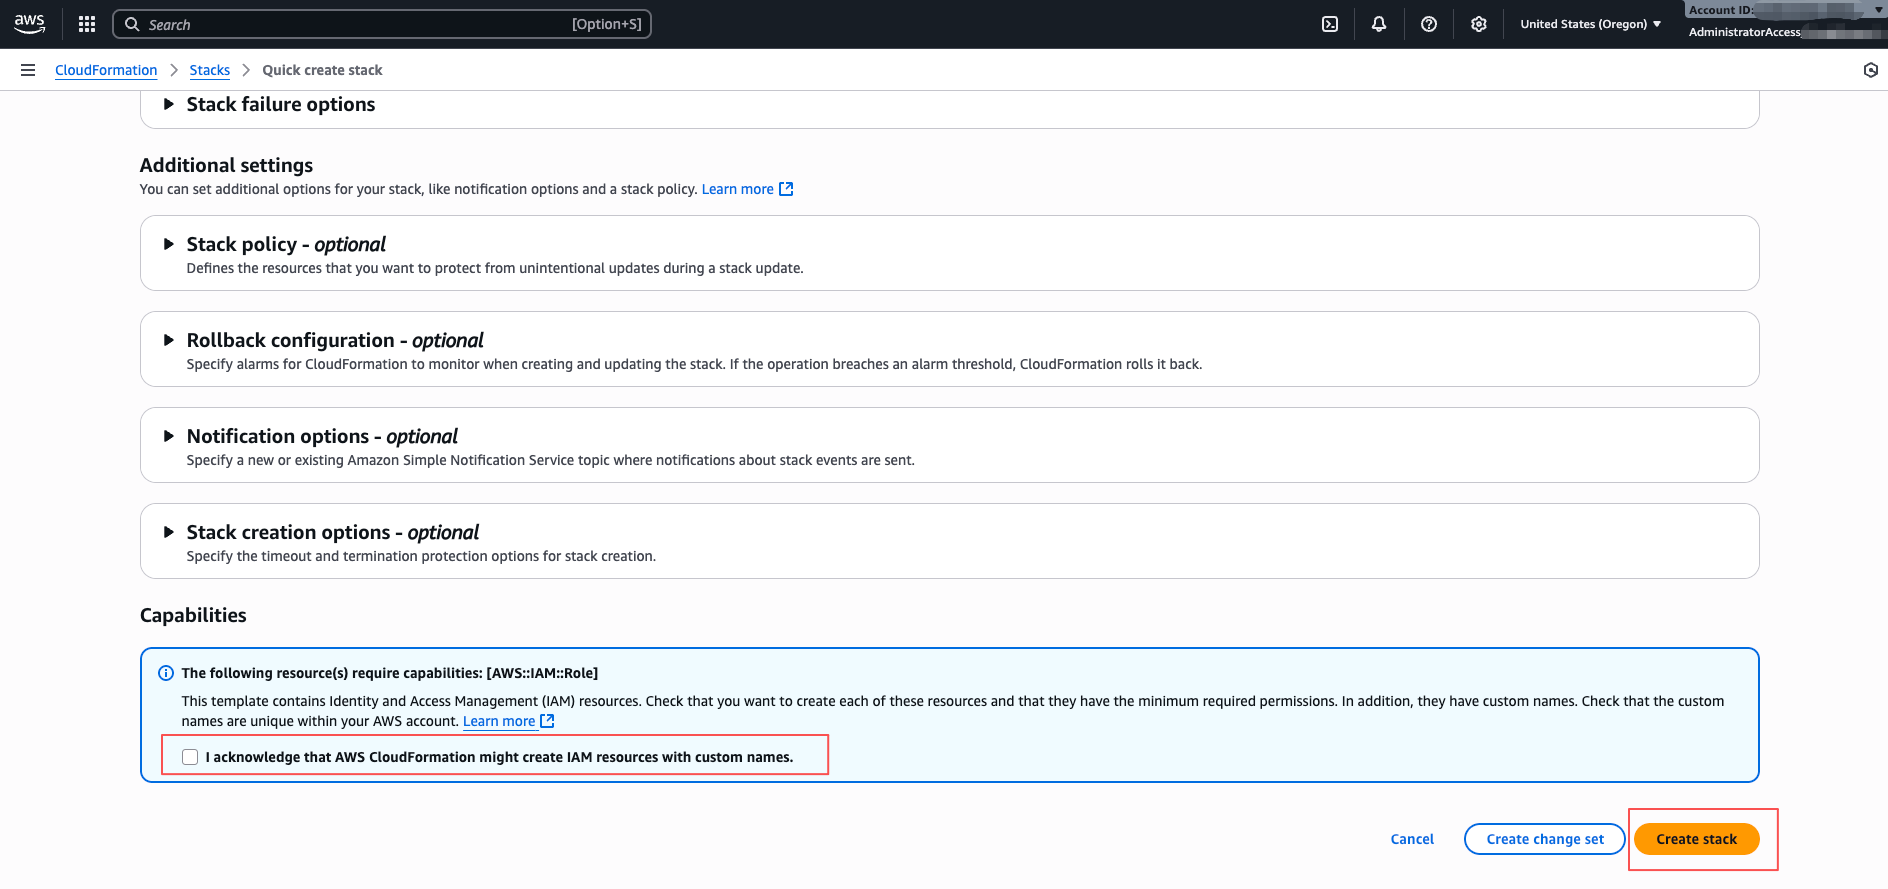
>  ### Step 2: Configure Partner Central API Permissions
1. On the redirected **CloudFormation** page, review the settings.
- Check the box **“I acknowledge that AWS CloudFormation might create IAM resources with custom names.”**
- Click **Create stack**.
>
### Step 2: Configure Partner Central API Permissions
1. On the redirected **CloudFormation** page, review the settings.
- Check the box **“I acknowledge that AWS CloudFormation might create IAM resources with custom names.”**
- Click **Create stack**.
>  :::info
By running the CloudFormation update, all required AWS managed policies are automatically attached to the existing IAM Role.
This ensures Suger has the correct permissions to access the ACE Partner Central API without any additional manual configuration.
:::
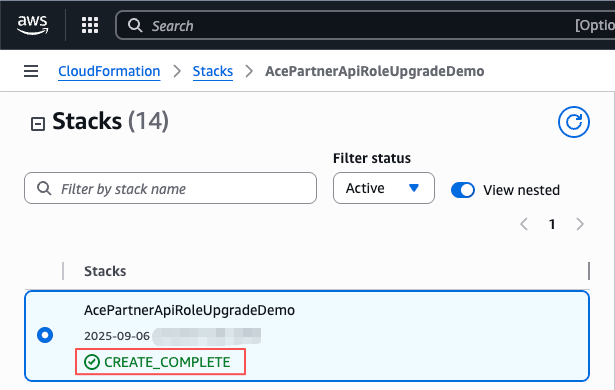
2. Wait until the stack status changes to **CREATE_COMPLETE**.
>
:::info
By running the CloudFormation update, all required AWS managed policies are automatically attached to the existing IAM Role.
This ensures Suger has the correct permissions to access the ACE Partner Central API without any additional manual configuration.
:::
2. Wait until the stack status changes to **CREATE_COMPLETE**.
>  :::info
This indicates that the IAM role permissions have been updated successfully.
:::
### Step 3: Verify Integration
1. Return to the **Suger Console → Settings → Integrations → AWS ACE**.
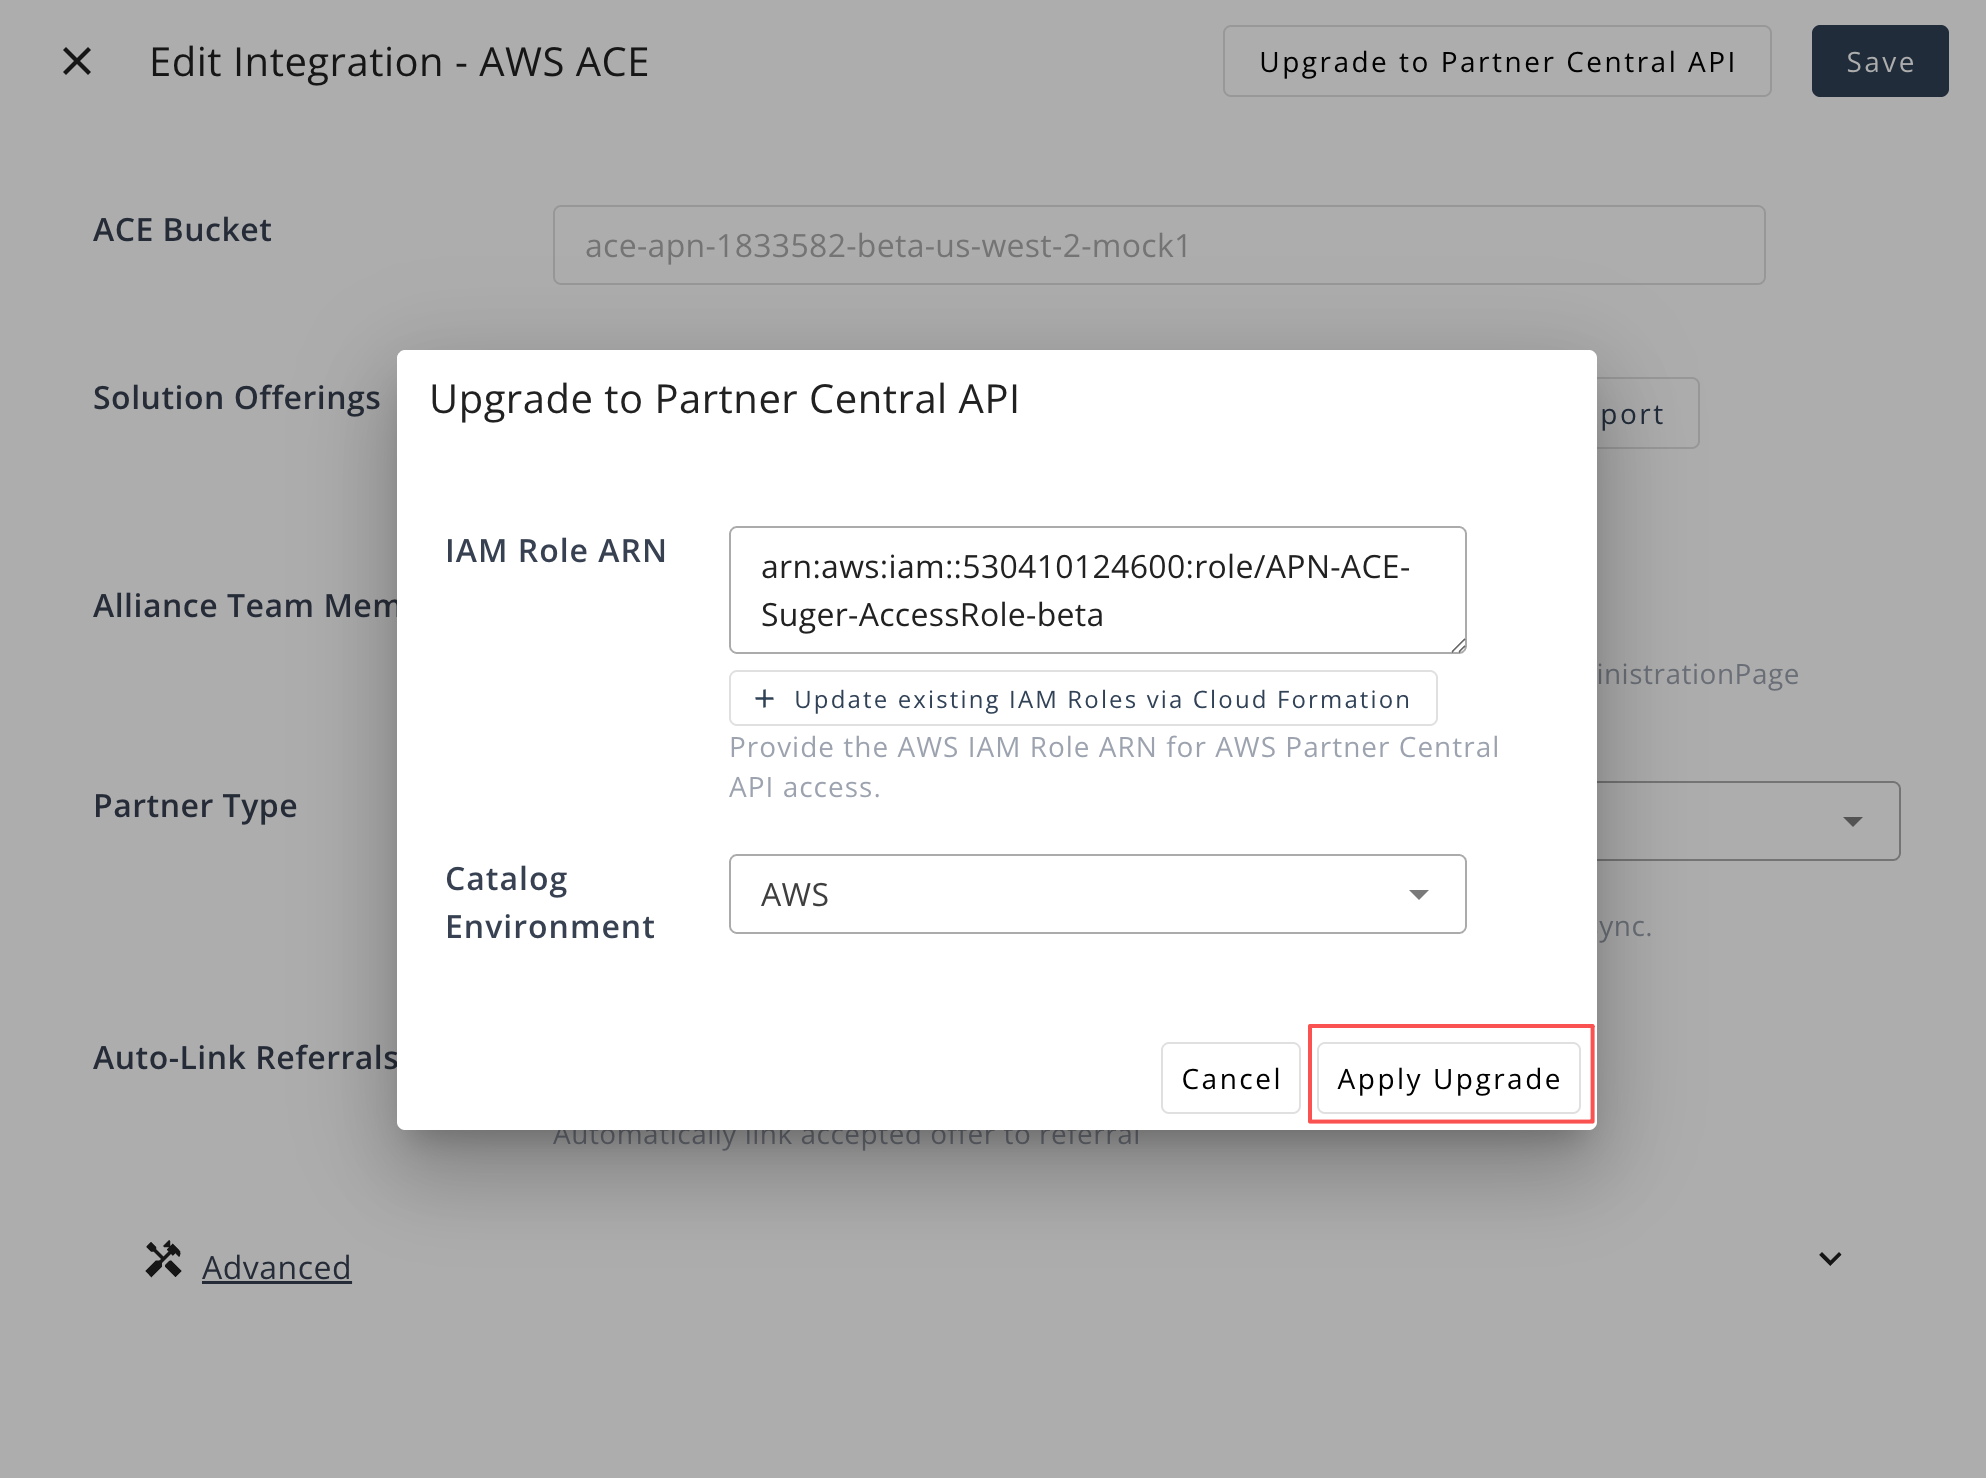
2. Click **Apply Upgrade** to update and verify the integration.
>
:::info
This indicates that the IAM role permissions have been updated successfully.
:::
### Step 3: Verify Integration
1. Return to the **Suger Console → Settings → Integrations → AWS ACE**.
2. Click **Apply Upgrade** to update and verify the integration.
>  :::info
Once verified, the system will automatically create an EventBridge rule and an API destination in your AWS account to listen for APN opportunity changes.
Verification ensures that your IAM role and API connection are working correctly before moving on to data synchronization.
:::
### Step 4: Perform Data Synchronization
1. In the **Suger Console → [Co-Sell](https://console.suger.io/cosell) → AWS ACE**, click the **Inbound Sync** button to pull opportunity data from **APN** into **Suger**.
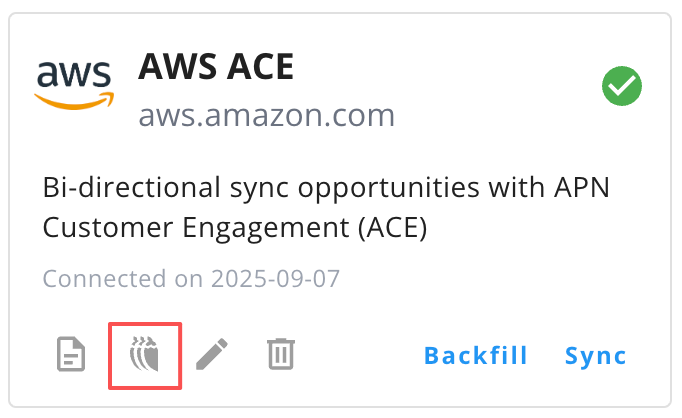
2. Go to **Settings → Integrations → AWS ACE → Operations** and wait until the inbound sync **status** changes to **Completed**.
:::note Duration
_This typically takes a few minutes; the actual duration depends on the number of APN opportunities being fetched._
:::
>
:::info
Once verified, the system will automatically create an EventBridge rule and an API destination in your AWS account to listen for APN opportunity changes.
Verification ensures that your IAM role and API connection are working correctly before moving on to data synchronization.
:::
### Step 4: Perform Data Synchronization
1. In the **Suger Console → [Co-Sell](https://console.suger.io/cosell) → AWS ACE**, click the **Inbound Sync** button to pull opportunity data from **APN** into **Suger**.
2. Go to **Settings → Integrations → AWS ACE → Operations** and wait until the inbound sync **status** changes to **Completed**.
:::note Duration
_This typically takes a few minutes; the actual duration depends on the number of APN opportunities being fetched._
:::
>  >
>  :::info
This confirms the data has been synchronized successfully.
:::
3. Next, return to **Co-Sell → AWS ACE** and click the **Outbound Sync** button to push data from **Suger** back to your **CRM Partner**.
4. Again, check the **Operations** page and wait until the outbound sync **status** shows **Completed**.
:::note Duration
_This usually takes a few minutes; the duration depends on the number of records to push and API limits._
:::
Both **inbound** and **outbound** sync must be completed successfully to ensure data consistency between **APN** and **Suger**.
:::info
This confirms the data has been synchronized successfully.
:::
3. Next, return to **Co-Sell → AWS ACE** and click the **Outbound Sync** button to push data from **Suger** back to your **CRM Partner**.
4. Again, check the **Operations** page and wait until the outbound sync **status** shows **Completed**.
:::note Duration
_This usually takes a few minutes; the duration depends on the number of records to push and API limits._
:::
Both **inbound** and **outbound** sync must be completed successfully to ensure data consistency between **APN** and **Suger**.